Canon PowerShot SX40 HS Software Guide for Windows - Page 40
Email, Attaching Images to Email
 |
View all Canon PowerShot SX40 HS manuals
Add to My Manuals
Save this manual to your list of manuals |
Page 40 highlights
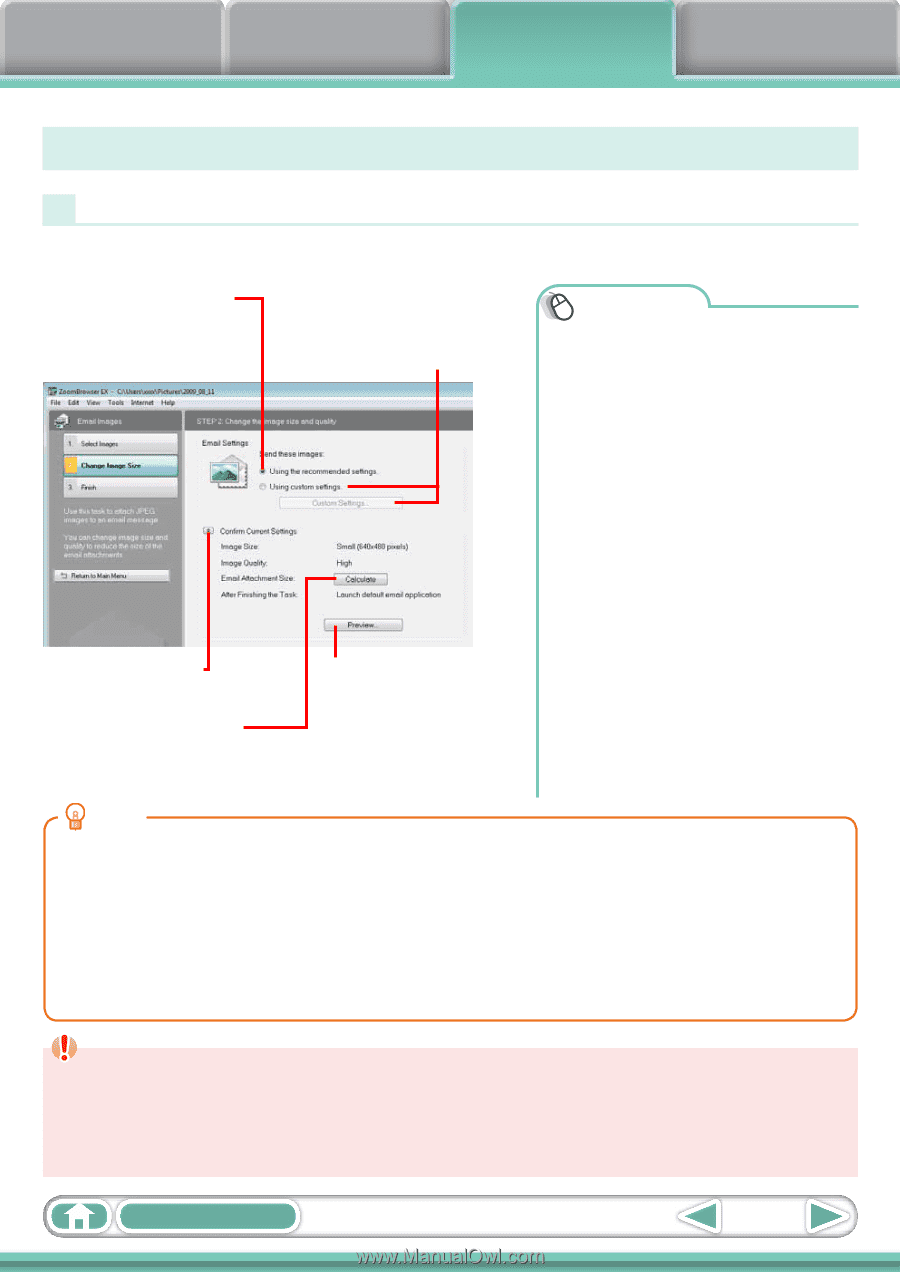
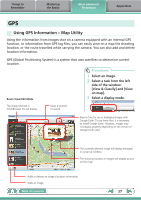
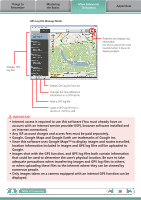
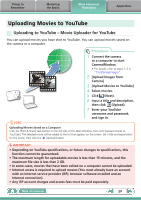
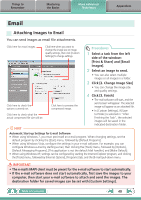
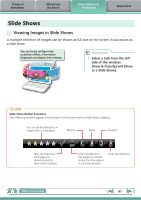
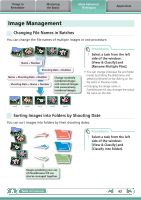
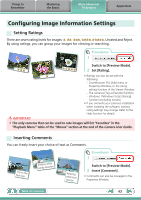
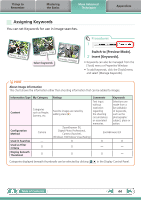
Things to Remember Mastering the Basics More Advanced Techniques Appendices Email Attaching Images to Email You can send images as email file attachments. Click here for most images. Click here when you want to change the image size or image quality settings, then click [Custom Settings] to change settings. Click here to check the options currently set. Click here to check what the actual compressed file size will be. Click here to preview the compressed image. HINT Procedures 1 Select a task from the left side of the window: [Print & Share] and [Email Images]. 2 Select an image to send. • You can also select multiple images or all images in a folder. 3 Click [2. Change Image Size] • You can change the image size and quality settings. 4 Click [3. Finish] • The mail software will start, and the send screen will appear. The selected image will appear as an attached file. • In [Custom Settings], if [Save to Folder] is selected in "After Finishing the Task", the selected images will be saved in the indicated destination folder. Automatic Start-up Settings for E-mail Software • When using Windows 7, you must pre-install an e-mail program. When changing settings, set the default program by clicking the [Start] menu, followed by [Default Programs]. • When using Windows Vista, configure the settings in your e-mail software. For example, you can configure Windows e-mail by starting e-mail, then clicking the [Tools] menu, followed by [Options], [Default Messaging Programs], [This application is not the default Mail handler], and [Make Default]. • When using Windows XP, settings can be configured by starting the Internet Explorer program, and clicking the [Tools] menu, followed by [Internet Options], [Programs] tab, and the [E-mail] pull-down menu. IMPORTANT • The e-mail's MAPI client must be preset for the e-mail software to start automatically. • If the e-mail software does not start automatically, first save the images to your computer, then start your e-mail software to attach and send the images. The destination folder for saved images can be set with [Custom Settings]. Table of Contents 40
-
 1
1 -
2
-
3
-
4
-
5
-
6
-
7
-
8
-
9
-
10
-
11
-
12
-
13
-
14
-
15
-
16
-
17
-
18
-
19
-
20
-
21
-
22
-
23
-
24
-
25
-
26
-
27
-
28
-
29
-
30
-
31
-
32
-
33
-
34
-
 35
35 -
 36
36 -
 37
37 -
 38
38 -
 39
39 -
 40
40 -
 41
41 -
 42
42 -
 43
43 -
 44
44 -
 45
45 -
46
-
47
-
48
-
49
-
50
-
51
-
52
-
53
-
54
-
55
-
56
-
57
-
58
-
59
-
60
-
61
-
62
 |
 |