Cisco WS-C4003-RF Hardware Maintenance Manual - Page 104
Top view, Front of the chassis, Side view, Proceed to the next Installing Main Memory SIMMs.
 |
View all Cisco WS-C4003-RF manuals
Add to My Manuals
Save this manual to your list of manuals |
Page 104 highlights
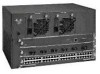
Memory Replacement Procedures Figure 5-8 Removing Main Memory SIMMs Top view Front of the chassis 2. Push the SIMM down and forward. 3. The socket guide posts release through the SIMM holes (on both sides). 1. Pull the locking spring clips (on both sides) outward to enable the SIMM to rock forward. The SIMM will not release unless the clips have cleared the back of the SIMM. Side view 2. Push the SIMM down and forward. SIMM polarization notch H1153 3. The socket guide posts release through the SIMM holes (on both sides). 1. Pull the locking spring clips outward to enable the SIMM to rock forward. The SIMM will not release unless the clips have cleared the back of the SIMM. Step 5 Hold the SIMM by the edges with your thumb and index finger and lift it out of the socket. Place the removed SIMM in an antistatic bag to protect it from ESD damage. Step 6 Repeat Steps 2 through 5 for each main memory SIMM card. Proceed to the next section, "Installing Main Memory SIMMs." 5-10 Cisco 4000 Series Hardware Installation and Maintenance
-
 1
1 -
2
-
3
-
4
-
5
-
6
-
7
-
8
-
9
-
10
-
11
-
12
-
13
-
14
-
15
-
16
-
17
-
18
-
19
-
20
-
21
-
22
-
23
-
24
-
25
-
26
-
27
-
28
-
29
-
30
-
31
-
32
-
33
-
34
-
35
-
36
-
37
-
38
-
39
-
40
-
41
-
42
-
43
-
44
-
45
-
46
-
47
-
48
-
49
-
50
-
51
-
52
-
53
-
54
-
55
-
56
-
57
-
58
-
59
-
60
-
61
-
62
-
63
-
64
-
65
-
66
-
67
-
68
-
69
-
70
-
71
-
72
-
73
-
74
-
75
-
76
-
77
-
78
-
79
-
80
-
81
-
82
-
83
-
84
-
85
-
86
-
87
-
88
-
89
-
90
-
91
-
92
-
93
-
94
-
95
-
96
-
97
-
98
-
 99
99 -
 100
100 -
 101
101 -
 102
102 -
 103
103 -
 104
104 -
 105
105 -
 106
106 -
 107
107 -
 108
108 -
 109
109 -
110
-
111
-
112
-
113
-
114
-
115
-
116
-
117
-
118
-
119
-
120
-
121
-
122
-
123
-
124
-
125
-
126
-
127
-
128
-
129
-
130
-
131
-
132
-
133
-
134
-
135
-
136
-
137
-
138
-
139
-
140
-
141
-
142
-
143
 |
 |
