Cisco WS-C4003-RF Hardware Maintenance Manual - Page 73
Router Products Configuration, Guide, Router Products Command Reference
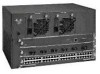 |
View all Cisco WS-C4003-RF manuals
Add to My Manuals
Save this manual to your list of manuals |
Page 73 highlights
Making Network Connections Step 6 At the prompt, specify the channel-group modification command, channel-group and timeslots to be mapped. The example shows channel-group 0 and timeslots 1, 3 through 5, and 7 selected for mapping. Router(config-controller)# channel-group 0 timeslots 1,3-5,7 Router(config-controller)# %LINEPROTO-5-UPDOWN: Line protocol on Interface Serial1:0, changed state to down %LINEPROTO-5-UPDOWN: Line protocol on Interface Serial1:0, changed state to up Router(config-controller)# Router(config-controller)# Step 7 At the prompt, specify the interface, serial, unit number, and channel-group to modify. Router(config-controller)# int serial 1:0 Step 8 At the prompt, assign an IP address and subnet mask to the interface with the ip address configuration subcommand as in the following example: Router(config-if)# ip address 1.1.15.1 255.255.255.0 Router(config-if)# Step 9 Add any additional configuration subcommands required to enable routing protocols and adjust the interface characteristics. Step 10 After including all of the configuration subcommands, to complete the configuration, enter ^Z (hold down the Control key while you press Z) to exit the configuration mode. Step 11 Write the new configuration to memory as follows: Router# write memory The system will display an OK message when the configuration is stored. Step 12 Exit the privileged level and return to the user level by entering disable at the prompt as follows: Router# disable Router> Step 13 Check the interface configuration with show commands. Refer to the printed Router Products Configuration Guide and Router Products Command Reference publications or UniverCD for a summary of the configuration options available and additional instructions for configuring the CT1 module. Installing the Router 3-15
-
 1
1 -
2
-
3
-
4
-
5
-
6
-
7
-
8
-
9
-
10
-
11
-
12
-
13
-
14
-
15
-
16
-
17
-
18
-
19
-
20
-
21
-
22
-
23
-
24
-
25
-
26
-
27
-
28
-
29
-
30
-
31
-
32
-
33
-
34
-
35
-
36
-
37
-
38
-
39
-
40
-
41
-
42
-
43
-
44
-
45
-
46
-
47
-
48
-
49
-
50
-
51
-
52
-
53
-
54
-
55
-
56
-
57
-
58
-
59
-
60
-
61
-
62
-
63
-
64
-
65
-
66
-
67
-
 68
68 -
 69
69 -
 70
70 -
 71
71 -
 72
72 -
 73
73 -
 74
74 -
 75
75 -
 76
76 -
 77
77 -
 78
78 -
79
-
80
-
81
-
82
-
83
-
84
-
85
-
86
-
87
-
88
-
89
-
90
-
91
-
92
-
93
-
94
-
95
-
96
-
97
-
98
-
99
-
100
-
101
-
102
-
103
-
104
-
105
-
106
-
107
-
108
-
109
-
110
-
111
-
112
-
113
-
114
-
115
-
116
-
117
-
118
-
119
-
120
-
121
-
122
-
123
-
124
-
125
-
126
-
127
-
128
-
129
-
130
-
131
-
132
-
133
-
134
-
135
-
136
-
137
-
138
-
139
-
140
-
141
-
142
-
143
 |
 |
