Cisco WS-C4003-RF Hardware Maintenance Manual - Page 108
Inserting Shared-Memory SIMMs, Memory Replacement Procedures, Step 1, Caution
 |
View all Cisco WS-C4003-RF manuals
Add to My Manuals
Save this manual to your list of manuals |
Page 108 highlights
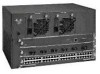
Memory Replacement Procedures Inserting Shared-Memory SIMMs Follow this procedure to insert shared-memory SIMMs: Step 1 Unplug the chassis power cord and network connections. Step 2 Put on an ESD-preventive wrist strap and ensure that it makes good contact with your skin. Connect the equipment end of the wrist strap to the metal back plate of the chassis, avoiding contact with the connectors. Step 3 Remove the chassis cover as described in the section "Accessing the Router Internal Components" earlier in this chapter. Step 4 On the left of the motherboard (as aligned in Figure 5-5 and Figure 5-6), find the shared-memory SIMM card socket locations. All the sockets should be empty. If not, remove the shared-memory SIMMs following the procedures in the section "Replacing Shared-Memory SIMMs" earlier in this chapter. Step 5 Turn the chassis so that the side with the shared-memory SIMM cards is closest to you. Caution Handle SIMMs by the card edges only. SIMMs are sensitive components and can be shorted by mishandling. Step 6 Hold the SIMM with the connector edge at the bottom, component side facing you, and the polarization notch on the left. (See Figure 5-10.) 5-14 Cisco 4000 Series Hardware Installation and Maintenance
-
 1
1 -
2
-
3
-
4
-
5
-
6
-
7
-
8
-
9
-
10
-
11
-
12
-
13
-
14
-
15
-
16
-
17
-
18
-
19
-
20
-
21
-
22
-
23
-
24
-
25
-
26
-
27
-
28
-
29
-
30
-
31
-
32
-
33
-
34
-
35
-
36
-
37
-
38
-
39
-
40
-
41
-
42
-
43
-
44
-
45
-
46
-
47
-
48
-
49
-
50
-
51
-
52
-
53
-
54
-
55
-
56
-
57
-
58
-
59
-
60
-
61
-
62
-
63
-
64
-
65
-
66
-
67
-
68
-
69
-
70
-
71
-
72
-
73
-
74
-
75
-
76
-
77
-
78
-
79
-
80
-
81
-
82
-
83
-
84
-
85
-
86
-
87
-
88
-
89
-
90
-
91
-
92
-
93
-
94
-
95
-
96
-
97
-
98
-
99
-
100
-
101
-
102
-
 103
103 -
 104
104 -
 105
105 -
 106
106 -
 107
107 -
 108
108 -
 109
109 -
 110
110 -
 111
111 -
 112
112 -
 113
113 -
114
-
115
-
116
-
117
-
118
-
119
-
120
-
121
-
122
-
123
-
124
-
125
-
126
-
127
-
128
-
129
-
130
-
131
-
132
-
133
-
134
-
135
-
136
-
137
-
138
-
139
-
140
-
141
-
142
-
143
 |
 |
