Cisco WS-C4003-RF Hardware Maintenance Manual - Page 105
Installing Main Memory SIMMs, Beginning with the SIMM nearest the edge of the motherboard
 |
View all Cisco WS-C4003-RF manuals
Add to My Manuals
Save this manual to your list of manuals |
Page 105 highlights
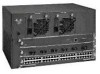
Memory Replacement Procedures Installing Main Memory SIMMs Follow this procedure to install main memory SIMMs. Step 1 Put on an ESD-preventive wrist strap and ensure that it makes good contact with your skin. Connect the equipment end of the wrist strap to the metal back plate of the chassis, avoiding contact with the connectors. Step 2 On the motherboard, locate the main memory SIMM card sockets shown in the upper right corner of Figure 5-5 for the Cisco 4000-M and Figure 5-6 for the Cisco 4500-M and Cisco 4700. All of the sockets should be empty. If not, follow the steps in the section "Removing Main Memory SIMMS" earlier in this chapter. Caution Handle SIMMs by the card edges only. SIMMs are ESD-sensitive components and can be damaged by mishandling. Step 3 Hold the SIMM with the polarization notch on the right and the component side away from you with the connector edge at the bottom. (See Figure 5-7.) Step 4 Beginning with the SIMM nearest the edge of the motherboard, insert the main memory SIMM card at a 45-degree angle and rock it into its vertical position (see Figure 5-9), using the minimum amount of force required. When the SIMM is properly seated, the socket guide posts will insert through the alignment holes, and the connector springs will click into place. Step 5 Ensure that each SIMM is straight and that the alignment holes (as shown in Figure 5-9) line up with the plastic socket guides on the socket. Maintaining and Upgrading the Router 5-11
-
 1
1 -
2
-
3
-
4
-
5
-
6
-
7
-
8
-
9
-
10
-
11
-
12
-
13
-
14
-
15
-
16
-
17
-
18
-
19
-
20
-
21
-
22
-
23
-
24
-
25
-
26
-
27
-
28
-
29
-
30
-
31
-
32
-
33
-
34
-
35
-
36
-
37
-
38
-
39
-
40
-
41
-
42
-
43
-
44
-
45
-
46
-
47
-
48
-
49
-
50
-
51
-
52
-
53
-
54
-
55
-
56
-
57
-
58
-
59
-
60
-
61
-
62
-
63
-
64
-
65
-
66
-
67
-
68
-
69
-
70
-
71
-
72
-
73
-
74
-
75
-
76
-
77
-
78
-
79
-
80
-
81
-
82
-
83
-
84
-
85
-
86
-
87
-
88
-
89
-
90
-
91
-
92
-
93
-
94
-
95
-
96
-
97
-
98
-
99
-
 100
100 -
 101
101 -
 102
102 -
 103
103 -
 104
104 -
 105
105 -
 106
106 -
 107
107 -
 108
108 -
 109
109 -
 110
110 -
111
-
112
-
113
-
114
-
115
-
116
-
117
-
118
-
119
-
120
-
121
-
122
-
123
-
124
-
125
-
126
-
127
-
128
-
129
-
130
-
131
-
132
-
133
-
134
-
135
-
136
-
137
-
138
-
139
-
140
-
141
-
142
-
143
 |
 |
