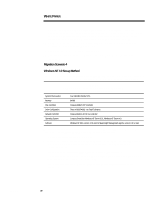
Compaq ProLiant 1000 Migrating to Microsoft Windows NT Server 4.0 on Compaq Se - Page 21
Insert the Windows NT 4.0 CD into the CD-ROM drive.
 |
View all Compaq ProLiant 1000 manuals
Add to My Manuals
Save this manual to your list of manuals |
Page 21 highlights
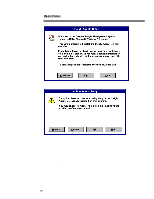
467A/0197 WHITE PAPER (cont.) ... 3. You can choose the following Windows NT 4.0 installation methods: − Direct CD-ROM install − Boot-up floppies NOTE: For this scenario, the Direct CD-ROM method was chosen. 4. Insert the Windows NT 4.0 CD into the CD-ROM drive. a) From the file manager, select the drive letter that represents the CD-ROM drive. b) Change to the i386 directory. c) Type in winnt32 /b (to create boot floppies, you would type winnt32 /ox in the same i386 directory). 5. The "Windows NT 4.0 Installation/Upgrade" screen displays. Press Enter when you are prompted; this starts the installation of Windows NT Server 4.0. Follow the instructions and remove the CD from the drive when you are prompted. 6. The system re-starts, the Microsoft install detects a CPQARRAY and Symbio Logic C810 PCI SCSI Host Adapter, (or another type of hard disk controller might be detected depending on your hardware configuration). You are then asked to enter additional driver information. Your available choices are: − Press the Enter key to continue, or − Press the letter S to specify additional drivers, or − Press F3 to exit. Select or press Enter, if you choose to specify additional drivers you must have the latest Compaq Support Software. 7. Press the Enter key to continue. The licensing screen displays. After reading the licensing agreement, press F8 for "I agree" or ESC for "I do not agree". 8. The next screen asks if you want to − Press Enter to upgrade, or − Press the letter N to install a new version, or − Press F3 to exit. Select or press Enter to upgrade. 9. You may then choose to scan the hard drive or skip detection; − Press Enter to scan the hard drive, or − Press ESC to skip detection. Press Enter to scan your hard drive 10. After your disk scan completes, a rectangular bar displays in the lower half of the screen or monitor, indicating files are being copied to your hard disk. At some point during the file copy process, the following message might display: Setup has determined the following file did not originate from Microsoft: oemnadnf.inf This file may have been provided by your hardware manufacturer 21
-
 1
1 -
2
-
3
-
4
-
5
-
6
-
7
-
8
-
9
-
10
-
11
-
12
-
13
-
14
-
15
-
 16
16 -
 17
17 -
 18
18 -
 19
19 -
 20
20 -
 21
21 -
 22
22 -
 23
23 -
 24
24 -
 25
25
 |
 |