D-Link DCS-5222L User Manual
D-Link DCS-5222L Manual
 |
View all D-Link DCS-5222L manuals
Add to My Manuals
Save this manual to your list of manuals |
D-Link DCS-5222L manual content summary:
- D-Link DCS-5222L | User Manual - Page 1
Version 1.0 | 12/23/2011 User Manual HD Wireless N Pan/Tilt Network Camera - D-Link DCS-5222L | User Manual - Page 2
obsolete as our services and websites develop and change. Please refer to the www.mydlink.com website for the most current information. Manual Revisions Revision 1.0 Date December 23, 2011 Description DCS-5222L Revision A1 with firmware version 1.00 Trademarks D-Link and the D-Link logo are - D-Link DCS-5222L | User Manual - Page 3
cables. Do not modify power cables or plugs. Consult a licensed electrician or your power company for site modifications. Always follow your local/national wiring rules. D-Link DCS-5222L User Manual ii - D-Link DCS-5222L | User Manual - Page 4
; CAMERA MANAGEMENT SOFTWARE, AND; A NETWORK CONNECTION. D-LINK HAS NO CONTROL OVER SUCH SERVICES AND PRODUCTS AND EXPRESSLY DISCLAIMS ANY AND ALL LIABILITY FOR THE FAILURE OF THE DEVICE OR ANY FEATURE THEREOF RESULTING FROM THE FAILURE OF ANY THIRD-PARTY SERVICE OR PRODUCT. D-Link DCS-5222L User - D-Link DCS-5222L | User Manual - Page 5
18 Network 22 Wireless 24 Dynamic DNS 25 Image Setup 26 Audio and Video 27 Time and Date 29 Video Clip 30 Snapshot 31 SD Recording 32 Digital Output 33 Motion Detection 34 Camera Control 35 SD Management 36 Maintenance 37 Admin 37 System 39 Firmware Upgrade 40 D-Link DCS-5222L User - D-Link DCS-5222L | User Manual - Page 6
-5222L with a Router 44 Troubleshooting 50 Networking Basics 54 Check your IP address 54 Statically Assign an IP Address 55 Technical Specifications - Remote Control Unit 56 Technical Specifications - I/O Terminal Application....... 58 Technical Specifications 59 D-Link DCS-5222L User Manual - D-Link DCS-5222L | User Manual - Page 7
Base and Mounting Kit Note: Using a power supply with a different voltage rating than the one included with the DCS-5222L will cause damage and void the warranty for this product. If any of the above items are missing from your package, please contact your retailer. D-Link DCS-5222L User Manual 1 - D-Link DCS-5222L | User Manual - Page 8
version of Java installed. Visit www.java.com to download the latest version. mydlink Website Requirements • Broadband Internet connection • Computer with: • Internet Explorer 7 or higher (ActiveX) • Firefox 6.5 or higher • Safari 4 or higher • Chrome 8 or higher D-Link DCS-5222L User Manual 2 - D-Link DCS-5222L | User Manual - Page 9
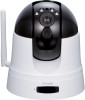
. The DCS-5222L features 802.11n wireless connectivity, allowing the camera to be placed anywhere within range of your wireless network. The DCS-5222L comes with remote monitoring and motion detection features for a complete and cost-effective home security solution. D-Link DCS-5222L User Manual 3 - D-Link DCS-5222L | User Manual - Page 10
no special hardware or software such as PC frame grabber cards. The DCS5222L supports both ActiveX mode for Internet Explorer and Java mode for other browsers such as Firefox, Chrome, and Safari. Supports a Variety of Platforms The DCS-5222L supports TCP/IP networking, HTTP, and other Internet - D-Link DCS-5222L | User Manual - Page 11
Section 1 - Product Overview Light Sensor Hardware Overview Front IR LED for night vision Camera Lens External Antenna (Optional) Passive Infrared Sensor (PIR) for motion detection Microphone D-Link DCS-5222L User Manual Remote Control Receiver 5 - D-Link DCS-5222L | User Manual - Page 12
port. Ethernet Port Connects to a PC or network through an Ethernet connection. Power Receptor Connects to the power adapter. WPS Button Micro SD Slot Used for storing recorded images and video Reset Button Press and hold to reset to the default factory settings. D-Link DCS-5222L User Manual 6 - D-Link DCS-5222L | User Manual - Page 13
frequency sources (such as microwave ovens), your wireless connection may degrade dramatically or drop completely. Make sure your 2.4GHz phone base is as far away from your wireless devices as possible. The base transmits a signal even if the phone in not in use. D-Link DCS-5222L User Manual 7 - D-Link DCS-5222L | User Manual - Page 14
it. The CD-ROM will open the Camera Installation Wizard. Simply click Start to go through the Installation Wizard, which will guide you through the installation process from connecting your hardware, configuring your camera, and registering with mydlink.com. D-Link DCS-5222L User Manual 8 - D-Link DCS-5222L | User Manual - Page 15
attach the external antenna unless you would like to boost your signal or install an outdoor enclosure. You must select which antenna you want to use in the Setup > Wireless section from the camera's web configuration utility (internal is set by default). WPS Button D-Link DCS-5222L User Manual 9 - D-Link DCS-5222L | User Manual - Page 16
After registering your DCS-5222L camera with a mydlink account in the Camera Setup Wizard. You will be able to remotely access your camera from the www.mydlink.com website. After signing in to your mydlink account, you will see a screen similar to the following: D-Link DCS-5222L User Manual 10 - D-Link DCS-5222L | User Manual - Page 17
camera's cable connections and make sure they are secure. • Check to make sure that the power LED on your camera is lit solid red. If you still cannot access your camera, reset your camera and run the Camera Setup Wizard again from the CD-ROM included in your package. D-Link DCS-5222L User Manual - D-Link DCS-5222L | User Manual - Page 18
Section 3 - mydlink Portal Live Video If the camera is available, a Live Video feed will be displayed. Video will be shown at full resolution if viewing your camera from a PC on the same local network, or viewing your camera from a PC on a remote network. D-Link DCS-5222L User Manual 12 - D-Link DCS-5222L | User Manual - Page 19
and password of your camera (not mydlink). Delete Camera: Click to remove the camera from mydlink. To add the camera back, you will need to run the setup wizard from the CD. Playback Search for clips Search for a recording time after download or playback. to view: D-Link DCS-5222L User Manual 13 - D-Link DCS-5222L | User Manual - Page 20
Camera, or enter the IP address of your camera into a web browser. To log in, enter your user name (admin) and the password you created in the Installation Wizard. If you did not create a password, the default password is blank. After entering your password, click OK. D-Link DCS-5222L User Manual - D-Link DCS-5222L | User Manual - Page 21
: Click this button to quickly move the camera to the desired patrol setup according to preset positions. Please refer to"camera control"setup to create preset positions. The next page contains several icons which can be used to control the camera's main functions. D-Link DCS-5222L User Manual 15 - D-Link DCS-5222L | User Manual - Page 22
Section 4 - Configuration Icon D-Link DCS-5222L User Manual Button Name Profile buttons Full Screen button Snapshot button Video recording button Storage folder button Listen button Talk button Zoom buttons Function Use these buttons to switch between video profiles. Refer to page 27 for more - D-Link DCS-5222L | User Manual - Page 23
may choose to configure your network by using the Internet Connection Setup Wizard that includes step-by-step instructions to connect your camera to the Internet. Alternatively, you can manually configure your connection by clicking Manual Internet Connection Setup. D-Link DCS-5222L User Manual 17 - D-Link DCS-5222L | User Manual - Page 24
Internet Connection Setup Wizard This wizard will guide you through a step-by-step process to configure your new D-Link Camera and connect the camera to the Internet. Note that this wizard will not register your camera with mydlink.com. Click Next to continue. Select Automatic IP Address - D-Link DCS-5222L | User Manual - Page 25
your username or email address used to connect to the DDNS. Password: Enter your password used to connect to the DDNS server. Timeout: You can setup how often the camera notifies the DDNS server of its current global IP address by entering a whole number in hours. D-Link DCS-5222L User Manual 19 - D-Link DCS-5222L | User Manual - Page 26
Create a unique name for your camera. Click Next to continue. Select the time zone that the camera is in so that scheduled events time manually to enable drop-down menus so that you can set the start and end time of daylight saving yourself. Click Next to continue. D-Link DCS-5222L User Manual 20 - D-Link DCS-5222L | User Manual - Page 27
Section 4 - Configuration A summary of the options you selected is displayed for confirmation. If you are happy with the selected configuration, click Apply otherwise click Back to make the required changes. D-Link DCS-5222L User Manual 21 - D-Link DCS-5222L | User Manual - Page 28
router supports UPnP, your camera and router can communicate allowing the router to discover which ports are used by each camera automatically without the need to open ports or port forward. Bonjour: Enabling Bonjour will allow discovery of cameras by Mac computers. D-Link DCS-5222L User Manual 22 - D-Link DCS-5222L | User Manual - Page 29
or 22, for security purposes. If you have problems accessing your camera through HTTP, try using a port higher than 1024. After making any changes, click the Save Settings button to save your changes, or click the Don't Save Settings button to discard your changes. D-Link DCS-5222L User Manual 23 - D-Link DCS-5222L | User Manual - Page 30
network. Show Hidden Key: Check this box to display the key. Antenna: Select to use the internal or external wireless antenna. After making any changes, click the Save Settings button to save your changes, or click the Don't Save Settings button to discard your changes. D-Link DCS-5222L User - D-Link DCS-5222L | User Manual - Page 31
. Confirm Password: Enter your password again for verification. Timeout: You can setup how often the camera notifies the DDNS server of its current global IP address by entering a whole number in hours. Status: Displays the connection status of your DDNS account. D-Link DCS-5222L User Manual 25 - D-Link DCS-5222L | User Manual - Page 32
: This can be used to allow manual control of the shutter speed. Select slower shutter speeds when environment is dimly lit, faster speeds are required when in brighter lighting. Note: Mirror and Flip can be used if you have mounted the DCS-5222L on the ceiling. D-Link DCS-5222L User Manual 26 - D-Link DCS-5222L | User Manual - Page 33
the audio port on the camera. Note: Video Profile 3 is always set to MJPEG as the Encode Type to ensure that at least one of the Video Profiles are viewable by non-IE browsers. Video Profile 4 is for mobile devices only, and always uses MPEG-4 as the Encode Type. D-Link DCS-5222L User Manual 27 - D-Link DCS-5222L | User Manual - Page 34
network bandwidth. For best viewing results on a mobile phone, we suggest setting the frame rate to 5 fps and the bit rate to 20 Kbps. After making any changes, click the Save Settings button to save your changes, or click the Don't Save Settings button to discard your changes. D-Link DCS-5222L - D-Link DCS-5222L | User Manual - Page 35
Time automatically. Synchronize NTP Network Time Protocol will synchronize Server: your camera with an Internet time server. You can enter an IP address of a server or select from the drop-down menu. Set the Date and Time Select this to set the time manually. Manually: Copy your Computer's Click - D-Link DCS-5222L | User Manual - Page 36
settings. After making any changes, click the Save Settings button to save your changes, or click the Don't Save Settings button to discard your changes. D-Link DCS-5222L User Manual 30 - D-Link DCS-5222L | User Manual - Page 37
you can set the camera to take snapshots when motion is detected. Snapshots can be sent to an e-mail address or to an FTP server. Trigger by: Select the trigger event from the drop-down menu. Motion or click the Don't Save Settings button to discard your changes. D-Link DCS-5222L User Manual 31 - D-Link DCS-5222L | User Manual - Page 38
select a scheduling method. DS Card: Select this option if you have inserted an available SD card into the camera. Trigger by: Select the type of trigger event from the drop-down menu. Motion begins or click the Don't Save Settings button to discard your changes. D-Link DCS-5222L User Manual 32 - D-Link DCS-5222L | User Manual - Page 39
Section 4 - Configuration Digital Output You can enable the digital output port as well as configure a trigger event. Motion Detection: When a motion detection is triggered. D/I Signal: A trigger from the Digital Input port. D-Link DCS-5222L User Manual 33 - D-Link DCS-5222L | User Manual - Page 40
your network camera. In blinking orange motion video icon like the one below. No Motion Motion The motion notification will continue to blink as long as motion is detected. If no additional motion is detected, it will return to its original state after eight seconds. D-Link DCS-5222L User Manual - D-Link DCS-5222L | User Manual - Page 41
to the Patrol Positions list by clicking Select. You can then select the order in which the camera will patrol through the preset locations by selecting a location and clicking Up or Down. Click Remove to remove a location from the list. Click Save when finished. D-Link DCS-5222L User Manual 35 - D-Link DCS-5222L | User Manual - Page 42
catalogs which are selected. Name: The name of file or catalog. Size: The file's size. Refresh: Click to refresh the page. Files per page: Select the number of files to be displayed on a single page. The maximum is 100 files. Pages: Show the current and total pages. D-Link DCS-5222L User Manual 36 - D-Link DCS-5222L | User Manual - Page 43
having access to the camera images. RTSP Authentication: Check to enable RTSP streaming. HTTP Authentication: Check to enable HTTP streaming. Snapshot URL Select Enable to allow access to the current camera snapshot Authentication: via the web address indicated. D-Link DCS-5222L User Manual 37 - D-Link DCS-5222L | User Manual - Page 44
calibrated whenever it is powered on and initialized or reset. Should the camera's pan, tilt, and zoom functions begin to behave incorrectly, or if the device has been jarred or handled improperly, you may need to recalibrate the camera manually by pressing this button. Privacy Mode: Select on/off - D-Link DCS-5222L | User Manual - Page 45
the new configuration. Restore to Factory Click this button to reset all settings to their factory Defaults: defaults. If you select to reset your settings, you will need to set up your camera again. Reboot Device: Clicking the Reboot button will reboot your device. D-Link DCS-5222L User Manual 39 - D-Link DCS-5222L | User Manual - Page 46
the firmware will not change any of your system settings, but it is recommended that you save your system configuration before doing a firmware upgrade. Note: It is recommended that you use a wired connection for your computer and camera when upgrading the firmware. D-Link DCS-5222L User Manual 40 - D-Link DCS-5222L | User Manual - Page 47
Section 4 - Configuration Status Device Info This screen displays various information about your camera and its current settings. D-Link DCS-5222L User Manual 41 - D-Link DCS-5222L | User Manual - Page 48
Section 4 - Configuration Log The log shows you a list of events that have happened recently. You can download the log by clicking the Download button, or you can empty the log by clicking the Clear button. D-Link DCS-5222L User Manual 42 - D-Link DCS-5222L | User Manual - Page 49
Section 4 - Configuration Help D-Link DCS-5222L User Manual 43 - D-Link DCS-5222L | User Manual - Page 50
to share the Internet with one or more PCs, the IP Address assigned to the Network Camera will be a local IP Address. This allows viewing within your Local Area Network (LAN) until the router is configured to allow remote viewing of the camera over the Internet. D-Link DCS-5222L User Manual 44 - D-Link DCS-5222L | User Manual - Page 51
the Network Camera. The DCS-5222L Live Video Page appears with a window displaying live video from the camera. Click on the Setup button on the left side. Scroll to the bottom of the Network Setup page to display the ports used by HTTP and Streaming audio and video. D-Link DCS-5222L User Manual 45 - D-Link DCS-5222L | User Manual - Page 52
> Network page displays the port settings for your camera. If necessary, these ports can be changed if they are already in use by other devices (e.g. in a multiple camera environment). Note: Both the HTTP port and RTSP port are required to be opened for the DCS-5222L. D-Link DCS-5222L User Manual - D-Link DCS-5222L | User Manual - Page 53
your router (as shown on the next page). The WAN IP Address will be listed. This will be the address that you will need to type in your web browser to view your camera over the Internet. Your WAN IP Address will be listed on the router's Status > Device Info page. D-Link DCS-5222L User Manual 47 - D-Link DCS-5222L | User Manual - Page 54
for RTSP and both (TCP and UDP) for 5556 - 5559 ports. 5. If you are using the default camera port settings, enter 80 into the Public and Private Port section, click Apply. 6. Scheduling should be set to Always so that the camera images can be accessed at any time. D-Link DCS-5222L User Manual 48 - D-Link DCS-5222L | User Manual - Page 55
are the same, so refer to your user manual for specific instructions on how to open ports. Enter valid ports in the Virtual Server section of your router. Please make sure to check the box next to the camera name on the Virtual Server List to enable your settings. D-Link DCS-5222L User Manual 49 - D-Link DCS-5222L | User Manual - Page 56
password, you will need to perform a hard reset of your camera. This process will change all your settings back to the factory defaults. To reset your camera, please use an unfolded paperclip to press and hold the RESET button for at least 8 seconds while your camera is plugged in. D-Link DCS-5222L - D-Link DCS-5222L | User Manual - Page 57
the Network Camera isn't conflicting with any Web server you may have running on your network. The default router setting might be a possible reason. Check that the configuration of the router settings allow the Network Camera to be accessed outside your local LAN. D-Link DCS-5222L User Manual 51 - D-Link DCS-5222L | User Manual - Page 58
This Network Camera can only be installed indoors. Do not install this camera in a place where IR interference can be a problem. IR interference can be found close to glass doors or windows, where direct sunlight can cause interference or in the path of car headlights. D-Link DCS-5222L User Manual - D-Link DCS-5222L | User Manual - Page 59
6 - Troubleshooting • Do not install this camera next to or in front of an air conditioner outlet or vent. • Do not install this camera close to wireless devices with of an object is required for detection. • Install this camera on a firm, static, anti-shock surface. D-Link DCS-5222L User Manual 53 - D-Link DCS-5222L | User Manual - Page 60
Some firewall software programs may block a DHCP request on newly installed adapters. If you are connecting to a wireless network at a hotspot (e.g. hotel, coffee shop, airport), please contact an employee or administrator to verify their wireless network settings. D-Link DCS-5222L User Manual 54 - D-Link DCS-5222L | User Manual - Page 61
Default Gateway the same as the LAN IP address of your router (192.168.0.1). Set Primary DNS the same as the LAN IP address of your router (192.168.0.1). The Secondary DNS is not needed or you may enter a DNS server from your ISP. Step 5 Click OK twice to save your settings. D-Link DCS-5222L User - D-Link DCS-5222L | User Manual - Page 62
the pan and tilt positions by moving from end to end and will go to the corrected home position. Privacy key Pressing the privacy key will tilt to the privacy position (privacy mode). Pressing it again privacy key will tilt the camera back to the previous position. D-Link DCS-5222L User Manual 56 - D-Link DCS-5222L | User Manual - Page 63
Up 44 Tilt up (2,1)...Left 4C Pan to the left (2,2)...Home 06 Return to home position (2,3)...Right (3,1)...Calibration (3,2)...Down (3,3)...Privacy 40 Pan to the right 07 Calibrate home position 48 Tilt down 0E Tilt to privacy position. D-Link DCS-5222L User Manual 57 - D-Link DCS-5222L | User Manual - Page 64
(+) SPECIFICATION Close circuit current max. 70 mA AC, or 100 mA DC. On-Resistance max. 30 Ohm. Open circuit blocking voltage max. 240VAC external AC or DC power supply. DO- AC/ DC Load DO+ Input device (active control device) has an independent power supply. D-Link DCS-5222L User Manual 58 - D-Link DCS-5222L | User Manual - Page 65
configurable motion detection window Maximum Resolution • 1280x720 Audio Codec • PCM/ADPCM Wireless Connectivity • 802.11g/n wireless with WEP/WPA/WPA2 Security • WPS Support Sensor • 1/4 inch WXGA (1280x800) Light Sensitivity • 1 [email protected] Digital Zoom • Up to 4X D-Link DCS-5222L User Manual 59 - D-Link DCS-5222L | User Manual - Page 66
, 50/60Hz • Output: 12VDC, 1.25A • Powered by an external power adapter • Maximum power consumption DCS-5222L: 10.5W @motor on ; 8.2W @motor off Dimensions (WxDxH) • 114.0mm x 114.0mm Emission (EMI), Safety & Other Certifications • FCC Class B • IC • C-Tick • CE D-Link DCS-5222L User Manual 60
-
 1
1 -
 2
2 -
 3
3 -
 4
4 -
 5
5 -
 6
6 -
 7
7 -
8
-
9
-
10
-
11
-
12
-
13
-
14
-
15
-
16
-
17
-
18
-
19
-
20
-
21
-
22
-
23
-
24
-
25
-
26
-
27
-
28
-
29
-
30
-
31
-
32
-
33
-
34
-
35
-
36
-
37
-
38
-
39
-
40
-
41
-
42
-
43
-
44
-
45
-
46
-
47
-
48
-
49
-
50
-
51
-
52
-
53
-
54
-
55
-
56
-
57
-
58
-
59
-
60
-
61
-
62
-
63
-
64
-
65
-
66
 |
 |
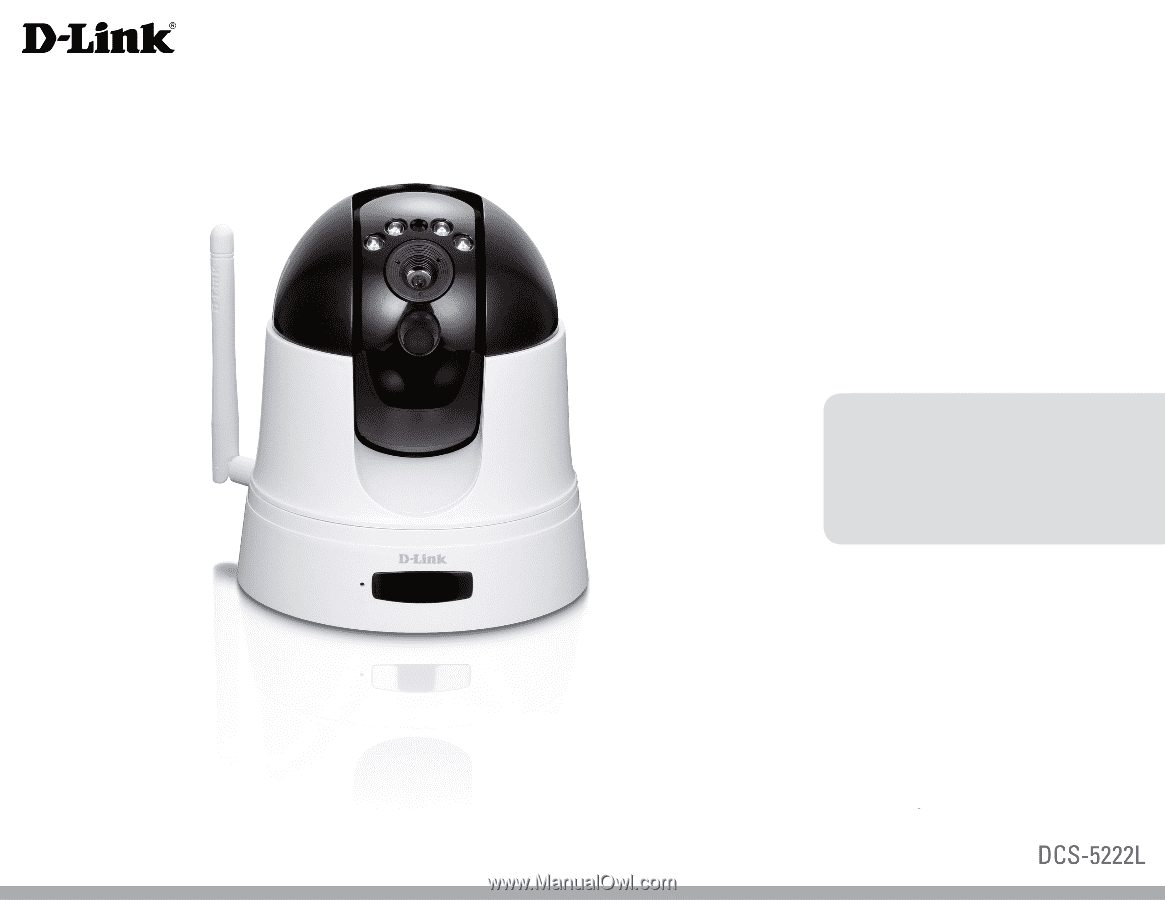
HD Wireless N Pan/Tilt Network Camera
User Manual
Version 1.0 | 12/23/2011