D-Link DCS-5222L User Manual - Page 40
Motion Detection - no live video
 |
View all D-Link DCS-5222L manuals
Add to My Manuals
Save this manual to your list of manuals |
Page 40 highlights
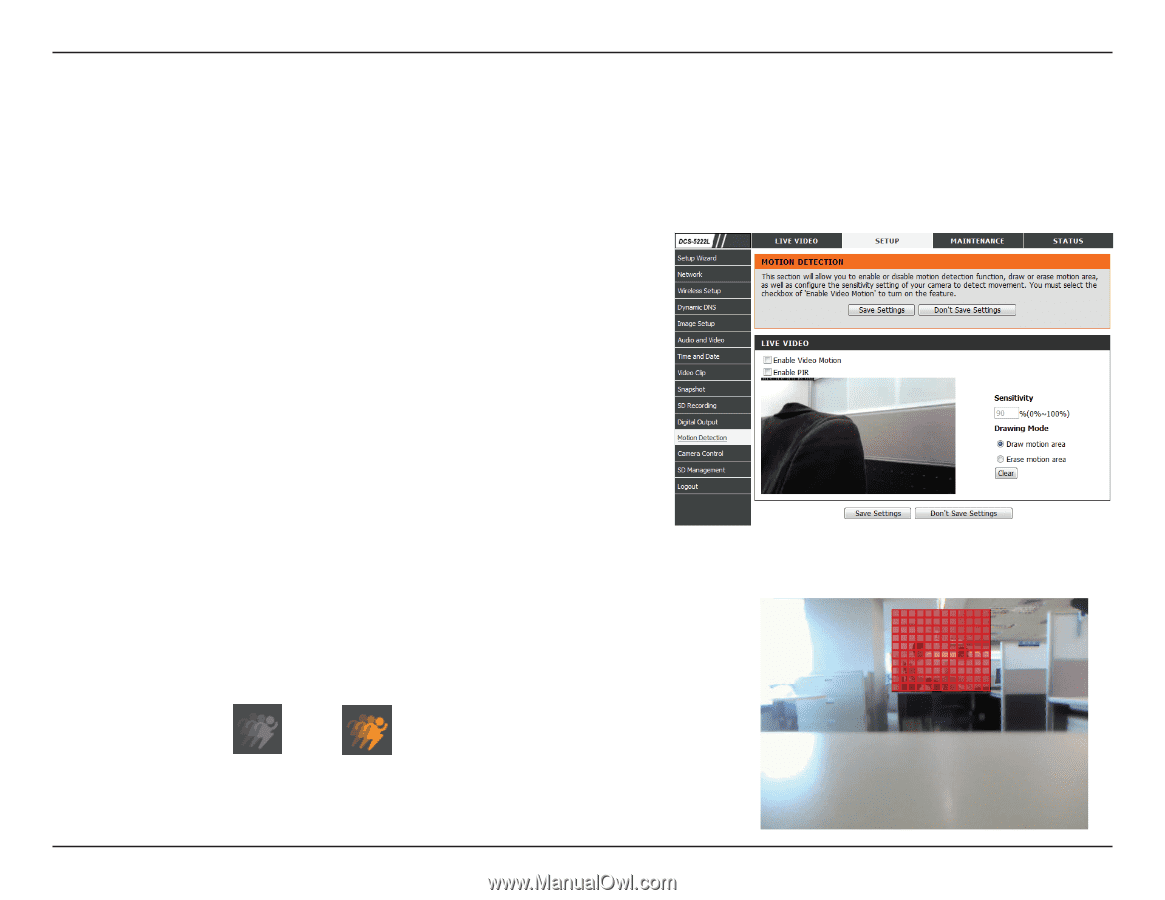
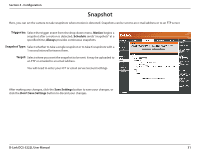
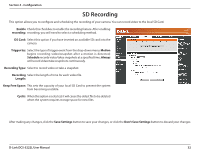
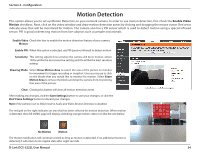
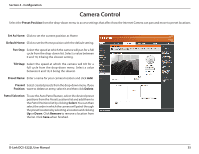
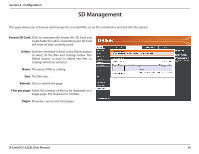
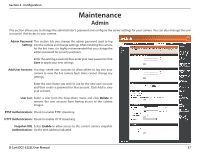
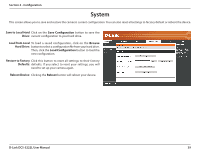
Section 4 - Configuration Motion Detection This option allows you to set up Motion Detection on your network camera. In order to use motion detection, first check the Enable Video Motion checkbox. Next, click on the video window and draw motion detection zones by clicking and dragging the mouse cursor. Red areas indicate areas that will be monitored for motion. The camera also has a PIR sensor which is used to detect motion using a special infrared sensor. PIR is good at detecting motion from live subjects such as people and animals. Enable Video Check this box to enable the motion detection feature of your camera. Motion: Enable PIR: When this option is selected, use PIR (passive infrared) to detect motion. Sensitivity: This setting adjusts how sensitive the camera will be to motion, where 100% will be the most sensitive setting and 0% will be the least sensitive setting. Drawing Mode: Select Draw Motion Area to select the area of the picture to monitor for movement to trigger recording or snapshot. Use your mouse to click on the blocks that you would like to monitor for motion. Select Erase Motion Area to remove the blocks and stop the camera from monitoring that area of the picture. Clear: Clicking this button will clear all motion detection zones. After making any changes, click the Save Settings button to save your changes, or click the Don't Save Settings button to discard your changes. Note: If the camera is set to SXGA mode in Audio and Video, Motion Detection is disabled. The red grid on the right indicates an area that has been selected for motion detection. When motion is detected, the LIVE VIDEO page will display a blinking orange motion video icon like the one below. No Motion Motion The motion notification will continue to blink as long as motion is detected. If no additional motion is detected, it will return to its original state after eight seconds. D-Link DCS-5222L User Manual 34
-
 1
1 -
2
-
3
-
4
-
5
-
6
-
7
-
8
-
9
-
10
-
11
-
12
-
13
-
14
-
15
-
16
-
17
-
18
-
19
-
20
-
21
-
22
-
23
-
24
-
25
-
26
-
27
-
28
-
29
-
30
-
31
-
32
-
33
-
34
-
 35
35 -
 36
36 -
 37
37 -
 38
38 -
 39
39 -
 40
40 -
 41
41 -
 42
42 -
 43
43 -
 44
44 -
 45
45 -
46
-
47
-
48
-
49
-
50
-
51
-
52
-
53
-
54
-
55
-
56
-
57
-
58
-
59
-
60
-
61
-
62
-
63
-
64
-
65
-
66
 |
 |