D-Link DCS-5222L User Manual - Page 33
Audio and Video - rtsp url
 |
View all D-Link DCS-5222L manuals
Add to My Manuals
Save this manual to your list of manuals |
Page 33 highlights
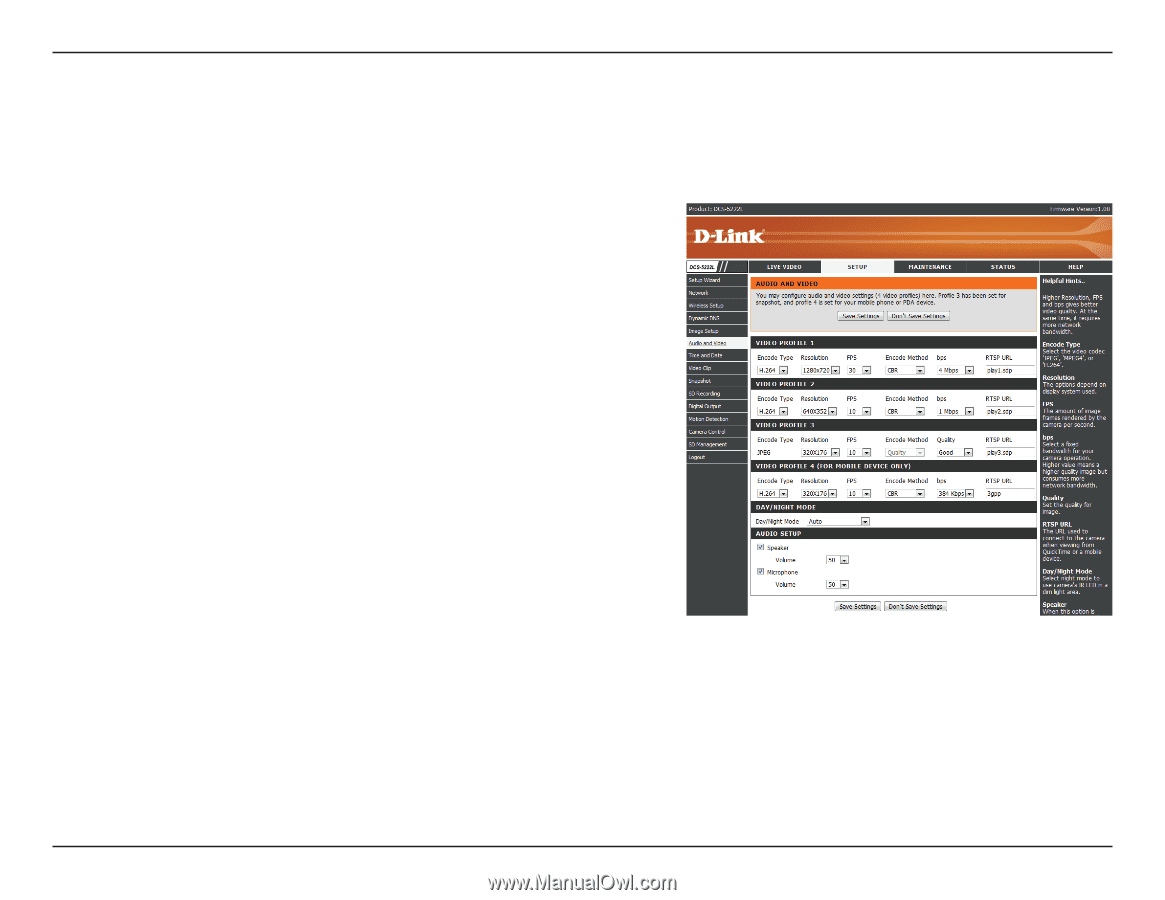
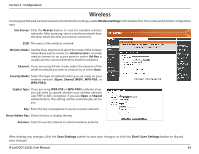
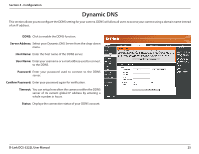
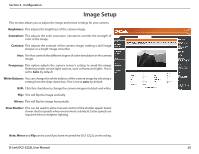
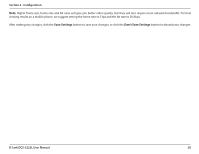
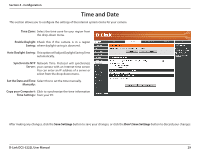
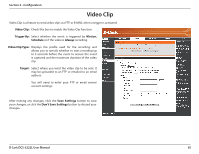
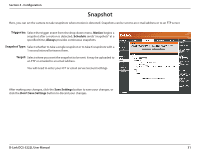
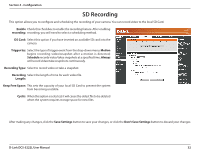
Section 4 - Configuration Audio and Video You may configure four video profiles with different settings for your camera. You may also set up different profiles for your computer and mobile display. In addition, you may configure the audio (speakers and microphone) settings for your camera. There are three sensor output selections (VGA, XGA, and SXGA). Do not select SXGA if you want to turn on the motion detection feature. Video Profile: This section allows you to change the Encode Type, Resolution, FPS, and Quality. Encode Type: The compression format used when viewing your camera. Resolution: Select the desired video resolution from the drop-down menu. The higher setting can obtain better quality. However, it will use more resource within your network. FPS: Select the optimal setting depending on your network status. Please note that the higher setting can obtain better quality. However, it will use more resources within your network. bps: Select the bitrate to assign the video. This is a constant bitrate. A higher bitrate will result in better looking video at the expense of a larger file size. Quality: Select one of five levels of image quality: Highest, High, Medium, Low, and Lowest. RTSP URL: The URL used to connect to the camera when viewing from QuickTime or a mobile device. Day/Night Allows you to control the IR LEDs on the front of the camera. Note Mode: that when this option is enabled, live feed video will be in black and white, and ICR filter will be activated. Audio Setup: Allows you to enable or disable and adjust the volume level of the speaker and microphone. If you select speaker, you must attach external speakers to the audio port on the camera. Note: Video Profile 3 is always set to MJPEG as the Encode Type to ensure that at least one of the Video Profiles are viewable by non-IE browsers. Video Profile 4 is for mobile devices only, and always uses MPEG-4 as the Encode Type. D-Link DCS-5222L User Manual 27
-
 1
1 -
2
-
3
-
4
-
5
-
6
-
7
-
8
-
9
-
10
-
11
-
12
-
13
-
14
-
15
-
16
-
17
-
18
-
19
-
20
-
21
-
22
-
23
-
24
-
25
-
26
-
27
-
 28
28 -
 29
29 -
 30
30 -
 31
31 -
 32
32 -
 33
33 -
 34
34 -
 35
35 -
 36
36 -
 37
37 -
 38
38 -
39
-
40
-
41
-
42
-
43
-
44
-
45
-
46
-
47
-
48
-
49
-
50
-
51
-
52
-
53
-
54
-
55
-
56
-
57
-
58
-
59
-
60
-
61
-
62
-
63
-
64
-
65
-
66
 |
 |