D-Link DSM-G600 Product Manual
D-Link DSM-G600 - MediaLounge Wireless G Network Storage Enclosure NAS Server Manual
 |
UPC - 790069273278
View all D-Link DSM-G600 manuals
Add to My Manuals
Save this manual to your list of manuals |
D-Link DSM-G600 manual content summary:
- D-Link DSM-G600 | Product Manual - Page 1
- D-Link DSM-G600 | Product Manual - Page 2
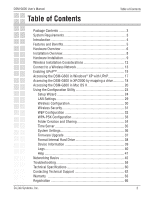
Installation Considerations 12 Connect to a Wireless Network 13 Enabling UPnP 15 Accessing the DSM-G600 in Windows® XP with UPnP 17 Accessing the DSM-G600 in XP/2000 by mapping a drive 18 Accessing the DSM-G600 in Mac OS X 20 Using the Configuration Utility 23 Setup Wizard 24 LAN Settings 29 - D-Link DSM-G600 | Product Manual - Page 3
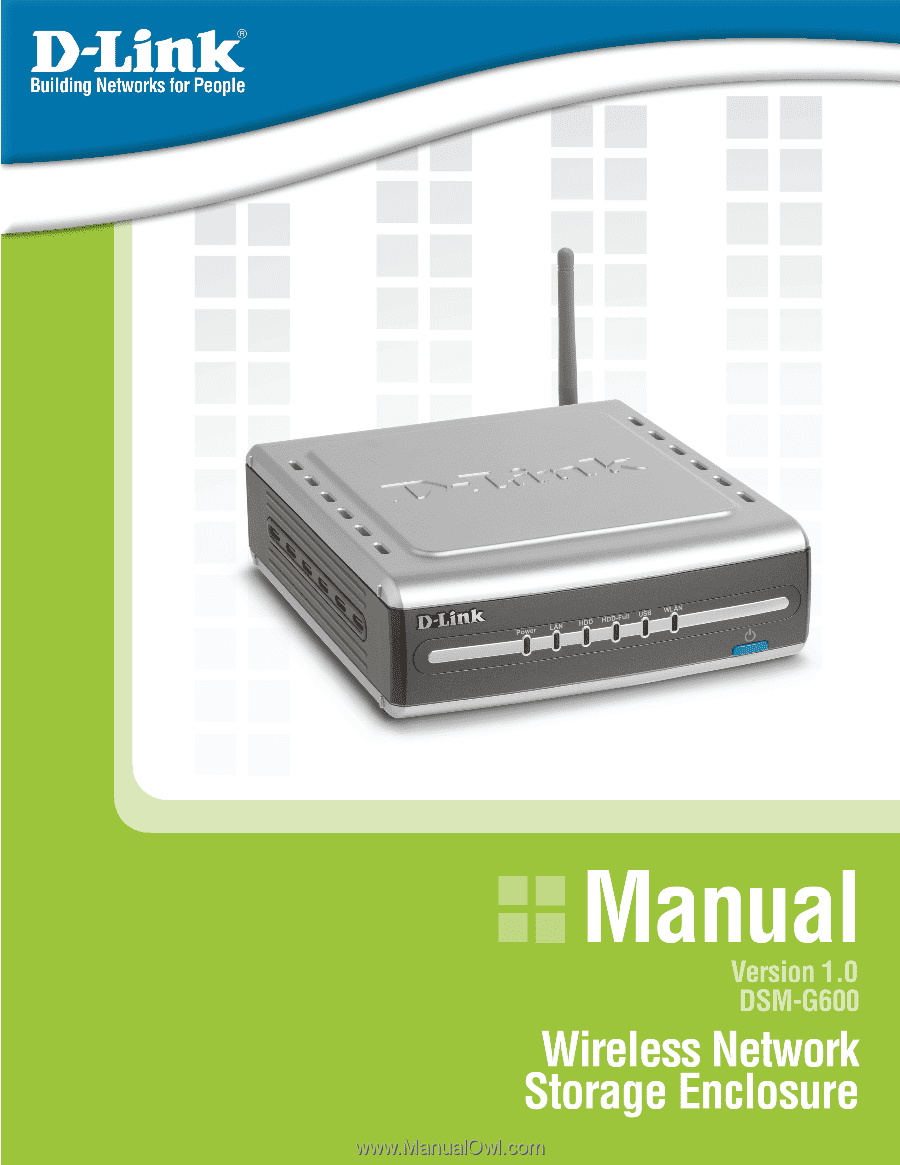
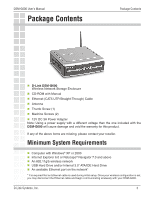
DSM-G600 User's Manual Package Contents Package Contents D-Link DSM-G600 Wireless Network Storage Enclosure CD-ROM with Manual Ethernet (CAT5 UTP/Straight-Through) Cable Antenna Thumb Screw (1) Machine Screws (2) 12V DC 3A Power Adapter Note: Using a power supply with a different - D-Link DSM-G600 | Product Manual - Page 4
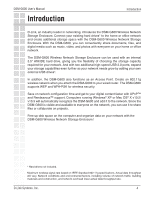
DSM-G600 User's Manual Introduction Introduction D-Link, an industry leader in networking, introduces the DSM-G600 Wireless Network Storage Enclosure. Connect your existing hard drives* to the home or office network and create additional storage space with the DSM-G600 Wireless Network Storage - D-Link DSM-G600 | Product Manual - Page 5
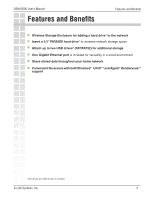
DSM-G600 User's Manual Features and Benefits Features and Benefits Wireless Storage Enclosure for adding a hard drive* to the network Insert a 3.5" PATA/IDE hard drive* to increase network storage space Attach up to two USB drives* (FAT/FAT32) for additional storage One Gigabit Ethernet port - D-Link DSM-G600 | Product Manual - Page 6
DSM-G600 User's Manual Hardware Overview Front Panel Hardware Overview HDD-Full LED Indicates that the internal hard drive is out of space. LAN LED Solid indicates an Ethernet connection. Blinking indicates traffic at the Ethernet port. WLAN LED A solid light indicates that wireless is ready. This - D-Link DSM-G600 | Product Manual - Page 7
DSM-G600 User's Manual Rear Panel Hardware Overview Reset Button Pressing the reset button for 10 seconds with a paper clip will restore the unit to the original factory default settings. The button is inside the hole to prevent an accidental reset. Antenna Connects to a wireless network. Power - D-Link DSM-G600 | Product Manual - Page 8
DSM-G600 User's Manual Installation Overview Installation Overview When you have completed the steps in this Quick Installation Guide, your connected network may look similar to this: D-Link Systems, Inc. 8 - D-Link DSM-G600 | Product Manual - Page 9
DSM-G600 User's Manual Hardware Installation A. Unscrew the two screws on the back panel of the DSM-G600 to remove the cover. Hardware Installation B. Connect the IDE cable to the IDE cable connector on your hard drive. Note: Make sure the jumper setting - D-Link DSM-G600 | Product Manual - Page 10
jack located on the back of the DSM-G600 for initial setup. Note: It is required that an Ethernet cable is used during initial setup. Once your wireless configuration is set, you may disconnect the Ethernet cable and begin communicating wirelessly with your DSM-G600. D-Link Systems, Inc. 10 - D-Link DSM-G600 | Product Manual - Page 11
DSM-G600 User's Manual G. Connect the antenna to the antenna connector located on the back of the DSM-G600. Hardware Installation H. Connect the power adapter to the connector on the back panel of the DSM-G600 of the DSM-G600. Do not power the unit off during this process. D-Link Systems, Inc. 11 - D-Link DSM-G600 | Product Manual - Page 12
DSM-G600 User's Manual Wireless Installation Considerations Wireless Installation Considerations The DSM-G600 lets you access your stored data and media files using a wireless connection from virtually anywhere within the operating range of your wireless network. Keep in mind, however, that the - D-Link DSM-G600 | Product Manual - Page 13
DSM-G600 User's Manual Connect to a Wireless Network Connect to a Wireless Network Open your Web browser and type http://dsm-g600 into the URL address box. Then press the Enter or Return key. If you cannot access the DSM-G600 with the DNS name, enter the IP address instead. If a DHCP server is - D-Link DSM-G600 | Product Manual - Page 14
DSM-G600 User's Manual Next, click on the Wireless button. Connect to a Wireless Network Click Wireless as your Network Type. Select your Wireless Mode and input your wireless settings. Select Client if you will be connecting to an existing wireless router or access point. Select Access Point if - D-Link DSM-G600 | Product Manual - Page 15
DSM-G600 User's Manual in Windows® XP, you will have easy access to shared folders through My Network Places. To enable UPnP, go to the Start menu, select Settings and Highlight Networking Services. Click Details. The Networking Services screen allows you to add or remove networking components in - D-Link DSM-G600 | Product Manual - Page 16
DSM-G600 User's Manual Enabling UPnP Enabling UPnPTM in Windows® XP (continued) Click Next. Click Finish. UPnPTM is now enabled! D-Link Systems, Inc. 16 - D-Link DSM-G600 | Product Manual - Page 17
drive, the DSM-G600 will automatically format the hard drive when first powered on. Using UPnP™ For Windows® XP users, it is recommended to activate UPnP for ease of use. To learn how to activate UPnP, please refer to Enabling UPnP in Windows® XP in this manual. Double-Click My Network Places on the - D-Link DSM-G600 | Product Manual - Page 18
DSM-G600 User's Manual Accessing the DSM-G600 in Windows® XP Accessing the DSM-G600 in Windows® XP Mapping a Drive As an alternate method, you can access the DSM-G600 by mapping the shared folders in Windows®. Please see the following instructions for mapping the DSM-G600 so that it is accessible - D-Link DSM-G600 | Product Manual - Page 19
DSM-G600 User's Manual Accessing the DSM-G600 in Windows® XP Mapping a Drive (continued) Select your DSM-G600 share folder. Click OK. Click Finish. In the My Computer window, the newly created mapped drive will be displayed. Double-click the drive to access the DSM-G600. You may now access - D-Link DSM-G600 | Product Manual - Page 20
DSM-G600 User's Manual Accessing the DSM-G600 in Macintosh OS X Accessing the DSM-G600 in Macintosh OS X From the desktop Go menu, select Connect to Server. Click Browse. Click DSM-G600. D-Link Systems, Inc. 20 - D-Link DSM-G600 | Product Manual - Page 21
DSM-G600 User's Manual Accessing the DSM-G600 in Macintosh OS X Click OK. By default, there is no password. Click OK. The share window will open. D-Link Systems, Inc. 21 - D-Link DSM-G600 | Product Manual - Page 22
DSM-G600 User's Manual Accessing the DSM-G600 in Macintosh OS X The DSM-G600 will appear on your desktop. Double-click on the shared drive to access the DSM-G600. You may now access your mapped drives! D-Link Systems, Inc. 22 - D-Link DSM-G600 | Product Manual - Page 23
For Windows® users: Open a web browser such as Internet Explorer. If you do not have a DHCP server in your network: Type the IP address of the DSM-G600 in the address field and press Enter. The default IP address is 192.168.0.100. Make sure that the IP addresses of the DSM-G600 and your computer - D-Link DSM-G600 | Product Manual - Page 24
DSM-G600 User's Manual Using the Configuration Utility Home > Wizard The Home > Wizard screen will appear. Click Run Wizard and the Setup Wizard will guide you through the basic configuration. These buttons appear on most of the configuration screens in this section. Please click on the appropriate - D-Link DSM-G600 | Product Manual - Page 25
DSM-G600 User's Manual Using the Setup Wizard The Wizard will guide you through four steps: System LAN or Wireless Time Additional settings Click Next. Using the Configuration Utility Enter the Server Name. This is the name of the DSM-G600 device. Enter and confirm a new password. Click Next. - D-Link DSM-G600 | Product Manual - Page 26
DSM-G600 User's Manual Using the Setup Wizard (continued) Select Dynamic IP Address when you have a DHCP server in your network. No other configuration is required in this screen when Dynamic IP address is selected. Using the Configuration Utility Click Next. If you selected LAN, please skip to page - D-Link DSM-G600 | Product Manual - Page 27
DSM-G600 User's Manual Using the Setup Wizard (continued) Using the Configuration Utility Select the type of security. Click on None if your not using encryption on your wireless network. Please refer to page 31 for information on wireless security. Click Next. If you select WEP, the following - D-Link DSM-G600 | Product Manual - Page 28
DSM-G600 User's Manual Using the Setup Wizard (continued) Using the Configuration Utility Select the appropriate time zone in the pulldown menu. Set device date and time Click Next. Enter the Workgroup name Click Restart. You have completed the basic configuration of the DSM-G600 using the setup - D-Link DSM-G600 | Product Manual - Page 29
the DSM-G600 earlier in this manual). Dynamic IP: Select to obtain an IP address from a DHCP server. Static IP: Select to manually assign an IP address. Static IP Address: Enter the address here, when Static IP is selected. This address must be different from any other on the network. Subnet - D-Link DSM-G600 | Product Manual - Page 30
DSM-G600 User's Manual Home > Wireless Using the Configuration Utility Network Type: Select Wireless to enable wireless functionality. Wireless Mode: Client: Select this mode if you will be connecting to an existing wireless router or access point. Access Point: Select this mode if wireless - D-Link DSM-G600 | Product Manual - Page 31
DSM-G600 User's Manual Using the Configuration Utility Wireless Security The DSM-G600 offers 2 types of wireless security - WEP and WPA-PSK. WEP (Wired Equivalent Privacy) is a method of encrypting data for wireless communication intended to provide the same level of privacy as a wired network. To - D-Link DSM-G600 | Product Manual - Page 32
DSM-G600 User's Manual Home > Wireless Using the Configuration Utility WEP: Enter the WEP key as described in Wireless Security on the previous page. Authentication: Open System - Allows association to wireless would like to use. Apply: Click Apply to save your settings. D-Link Systems, Inc. 32 - D-Link DSM-G600 | Product Manual - Page 33
DSM-G600 User's Manual Home > Wireless Using the Configuration Utility WPA-PSK: Enter the WPA-PSK passphrase as described in Wireless Security on the previous page. Passphrase: Enter your WPA passphrase. Confirm Passphrase: Enter your WPA passphase again for confirmation. Apply: Click Apply to - D-Link DSM-G600 | Product Manual - Page 34
DSM-G600 User's Manual Advanced > Share Using the Configuration Utility In this window you can create new folders and provide writing and sharing privileges for them on the DSM-G600's internal drive and the connected USB drives. New Folder Enter a name for the folder. Click Create and the folder - D-Link DSM-G600 | Product Manual - Page 35
DSM-G600 User's Manual Tools > Time Using the Configuration Utility Time Zone: Select the Time Zone. Default NTP Network Time Protocol synchronizes time on your DSM-G600 with Server: an NTP server (a time server). Input an optional NTP server address here. Set Date & Time: Enter the date and time - D-Link DSM-G600 | Product Manual - Page 36
DSM-G600 User's Manual Tools > System Using the Configuration Utility Format: Click to , after using the Browse feature, above, to select the file. Reset: Click to reset to factory default settings. All current settings will be lost. Reboot: Click to restart the DSM-G600. D-Link Systems, Inc. 36 - D-Link DSM-G600 | Product Manual - Page 37
DSM-G600 User's Manual Tools > Firmware Using the Configuration Utility Click on the link to find information about firmware upgrades on D-Link's support site. Download the firmware file from the support site to your computer's hard drive. Browse: After you have downloaded the firmware upgrade to your - D-Link DSM-G600 | Product Manual - Page 38
DSM-G600 User's Manual Tools > Format Using the Configuration Utility Before you can use the Internal hard drive, you must format it using the DSM-G600. If you install an unformatted hard drive, the DSM-G600 will below will appear. Click OK to begin the format process. D-Link Systems, Inc. 38 - D-Link DSM-G600 | Product Manual - Page 39
DSM-G600 User's Manual Status > Device Info Using the Configuration Utility Device Information: The firmware version is displayed here. Network: The network information is displayed here. HDD drive: The following information about the hard disk drive is displayed here: Total Disk Size Used Space - D-Link DSM-G600 | Product Manual - Page 40
DSM-G600 User's Manual Status > Logs Using the Configuration Utility You can manage your logs and log settings here. Click Log Settings and the screen below will appear. In this window, select the log type that you wish to view. Apply: Click Apply after you have made your selections. D-Link - D-Link DSM-G600 | Product Manual - Page 41
DSM-G600 User's Manual Help Using the Configuration Menu Click on any of the above topics to access help and information. D-Link Systems, Inc. 41 - D-Link DSM-G600 | Product Manual - Page 42
DSM-G600 User's Manual Networking Basics Networking Basics Using the Network Setup Wizard in Windows® XP In this section you will learn how to establish a network at home or work, using Microsoft Windows® XP. Note: Please refer to websites such as http://www.homenethelp.com and http://www. - D-Link DSM-G600 | Product Manual - Page 43
DSM-G600 User's Manual Please follow all the instructions in this window: Networking Basics Click Next. In the following window, select the best description of your computer. If your computer connects to the internet through a gateway/router, select the second option as shown. Click Next. D-Link - D-Link DSM-G600 | Product Manual - Page 44
DSM-G600 User's Manual Networking Basics Enter a Computer description and a Computer name (optional). Click Next. Enter a Workgroup name. All computers on your network should have the same Workgroup name. Click Next. D-Link Systems, Inc. 44 - D-Link DSM-G600 | Product Manual - Page 45
DSM-G600 User's Manual Networking Basics Please wait while the Network Setup Wizard applies the changes. When the changes are complete, click Next. Please wait while the Network Setup Wizard configures the computer. This may take a few minutes. D-Link Systems, Inc. 45 - D-Link DSM-G600 | Product Manual - Page 46
DSM-G600 User's Manual Networking Basics In the window below, select the option that fits your needs. In this example, Create a Network Setup Disk has been selected. You will run this disk on each of the computers on your network. Click Next. Insert a disk into the Floppy Disk Drive, in this case - D-Link DSM-G600 | Product Manual - Page 47
DSM-G600 User's Manual Networking Basics Please read the information under Here's how in the screen below. After you complete the Network Setup Wizard you will use the Network Setup Disk to run the Network Setup Wizard once on each of the computers on your network. To continue click Next. D-Link - D-Link DSM-G600 | Product Manual - Page 48
DSM-G600 User's Manual Networking Basics Please read the information on this screen, then click Finish to complete the Network Setup Wizard. The new settings will take effect when you restart the computer. Click Yes to restart the computer. You have completed configuring this computer. - D-Link DSM-G600 | Product Manual - Page 49
DSM-G600 User's Manual Naming Your Computer Networking Basics To name your computer n Windows® XP, please follow these directions. Click Start (in the lower left Description if you wish; this field is optional. To rename the computer and join a domain, Click Change. D-Link Systems, Inc. 49 - D-Link DSM-G600 | Product Manual - Page 50
DSM-G600 User's Manual Networking Basics In this window, enter the Computer name. Select Workgroup and enter the name of the Workgroup. All computers on your network must have the same Workgroup name. Click OK. D-Link Systems, Inc. 50 - D-Link DSM-G600 | Product Manual - Page 51
DSM-G600 User's Manual Networking Basics Checking the IP Address in Windows® XP The wireless adapter-equipped computers in your network must be in the same IP Address range (see Getting Started in this manual for a definition of IP Address Range.) To check on the IP Address of the adapter, please - D-Link DSM-G600 | Product Manual - Page 52
DSM-G600 User's Manual Networking Basics Assigning a Static IP Address in Windows® XP/2000 Note: DHCP-enabled routers will automatically assign IP addresses to the computers on the network, using DHCP (Dynamic Host Configuration Protocol) technology. If you are using a DHCP-capable router you will - D-Link DSM-G600 | Product Manual - Page 53
DSM-G600 User's Manual Right-click on Local Area Connections. Double-click on Properties. Networking Basics Click on Internet Protocol (TCP/IP). Click Properties. Input your IP address and subnet mask. (The IP addresses on your network must be within the same range. For example, if one - D-Link DSM-G600 | Product Manual - Page 54
DSM-G600 User's Manual Networking Basics Input your DNS server addresses. (Note: If you are entering a DNS server, you must enter the IP address of the default gateway.) The DNS server information will be supplied by your ISP (Internet Service Provider.) Click OK. Assigning a Static IP - D-Link DSM-G600 | Product Manual - Page 55
DSM-G600 User's Manual Select Built-in Ethernet in the Show pull-down menu. Select Manually in the Configure pull-down menu. Networking Basics Input the Static IP Address, the Subnet Mask and the Router IP Address in the appropriate fields. Click Apply Now. D-Link Systems, Inc. 55 - D-Link DSM-G600 | Product Manual - Page 56
DSM-G600 User's Manual Go to the Apple Menu and select System Preferences. Click on Network. Networking Basics Select Built-in Ethernet in the Show pull-down menu. Select Using DHCP in the Configure pull-down menu. D-Link Systems, Inc. 56 - D-Link DSM-G600 | Product Manual - Page 57
DSM-G600 User's Manual Networking Basics Click Apply Now. The IP Address, Subnet mask, and the Router's IP Address will appear in a few seconds. Checking the Wireless Connection by Pinging in Windows® XP and 2000 Go to Start > Run > type cmd. A window similar to this one will appear. Type - D-Link DSM-G600 | Product Manual - Page 58
DSM-G600 User's Manual Troubleshooting Troubleshooting 1. Why does my wireless connection keep dropping? Antenna Orientation- Try different antenna orientations for the DSM-G600. Try to keep the antenna at least 6 inches away from the wall or other objects. If you are using 2.4GHz cordless - D-Link DSM-G600 | Product Manual - Page 59
DSM-G600 User's Manual Troubleshooting 3. What variables may cause my wireless products to lose reception? D-Link products let you access your network from virtually anywhere you want. However, the positioning of the products within your environment will affect the wireless range. Please refer to - D-Link DSM-G600 | Product Manual - Page 60
DSM-G600 User's Manual Technical Specifications Technical Specifications Standards • IEEE 802.11 • IEEE 802.11b • IEEE 802.11g • IEEE 802.3 • IEEE 802.3u • IEEE 802.3ab • UPnPTM (Windows® XP) • RendezvousTM (Mac OS X) Device Management • Web-Based - Internet Explorer v6 or later; Netscape Navigator - D-Link DSM-G600 | Product Manual - Page 61
DSM-G600 User's Manual Wireless Transmit Power • 15 dBm (32 mW) 2dBi gain Receiver Sensitivity • 54 Mbps OFDM, 10% PER, -68 dBm • ) Certifications • FCC Part 15 Class B Dimensions • L = 7.69 inches • W = 6.96 inches • H = 2.41 inches Warranty • 1 Year Technical Specifications D-Link Systems, Inc. 61 - D-Link DSM-G600 | Product Manual - Page 62
DSM-G600 User's Manual Contacting Technical Support Contacting Technical Support You can find software updates and user documentation on the D-Link website. D-Link provides free technical support for customers within the United States and within Canada for the duration of the warranty period on - D-Link DSM-G600 | Product Manual - Page 63
DSM-G600 User's Manual Warranty Subject to the terms and conditions set forth herein, D-Link Systems, Inc. ("D-Link") provides this Limited Warranty: · Only to the person or entity that originally purchased the product from D-Link or its authorized reseller or distributor, and · Only for products - D-Link DSM-G600 | Product Manual - Page 64
DSM-G600 User's Manual software, firmware or other products or services provided by anyone other than D-Link; and Products that have been purchased from inventory clearance or liquidation sales or other sales in which D-Link used in accordance with the instructions, may cause harmful interference to - D-Link DSM-G600 | Product Manual - Page 65
DSM-G600 User's Manual Warranty FCC Caution: The manufacturer is not responsible for any radio or TV interference caused by unauthorized modifications to this equipment; such modifications could void the user must not be operated in conjunction with any other antenna. D-Link Systems, Inc. 65 - D-Link DSM-G600 | Product Manual - Page 66
DSM-G600 User's Manual Registration Registration Product registration is entirely voluntary and failure to complete or return this form will not diminish your warranty rights. 05/27/2005 D-Link Systems, Inc. 66
-
 1
1 -
 2
2 -
 3
3 -
 4
4 -
 5
5 -
 6
6 -
 7
7 -
8
-
9
-
10
-
11
-
12
-
13
-
14
-
15
-
16
-
17
-
18
-
19
-
20
-
21
-
22
-
23
-
24
-
25
-
26
-
27
-
28
-
29
-
30
-
31
-
32
-
33
-
34
-
35
-
36
-
37
-
38
-
39
-
40
-
41
-
42
-
43
-
44
-
45
-
46
-
47
-
48
-
49
-
50
-
51
-
52
-
53
-
54
-
55
-
56
-
57
-
58
-
59
-
60
-
61
-
62
-
63
-
64
-
65
-
66
 |
 |