D-Link DSN-4200 Hardware Reference Guide for DSN-4000 - Page 30
Installing or Removing Hard Disk Drives
 |
View all D-Link DSN-4200 manuals
Add to My Manuals
Save this manual to your list of manuals |
Page 30 highlights
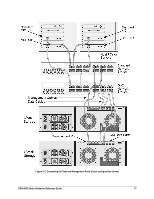
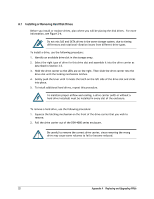
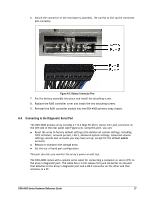
A.1 Installing or Removing Hard Disk Drives Before you install or replace drives, plan where you will be placing the disk drives. For more information, see Figure 2-4. Do not mix SAS and SATA drives in the same storage system, due to timing differences and rotational vibration issues from different drive types. To install a drive, use the following procedure: 1. Identify an available drive slot in the storage array. 2. Select the right type of drive for this drive slot and assemble it into the drive carrier as described in Section 3.5. 3. Hold the drive carrier so the LEDs are on the right. Then slide the drive carrier into the drive slot until the locking mechanism latches. 4. Gently push the lever until it meets the latch on the left side of the drive slot and clicks into place. 5. To install additional hard drives, repeat this procedure. To maintain proper airflow and cooling, a drive carrier (with or without a hard drive installed) must be installed in every slot of the enclosure. To remove a hard drive, use the following procedure: 1. Squeeze the latching mechanism on the front of the drive carrier that you wish to remove. 2. Pull the drive carrier out of the DSN-4000 series enclosure. Be careful to remove the correct drive carrier, since removing the wrong drive may cause some volumes to fail or become reduced. 22 Appendix A Replacing and Upgrading FRUs
-
 1
1 -
2
-
3
-
4
-
5
-
6
-
7
-
8
-
9
-
10
-
11
-
12
-
13
-
14
-
15
-
16
-
17
-
18
-
19
-
20
-
21
-
22
-
23
-
24
-
 25
25 -
 26
26 -
 27
27 -
 28
28 -
 29
29 -
 30
30 -
 31
31 -
 32
32 -
 33
33 -
 34
34 -
 35
35 -
36
-
37
-
38
 |
 |