D-Link DSN-4200 Hardware Reference Guide for DSN-4000 - Page 32
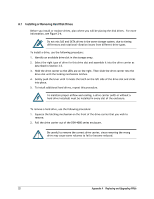
Replacing a Cooling Fan Module
 |
View all D-Link DSN-4200 manuals
Add to My Manuals
Save this manual to your list of manuals |
Page 32 highlights
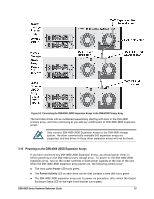
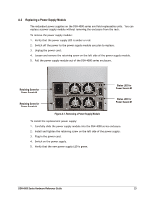
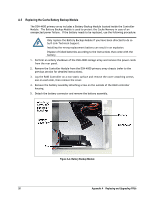
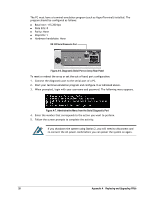
A.3 Replacing a Cooling Fan Module The cooling fan modules on the DSN-4000 series are hot-swappable and can be replaced while the system is running, without shutting down the system or removing the enclosure from the rack. To remove a cooling fan module: 1. Verify that the Fan Status LED is red to identify which cooling fan module has failed. 2. Loosen the two thumbscrews for the cooling fan module, as shown in Figure A-2. 3. Remove the cooling fan module from the Controller module. Thumbscrew Cooling Fan Module with Fans 0 and 1 Thumbscrew Thumbscrew Cooling Fan Module with Fans 2 and 3 Thumbscrew Figure A-2. Removing a Cooling Fan Module To install a replacement cooling fan module: 1. Align the tabs on the side of the cooling fan module with the slots in the controller module rear panel, to ensure that the fan is installed in the correct orientation. 2. Slide the cooling fan module into the opening in the Controller module until it is fully seated. 3. Tighten both of the thumbscrews. 4. Verify that the Fan Status LED is green. 24 Appendix A Replacing and Upgrading FRUs
-
 1
1 -
2
-
3
-
4
-
5
-
6
-
7
-
8
-
9
-
10
-
11
-
12
-
13
-
14
-
15
-
16
-
17
-
18
-
19
-
20
-
21
-
22
-
23
-
24
-
25
-
26
-
 27
27 -
 28
28 -
 29
29 -
 30
30 -
 31
31 -
 32
32 -
 33
33 -
 34
34 -
 35
35 -
 36
36 -
 37
37 -
38
 |
 |
