Danby DPAC8399 User Guide
Danby DPAC8399 Manual
 |
View all Danby DPAC8399 manuals
Add to My Manuals
Save this manual to your list of manuals |
Danby DPAC8399 manual content summary:
- Danby DPAC8399 | User Guide - Page 1
Limited, Guelph, Ontario Canada N1H 6Z9 Danby Products Inc., Findlay, Ohio USA 45840 OWNER'S MANUAL MANUEL D'UTILISATION MANUAL DEL PROPIETARIO Model • Modèle • Modelo DPAC8399 CAUTION: Read and follow all safety rules and operating instructions before first use of this product. PRÉCAUTION - Danby DPAC8399 | User Guide - Page 2
Instructions 5 Operating Instructions 7 Care and Maintenance 22 Warranty 23 Illuminated Control Panel Remote Control Receiver Window Removable Air Filter Panel (left side) Horizontal Louver Blades Unit Parts Identification Oscillating Air el hogar En el hogar Danby Products Limited PO Box 1778 - Danby DPAC8399 | User Guide - Page 3
read the instructions thoroughly and familiarize yourself with all of the operational aspects of this appliance. Your Danby Portable Air-Conditioner is a multi-functional room air-exchanging, air-processing appliance, designed to offer you the functions of; Air Conditioning, Dehumidifying, Heating - Danby DPAC8399 | User Guide - Page 4
DPAC8399 Cooling Capacity Heating Capacity (High/Low) Dehumidifying Capacity Noise Level Power Source Refrigerant Internal Water Tank Capacity External Water Tank Capacity Unit Weight Unit Dimensions (inches) W x D x H Unit Dimensions (cm) W x D x H Fan Speeds Control Panel (Illuminated) Remote - Danby DPAC8399 | User Guide - Page 5
airborne particles. Keep the air filter clean at all times. 3) Use drapes, curtains or shades to keep direct sunlight from penetrating and heating room, but do not allow drapes or curtains to obstruct the air flow around the unit. 4) Start your air conditioner before the outdoor air becomes hot and - Danby DPAC8399 | User Guide - Page 6
total running time/operation (air conditioner & dehumidifying modes only) up-to Water Tank Instructions: 1. Attach the water tank support tray (with sealed (cooling) system, never use replacement screws longer than 16mm (5/8) Fig.35 Propiedades del control remoto La unidad portátil de control remoto le - Danby DPAC8399 | User Guide - Page 7
OFF, y la hora seleccionada aparecerá provisoriamente, reemplazando la hora del día, por unos 5 segundos. External Water Tank Instructions (cont'd) 3. Position the external water tank on the support tray, making sure the quick connect on the water tank is aligned with the factory installed quick - Danby DPAC8399 | User Guide - Page 8
cooling or dehumidifying will occur cm) Fig. 2c Operating Instructions Before Starting This Unit 1) Hose and the Adjustable Window/Patio Door Slider Kit as depicted in Fig. 2, Fig. 2a or Fig. 2b. NOTE: Step 2 is required only while using the AIR CONDITIONER manual antes de la hora en que el - Danby DPAC8399 | User Guide - Page 9
segundos. Fig. 32 Fig. 32a Key Pad Functions Fig. 5 The control panel on this unit "illuminates" automatically when any key pad is depressed. turns off when desired temperature is achieved. Applicable to both Air Conditioner and Dehumidifier. Red Light: Remains on while heater is operating. Red - Danby DPAC8399 | User Guide - Page 10
re-set the clock program. Air Conditioner Operating Instructions 1) Install the Flexible Exhaust Hose Fig. 10 and the Air Conditioner Mode Temperature Fig. 8 Fig. 9 Fig. 12 Fig. 13 Instrucciones para el reloj automático NOTA: No puede graduar los programas del horario automático con el control - Danby DPAC8399 | User Guide - Page 11
28. Oscilación del aire Fig. 25 Fig. 26 Fig. 27 Fig. 28 Air Conditioner Operating Instructions (cont'd) 5) Press water. Replace the water tank back to it's original position (in cabinet) and the air conditioning process temperature control. CAUTION During air conditioning and dehumidifying modes, - Danby DPAC8399 | User Guide - Page 12
Replace the water tank back to it's original position (in cabinet) and the Dehumidifying process Hardware Store. Drain Hose Specifications: Standard garden hose. Green Light Dry aire (el símbolo "air swing" aparecerá en la ventana LCD). Figura 23. Para desactivar la opción de oscilación de aire - Danby DPAC8399 | User Guide - Page 13
. DRY (Dehumidifier) Operating Instructions (cont'd) hose (unplugged) inside the water tank, when relocating your unit to a location (room) where continuous draining is not possible. Failure to comply with these procedures will result in flooding. CAUTION During air conditioning and dehumidifying - Danby DPAC8399 | User Guide - Page 14
Heater Operating Instructions 1) Press the MODE key until the word Heat is displayed in the mode light will close. Heating will resume when the room temperature falls below the established temperature setting. Air Swing Fig. 20 Fig. 21 Fig. 22 Fig. 23 Fig. 24 Instrucciones de operación para - Danby DPAC8399 | User Guide - Page 15
su ciclo) para mantener un control óptimo de temperatura. PRECAUCIÓN Durante los modos de aire acondicionamiento y deshumidificación, si se haya vaciado y/o se haya vuelto a colocar en la posición correcta. Fan Operating Instructions 1) Press the I/O (on/off) key pad to switch on the unit. 2) Press - Danby DPAC8399 | User Guide - Page 16
Instructions NOTE: Auto-Timed programs cannot be set with the hand held remote control unit to operate. (Hi, Med, Low) (excluding Dehumidifying, as this mode has "1" fan speed setting only). verde se encenderá indicando que el modo de aire acondicionado está funcionando (es posible que haya una - Danby DPAC8399 | User Guide - Page 17
teclado (Figura 5) El panel de control sobre esta unidad "ilumina" automá se obtiene la temperatura deseada. Corresponde tanto para el Aire Acondicionado como para el Deshumidificador. Luz roja: Permanece encendida temporarily (replacing the time of day) for approximately 5 seconds. Fig. 32 Fig. 32a - Danby DPAC8399 | User Guide - Page 18
you selected will appear (flash) temporarily (replacing the time of day) for approximately 5 -TIMED program, simply turn off the unit manually, prior to the scheduled AUTO-OFF time. paso se requiere solamente cuando se usa el MODO DE AIRE ACONDICIONADO. 3) Enchufe la unidad en un tomacorriente con - Danby DPAC8399 | User Guide - Page 19
) el tanque de agua externo, apreta el botón de desenganchar que está en la parte superior del conector rápido del armario, pues sujete los mangos de desenganchar localizado por ambos lados the selected time will temporarily appear replacing the time of day clock for approximately 5 seconds. - Danby DPAC8399 | User Guide - Page 20
your Portable 4 Season Home Comfort Appliance from the convenience of your favorite armchair. Here are some things you should know about operating the unit with the hand held remote. Upper Control Buttons I/O: Power switch (On/Off). Mode: Selects the operating mode (Auto-Cool-Dry/Dehumidifier-Heat - Danby DPAC8399 | User Guide - Page 21
de aire es muy eficaz en la remoción de partículas contenidas en el aire. Siempre rápid(Tanque externo) Remote Control Operating Instructions 1. Sending Signal: When remote (positive+/ negative-)? • Check the batteries. If low, replace. 2. Setting/Adjusting Time of Day Clock (Remote Control - Danby DPAC8399 | User Guide - Page 22
Remote Control Operating Instructions (cont'd) How the External Water Tank Feature Works 6. Swing Setting: Press the remote "Swing" button to activate the automatic air directed inside the internal water tank. SPECIALNOTE: (Air Conditioner & Dehumidifier Modes Only) • This unit can operate without - Danby DPAC8399 | User Guide - Page 23
water. Allow time to dry before reinstalling into the unit. 6) Replace the air filter. 7) Replacement air filters are available through the Customer Service Parts Department. Air Filter Tab CAUTION Never operate the unit without the air filter in place as this may result in damage to the unit - Danby DPAC8399 | User Guide - Page 24
, present this document to our AUTHORIZED SERVICE DEPOT. Portable 4 Season Home Comfort Dehumidifiers Freezers Chest Uprights Warranty Service Canada United States In Home Carry In In Home In Home In Home Carry In In Home In Home Refrigerators Danby Products Limited PO Box 1778, Guelph - Danby DPAC8399 | User Guide - Page 25
être effectuées par un technicien qualifié. Si les réparations sont effectuées par quiconque autre que la station de service agréée où à des fins commerciales, toutes les obligations de Danby en vertu de cette garantie seront nulles et non avenues. EXCLUSIONS En vertu de la présente, il n'existe - Danby DPAC8399 | User Guide - Page 26
installation dans la fenêtre 27 Instructions d'installation du réservoir d'eau externe 28 Instructions d'utilisation 30 Soins et entretien du Département des pièces, du Service à la clientèle. PRÉCAUTION Pour éviter d'endommager l'appareil, le filtre à air doit toujours être installé durant le - Danby DPAC8399 | User Guide - Page 27
plusieurs années de service sans ennui. Avant de commencer, veuillez lire attentivement toutes les instructions pour vous renseigner de tous les aspects du fonctionnement de votre appareil. Votre climatiseur portatif Danby est un appareil d'échange et de traitement d'air à multi-fonctions. Sa - Danby DPAC8399 | User Guide - Page 28
alimentation avant d'accomplir l'installation ou le service. Table 1 Dérivation individuelle suggérée Chauffage Déshumidification Ventilation Modèle DPAC8399 8 300 btu/h 1 380W/830W sans préavis en raison des améliorations. Instructions d'utilisation de la télécommande 1 Envoyez un signal - Danby DPAC8399 | User Guide - Page 29
est normale) Conseil pour la conservation d'énergie Votre appareil Danby est doté d'une conception à très haute économie le modèle). Ceci permet la circulation rafraîchissante de l'air à l'intérieur et l'économie énergétique qui vous Veuillez lire attentivement les instructions afin d'éviter les - Danby DPAC8399 | User Guide - Page 30
ée jusqu'à environ 12 heures (selon l'état hygrométrique de l'air) en utilisant les deux réservoirs. L'appareil peut fonctionner lorsque le d'eau externe suivrez ces instructions: 1. Attachez la tablette de support du réservoir (avec les roulements installés à l'usine) aux supports (2) situés à l' - Danby DPAC8399 | User Guide - Page 31
du MINUTEUR AUTOMATIQUE, vous n'avez qu'à arrêter l'appareil manuellement avant l'heure programmée pour l'ARRÊT AUTOMATIQUE. Fig. 33 Fig. 33a Instructions d'installation du réservoir d'eau externe (suite): 3. Mettez le réservoir d'eau externe à la bonne position sur le rebord de soutien. S'assurez - Danby DPAC8399 | User Guide - Page 32
soit à vide et/ou bien installé. Ce procédé peut prendre quelques minutes car le compressseur doit recommencer son fonctionnement normal. Instruction d'utilisation Avant de mettre l'appareil en marche 1) Choisissez un emplacement approprié, en s'assurant d'un accès facile à une prise de courant - Danby DPAC8399 | User Guide - Page 33
Instructions pour le minuteur automatique REMARQUE: Les programmes du minuteur automatique ne 30. 4) Pour obtenir l'oscillation désirée (balayage automatique) appuyez sur la touche SWING (le symbole "air swing" est indiqué sur l'affichage). Fig. 31. Sélection du mode Fig. 29 Réglage du minuteur - Danby DPAC8399 | User Guide - Page 34
verte Mode de climatisation Température Fig. 8 Fig. 9 Fig. 12 Instructions d'utilisation du ventilateur 1) Appuyez sur la touche I/O (mise en marche Vitesse du ventilateur Balayage 5) Pour ajuster la direction de la "circulation d'air", (vers le haut / bas seulement) réglez un des volets - Danby DPAC8399 | User Guide - Page 35
"rouge" s'éteint. Le chauffage recommence lorsque la température baisse en dessus de la température réglée. Balayage d'air Fig. 20 Fig. 21 Fig. 22 Fig. 23 Fig. 24 Instructions d'utilisation du climatiseur (suite) 5) Appuyez sur la touche FAN pour choisir la vitesse du ventilateur de votre choix - Danby DPAC8399 | User Guide - Page 36
gion. Spécifications du boyau d'écoulement: Boyau standard de jardinage. Lampe verte Mode du déshumidificateur Température Fig. 17 Fig. 18 Instructions d'utilisation du déshumidificateur (suite) 6) Raccord de l'option d'écoulement continu. Enlevez le réservoir d'eau du caisson. Al'intérieur du
-
 1
1 -
 2
2 -
 3
3 -
 4
4 -
 5
5 -
 6
6 -
 7
7 -
8
-
9
-
10
-
11
-
12
-
13
-
14
-
15
-
16
-
17
-
18
-
19
-
20
-
21
-
22
-
23
-
24
-
25
-
26
-
27
-
28
-
29
-
30
-
31
-
32
-
33
-
34
-
35
-
36
 |
 |
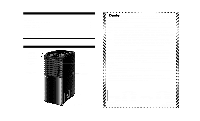
Portable 4 Season Home Comfort
The model number can be found on the serial plate located on the
back panel of the unit.
All repair parts available for purchase or special order when you visit
your nearest service depot.
To request service and/or the location of
the service depot nearest you, call the TOLL FREE NUMBER.
When requesting service or ordering parts, always provide the
following information:
•
Product Type
•
Model Number
•
Part Number
•
Part Description
Appareil de confort au foyer portatif 4 saisons
Le numéro de modèle se trouve sur la plaque d'information sur la
paroi arrière de l’appareil.
Toutes les pièces de rechange ou commandes spéciales sont
disponibles de votre centre régional de service autorisé.
Pour exiger
le service et-ou le nom de votre centre de service régional, signalez
le NUMÉRO SANS FRAIS.
Ayez les renseignements suivants à la portée de la main lors de la
commande de pièce ou service:
•
Genre de produit
•
Numéro de modèle
•
Numéro de pièce
•
Description de la pièce
Aparato de confort doméstico para 4 estaciones
El número del modelo se encuentra en la placa de información
ubicada en el tablero posterior de la unidad.
Todos los repuestos disponibles a la venta, o encargos especiales
se pueden obtener a través de su departamento de servicio más
cercano.
Para solicitar servicio y/o la ubicación del departamento de
servicio más cercano, llame a nuestro número de teléfono DE
LLAMADA GRATIS.
Cuando solicite servicio o encargue repuestos, siempre suministre la
siguiente información:
•
Tipo de producto
•
Número del modelo
•
Número del repuesto
•
Descripción del repuesto
Danby Products Limited, Guelph, Ontario Canada
N1H 6Z9
Danby Products Inc., Findlay, Ohio USA
45840
Model • Modèle • Modelo
DPAC8399
For service, contact your nearest
service depot or call:
1-800-26-
Danby
(1-800-263-2629)
to recommend a depot in
your area.
Pour obtenir le service, consultez
votre succursale régionale de
service ou téléphonez:
1-800-26-
Danby
(1-800-263-2629)
qui vous recommandera
un centre régional.
Para obtener servicio, comuníquese con
su departamento de servicio más
cercano o llame al teléfono:
1-800-26-
Danby
(1-800-263-2629)
para que le recomienden un
representante en su zona.
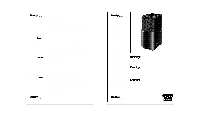
OWNER’S MANUAL
MANUEL
D’UTILISATION
MANUAL DEL
PROPIETARIO
Model • Modèle • Modelo
DPAC8399
CAUTION:
Read and follow all safety
rules and operating
instructions before first use
of this product.
PRÉCAUTION:
Veuillez lire attentivement
les consignes de sécurité et
les instructions d'utilisation
avant l'utilisation initiale de
ce produit.
ADVERTENCIA:
Es importante que lea y
observe todas las reglas de
seguridad e instrucciones de
operación antes de usar este
producto por primera vez.
PORTABLE 4 SEASON HOME COMFORT
Table of contents . . . . . . . . . . . . . . . . . . . . . .
1
APPAREIL DE CONFORT AU
FOYER PORTATIF 4 SAISONS
Table des matières
. . . . . . . . . . . . . . . . . . . .
24
APARATO DE CONFORT DOMÉSTICO
PARA 4 ESTACIONES
Índice
. . . . . . . . . . . . . . . . . . . . . . . . . . . . . . .
47
Danby Products Limited, Guelph, Ontario Canada
N1H 6Z9
Danby Products Inc., Findlay, Ohio USA
45840