Danby DPAC8399 User Guide - Page 18
InstalaciÓn Del Juego Para La
 |
View all Danby DPAC8399 manuals
Add to My Manuals
Save this manual to your list of manuals |
Page 18 highlights
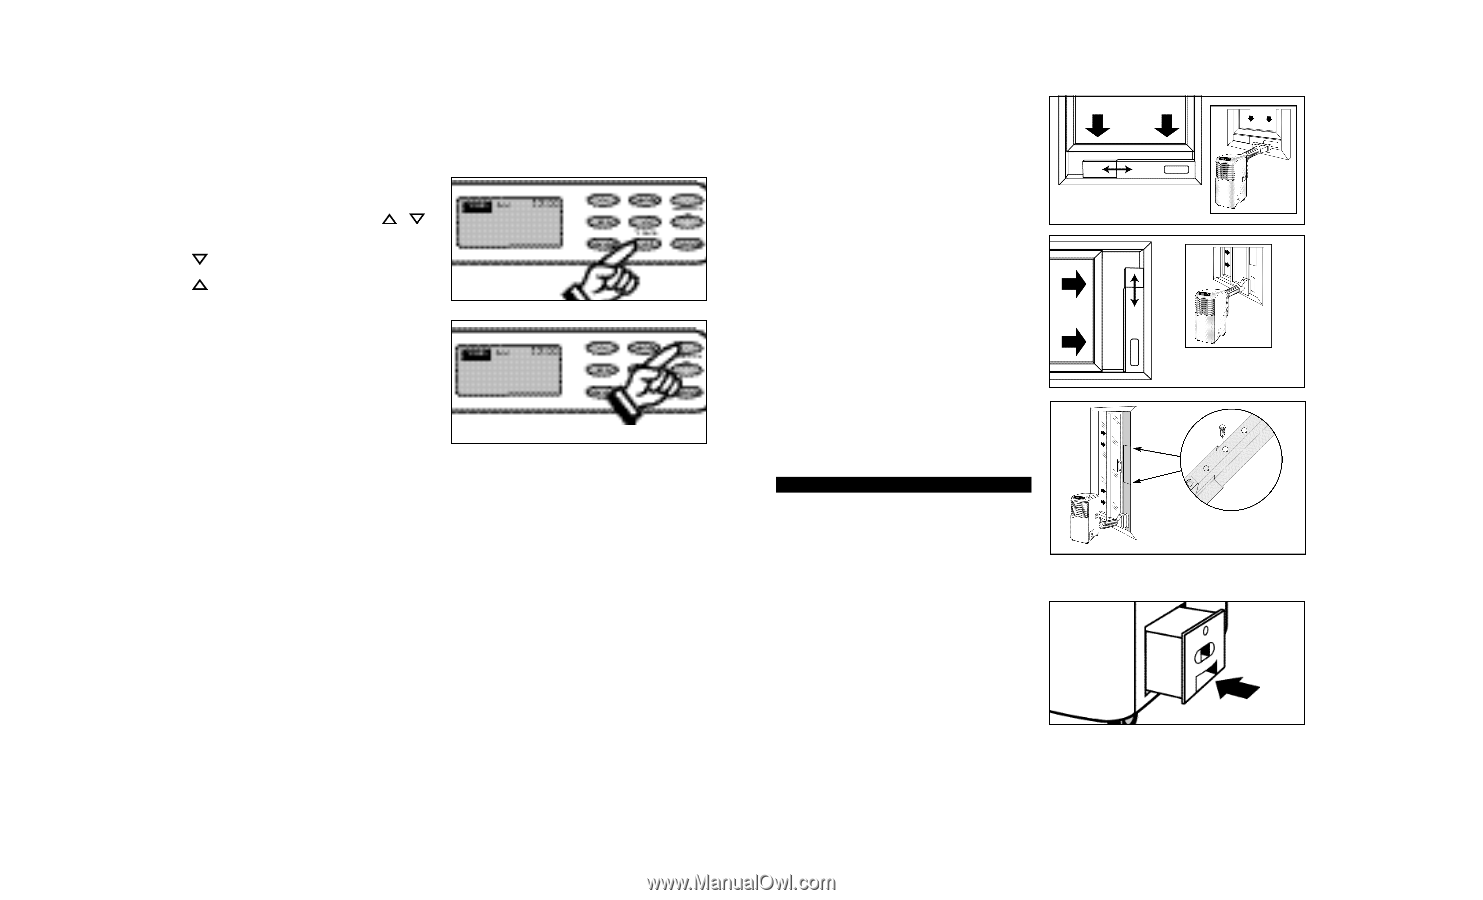
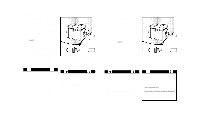
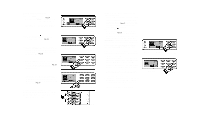
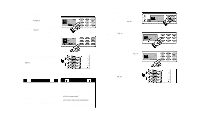
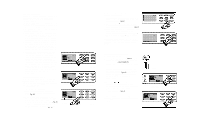
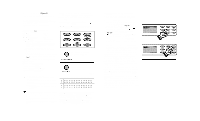
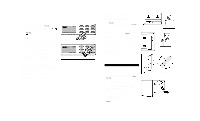
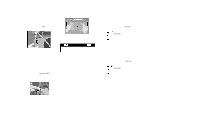
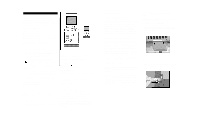
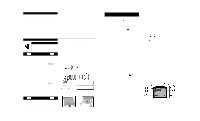
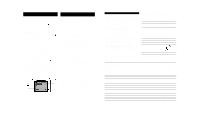
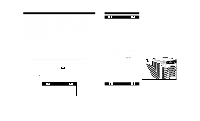
Setting the AUTO-OFF TIMER Before setting the AUTO-OFF timer, the time of day clock must be set/operational. 1) To set the AUTO-OFF timer, the unit must be turned on (I/O switch) and operational. 2) Press the TIMER-OFF key pad to initiate the AUTO-OFF time sequence. Fig. 33. The display window will indicate TIMER-OFF and the word OFF will flash for 5 seconds. Press the or key pad to select the desired AUTO-OFF time. Fig. 33a. key pad will decrease the AUTO-TIMED setting in 10 minute increments. keypad will increase the AUTO-TIMED setting in 10 minute increments. When the desired time is established, (the time will flash in the display window) press the CLOCK key pad to register the AUTO TIMEROFF program. The word OFF will stop flashing and remain "on" (TIMER OFF) indicating the program is set. The time of day clock setting will immediately revert back in the display window. You can varify the AUTO-OFF time selection anytime by pressing the TIMER-OFF key pad. The time you selected will appear (flash) temporarily (replacing the time of day) for approximately 5 seconds. IMPORTANT: The desired AUTO-OFF time must be registered within a 5 second period (after pressing the TIMER-OFF key pad) otherwise the selected time will not register and the system will automatically revert back to the regular "time of day" clock setting. If this occurs, you must repeat step 2 again. The unit will stop automatically when the specified AUTO-OFF time is achieved on the time of day clock. To cancel or override the AUTO-TIMED program, simply turn off the unit manually, prior to the scheduled AUTO-OFF time. Fig. 33 Fig. 33a INSTALACIÓN DEL JUEGO PARA LA VENTANA/PUERTA DE PATIO Su juego para la ventana ha sido diseñado para que se adapte a la mayoría de aplicaciones estándar de ventanas verticales y horizontales. Ahora con la adición de una tercera sección de corredera (Fig. 2b), es posible instalar este juego en puertas de patio (hasta una altura máxima de 80"). Consulte las figuras 2, 2a y 2b para verificar las aberturas mínimas y máximas. Para aplicaciones de ventanas verticales y/o puertas de patio, se suministran trabas de posiciones múltiples en el borde de cada sección de corredera. También se suministran dos tornillos de traba para asegurar cada sección corrediza en la posición deseada. Figura 2c. Opción de seguridad del tangue de agua interno Esta unidad viene equipada con un mecanismo conmutador de seguridad integrada que evita que la unidad condense agua si el tanque de agua se mueve por accidente y/o está LLENO de agua. Si ocurre esta situación, la unidad emitirá una señal de 8 PITIDOS y la luz indicadora de LLENO DE AGUA centelleará en color rojo continuamente hasta que el tanque de agua se vuelva a colocar en posición correcta y/o se vacíe. NOTA: El motor del ventilador continuará operando en este estado. Esto es normal, pero no habrá ni refrigeración ni deshumidificación hasta que el tanque se vacíe y/o se instale correctamente (podrá demorar unos minutos antes de que el compresor regrese a su funcionamiento normal). Instrucciones de operación Antes de encender esta unidad 1) Seleccione un lugar adecuado, asegurándose de que tenga un acceso fácil a un tomacorriente. 2) Instale la Manguera flexible de escape y el Juego graduable de corredera para la ventana según se ilustra en las figuras 2, 2a y 2b NOTA: El segundo paso se requiere solamente cuando se usa el MODO DE AIRE ACONDICIONADO. 3) Enchufe la unidad en un tomacorriente con conexión a tierra de 115 V/60 Hz. NO USE UN CABLE DE ALARGAMIENTO REGULAR CON ESTAUNIDAD. Si es necesario usar un cable de alargamiento para conectar su acondicionador de aire use un cable de alargamiento aprobado específicamente para un acondicionador de aire (disponible en cualquier tienda de ferretería local). 4) Asegúrese de que el Tanque de agua esté en posición correcta dentro del armario ya que, de otra forma, la unidad no funcionará. Figura 4. Ventana horizontal Juego de corredera para la ventana Mínimo: 26 5/8" (67.5 cm) Máximo: 48 3/8" (123 cm) Fig. 2 Ventana vertical Fig. 2a Juego de corredera para la ventana Mínimo: 26 5/8" (67.5 cm) Máximo: 48 3/8" (123 cm) Puerta de patio Fig. 2b Fig. 2c Juego para puerta de patio Mínimo: 26 5/8" (67.5 cm) Máximo: 80" (203 cm) Fig. 4
-
 1
1 -
2
-
3
-
4
-
5
-
6
-
7
-
8
-
9
-
10
-
11
-
12
-
 13
13 -
 14
14 -
 15
15 -
 16
16 -
 17
17 -
 18
18 -
 19
19 -
 20
20 -
 21
21 -
 22
22 -
 23
23 -
24
-
25
-
26
-
27
-
28
-
29
-
30
-
31
-
32
-
33
-
34
-
35
-
36
 |
 |