Danby DPAC8399 User Guide - Page 16
Auto-Timer Instructions, Setting the AUTO-ON TIMER, Instrucciones para graduar la, HORA DEL DÍA
 |
View all Danby DPAC8399 manuals
Add to My Manuals
Save this manual to your list of manuals |
Page 16 highlights
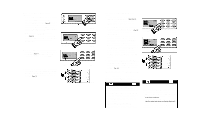
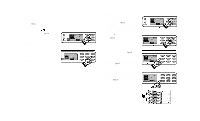
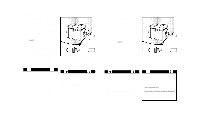
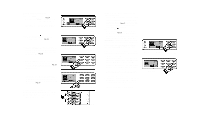
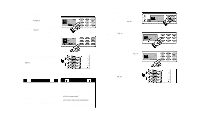
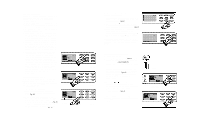
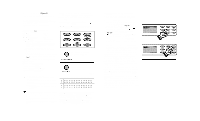
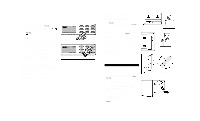
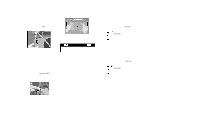
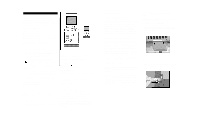
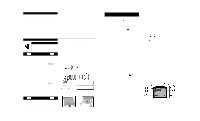
Auto-Timer Instructions NOTE: Auto-Timed programs cannot be set with the hand held remote control. The TIME OF DAY CLOCK must be set before the AUTO-TIMER feature will operate. The AUTO-TIMER feature offers a unique selection of multiple choice, fully automatic on/off (start/stop) programs between 0 - 23 hrs, 50 min. under any one mode of your Portable 4 Season Home Comfort unit. The programs are as follows: a) Auto -Off: Pre-select a time that will turn off the unit (automatically) at a specified time (between 0 - 23 hrs, 50 min.). This function must be performed daily, (if required) as the program is automatically canceled/erased upon completion. b) Auto-On: Pre-select a time that will turn on the unit (atomatically) at a specified time (between 0 - 23 hrs, 50 min.). This function must be performed daily, (if required) as the program is automatically canceled/erased upon completion. c) Auto-On & Auto-Off: Pre-select a time that will turn on and turn off the unit (automatically) at specified times (between 0 - 23 hrs, 50 min.). This program contains built-in memory. Unlike programs a) and b) above. This program automatically stores into memory the selected times and will repeat daily, (same specified times) until the program is overridden and/or canceled. Any interruption to the electrical power supply of the unit automatically cancels/erases all auto timed programs. In the event this should happen, you will be required to re-set your program. Setting the AUTO-ON TIMER Before setting the AUTO-ON timer, the TIME OF DAYCLOCK must be set/operational. You must also select the appropriate MODE and settings (FAN SPEED, TEMP, SWING etc.) you will require under the AUTO TIMED program. 1) Turn the unit "on" (I/O switch). 2) Select the appropriate MODE under which you want the unit to operate (Cool-Dry-HeatFan). Fig. 29. 3) Select the appropriate FAN SPEED setting, under which you want the unit to operate. (Hi, Med, Low) (excluding Dehumidifying, as this mode has "1" fan speed setting only). Fig. 30. 4) If you desire oscillation (auto-swing) push the SWING key pad (the "air swing" symbol will be displayed in the display window). Fig. 31. Mode Selection Fan Speed Air Swing Fig. 29 Fig. 30 Fig. 31 Instrucciones para graduar la HORA DEL DÍA (Reloj): 1) Presione y sostenga la tecla de CLOCK (RELOJ) durante tres (3) segundos. La visualización del reloj centelleará indicando "12.00" durante unos 10 segundos. Figura 8. 2) Presione ya sea la tecla o para entrar la hora correcta del día. Cada vez que presione la tecla, aumentará o disminuirá la graduación de la hora del día (incrementos de 1 minuto). Figura 9. 3) Cuando se haya establecido la hora correcta del día en la ventana de visualización, presione la tecla de CLOCK (RELOJ) nuevamente para activar la graduación del reloj con la HORADEL DÍA. Los "dos puntos" entre la HORADELDÍA comenzarán a centellear indicando que el reloj está funcionando. Nota importante: Toda interrupción en el suministro de corriente eléctrica cancelará automáticamente el programa del reloj de HORA DELDÍA. En este caso, se deberá volver a graduar el programa del reloj. Instrucciones de operación del acondicionador de aire 1) Instale la Manguera Flexible de Escape - figura 10 -y el Juego Graduable de Corredera para Ventana/Puerta de Patio según se ilustra en las figuras 2, 2a y 2b (página 45). 2) Oprima la tecla I/O (encendido/apagado) para encender la unidad. 3) Oprima la tecla de MODO hasta que la palabra COOL (FRÍO) aparezca en la ventana de visualización de cristal líquido (LCD según sus siglas en inglés). Figura 12. Cada vez que se oprima la tecla de MODO, se adelantará a una graduación de modo diferente. (Frío-Seco (Deshumidificador)Calor-Ventilación.). 4) Oprima la tecla o correspondiente para seleccionar una graduación de temperatura adecuada. La temperatura seleccionada quedará indicada en la ventana de visualización de cristal líquido (LCD según sus siglas en inglés). Las graduaciones de temperatura se pueden cambiar entre 17°C (63° F) y 30°C (88°F). Figura 13. La luz indicadora verde se encenderá indicando que el modo de aire acondicionado está funcionando (es posible que haya una pequeña demora de 10-30 segundos antes de que el ciclo comienzo, lo que es normal). Fig. 10 Luz verde Modo de aire acondicionado Temperatura Fig. 8 Fig. 9 Fig. 12 Fig. 13
-
 1
1 -
2
-
3
-
4
-
5
-
6
-
7
-
8
-
9
-
10
-
 11
11 -
 12
12 -
 13
13 -
 14
14 -
 15
15 -
 16
16 -
 17
17 -
 18
18 -
 19
19 -
 20
20 -
 21
21 -
22
-
23
-
24
-
25
-
26
-
27
-
28
-
29
-
30
-
31
-
32
-
33
-
34
-
35
-
36
 |
 |
