Dell E6500 Service Manual - Page 19
Display - camera
 |
UPC - 884116029793
View all Dell E6500 manuals
Add to My Manuals
Save this manual to your list of manuals |
Page 19 highlights
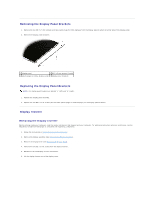
Back to Contents Page Display Dell™ Latitude™ E6500 Service Manual Removing the Display Assembly Replacing the Display Assembly Removing the Display Bezel Replacing the Display Bezel Removing the Display Panel Replacing the Display Panel Removing the Display Panel Brackets Replacing the Display Panel Brackets Display Inverter Removing the Camera and Microphone Assembly Replacing the Camera and Microphone Assembly Removing the Latch Hook Assembly Replacing the Latch Hook Assembly Removing the Display Cover Replacing the Display Cover NOTE: Some graphics may vary slightly, depending on whether you ordered a cold-cathode fluorescent lamp (CCFL) display or an LED display. Removing the Display Assembly Before working inside your computer, read the safety information that shipped with your computer. For additional safety best practices information, see the Regulatory Compliance Homepage at: www.dell.com/regulatory_compliance. 1. Follow the instructions in Before Working on Your Computer. 2. Close the display and turn the computer over. 3. Remove the bottom of the base assembly (see Removing the Bottom of the Base Assembly). 4. Remove the hinge covers (see Removing the Hinge Covers). 5. Disconnect the display cable, the WPAN cable, and the modem cable. CAUTION: After unrouting the cables, place all cables to the rear and away from the computer. 6. Unroute the display cable and the wireless cables (WLAN, WWAN, and WPAN). 1 display cable 2 WPAN cable 3 WLAN cable 4 WWAN cable 7. Remove the M2.5 x 5-mm screws from each hinge. 1 M2.5 x 5-mm screws (2)
-
 1
1 -
2
-
3
-
4
-
5
-
6
-
7
-
8
-
9
-
10
-
11
-
12
-
13
-
 14
14 -
 15
15 -
 16
16 -
 17
17 -
 18
18 -
 19
19 -
 20
20 -
 21
21 -
 22
22 -
 23
23 -
 24
24 -
25
-
26
-
27
-
28
-
29
-
30
-
31
-
32
-
33
-
34
-
35
-
36
-
37
-
38
-
39
-
40
-
41
-
42
-
43
-
44
-
45
-
46
-
47
-
48
-
49
-
50
-
51
-
52
-
53
-
54
-
55
-
56
-
57
-
58
-
59
-
60
-
61
-
62
-
63
-
64
-
65
-
66
-
67
-
68
-
69
-
70
-
71
-
72
 |
 |
