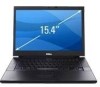
Dell E6500 Service Manual - Page 32
Hard Drive
 |
UPC - 884116029793
View all Dell E6500 manuals
Add to My Manuals
Save this manual to your list of manuals |
Page 32 highlights
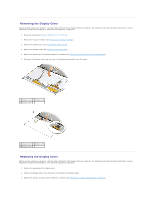
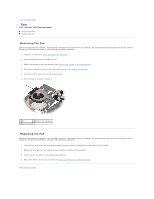
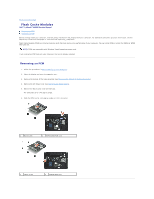
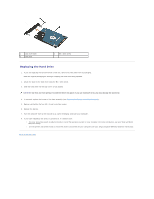
Back to Contents Page Hard Drive Dell™ Latitude™ E6500 Service Manual Removing the Hard Drive Replacing the Hard Drive NOTE: Dell does not guarantee compatibility or provide support for hard drives obtained from sources other than Dell. Removing the Hard Drive Before working inside your computer, read the safety information that shipped with your computer. For additional safety best practices information, see the Regulatory Compliance Homepage at: www.dell.com/regulatory_compliance. Do not touch the metal housing of the hard drive if you remove the hard drive from the computer while the drive is hot. CAUTION: Do not remove the hard drive while the computer is on or in sleep state. This might cause data loss. CAUTION: Hard drives are fragile. Handle them carefully. When the hard drive is not in the computer, store it in protective antistatic packaging. To remove the hard drive from the hard drive bay: 1. Follow the procedures in Before Working on Your Computer. 2. Place the computer upside down on a clean, flat surface. 3. Remove the bottom of the base assembly (seeRemoving the Bottom of the Base Assembly). NOTE: The hard drive can be removed with or without removing the bottom of the base assembly. However, if you are removing more than just the hard drive, you'll have to remove the bottom of the base assembly first. 4. Remove the four M3 x 3-mm screws (marked with an "H") that secure the hard drive. 5. Slide the hard drive out of the computer. 1 hard drive assembly 2 M3 x 3mm screws (4) 6. Remove the M3 x 3mm screw from the bezel and take the bezel off the hard drive.
-
 1
1 -
2
-
3
-
4
-
5
-
6
-
7
-
8
-
9
-
10
-
11
-
12
-
13
-
14
-
15
-
16
-
17
-
18
-
19
-
20
-
21
-
22
-
23
-
24
-
25
-
26
-
 27
27 -
 28
28 -
 29
29 -
 30
30 -
 31
31 -
 32
32 -
 33
33 -
 34
34 -
 35
35 -
 36
36 -
 37
37 -
38
-
39
-
40
-
41
-
42
-
43
-
44
-
45
-
46
-
47
-
48
-
49
-
50
-
51
-
52
-
53
-
54
-
55
-
56
-
57
-
58
-
59
-
60
-
61
-
62
-
63
-
64
-
65
-
66
-
67
-
68
-
69
-
70
-
71
-
72
 |
 |
