Dymo Rhino 6000 Industrial Label Printer User Guide - Page 11
Working with Label Files, Creating a Label File, Adding Labels to a Label File
 |
View all Dymo Rhino 6000 Industrial Label Printer manuals
Add to My Manuals
Save this manual to your list of manuals |
Page 11 highlights
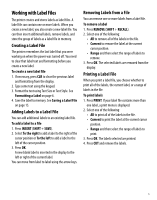
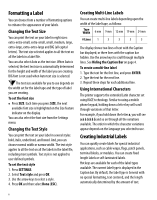
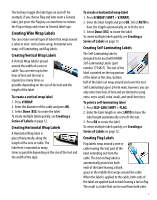
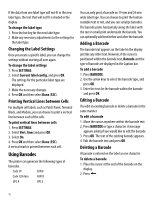
Working with Label Files The printer creates and stores labels as label files. A label file can contain one or more labels. When you create a new label, you also create a new label file. You can then insert additional labels, remove labels, and store the group of labels as a label file in memory. Creating a Label File The printer remembers the last label that you were working on when the power was turned off. You need to clear that label text and formatting before you create a new label. To create a new label file 1. If necessary, press CLR to clear the previous label and formatting from the display. 2. Type some text using the keypad. 3. Format the text using Text Size or Text Style. See Formatting a Label on page 6. 4. Save the label to memory. See Saving a Label File on page 15. Adding Labels to a Label File You can add additional labels to an existing label file. To add a label to a file 1. Press INSERT (SHIFT + SAVE). 2. Select To the right to add a label to the right of the cursor position or To the left to add a label to the left of the cursor position. 3. Press OK. A new blank label is inserted in the display to the left or right of the current label. You can move from label to label using the arrow keys. Removing Labels from a File You can remove one or more labels from a label file. To remove a label 1. Press REMOVE (SHIFT + RECALL). 2. Select one of the following: • All to remove all of the labels in the file. • Current to remove the label at the current cursor position. • Range and then select the range of labels to remove. 3. Press OK. The selected labels are removed from the display. Printing a Label File When you print a label file, you choose whether to print all of the labels, the current label, or a range of labels in the file. To print labels 1. Press PRINT. If your label file contains more than one label, a print menu is displayed. 2. Select one of the following: • All to print all of the labels in the file. • Current to print the label at the current cursor position. • Range and then select the range of labels to print. 3. Press OK. The labels selected are printed. 4. Press CUT and remove the labels. 5
-
 1
1 -
2
-
3
-
4
-
5
-
 6
6 -
 7
7 -
 8
8 -
 9
9 -
 10
10 -
 11
11 -
 12
12 -
 13
13 -
 14
14 -
 15
15 -
 16
16 -
17
-
18
-
19
-
20
-
21
-
22
-
23
-
24
-
25
-
26
-
27
-
28
-
29
-
30
-
31
-
32
 |
 |
