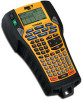
Dymo Rhino 6000 Industrial Label Printer User Guide - Page 20
Printing Options, Printing Multiple Copies, Pausing between Labels, Advancing the Label Tape
 |
View all Dymo Rhino 6000 Industrial Label Printer manuals
Add to My Manuals
Save this manual to your list of manuals |
Page 20 highlights
Printing Options You can choose to print multiple copies of the same label, collate the copies, pause to cut between labels, advance the label tape, and adjust the print contrast. Printing Multiple Copies You can print up to 99 copies of the same label at one time. To print multiple copies 1. Press # COPIES (SHIFT + PRINT). 2. Press the S arrow to increase the number of copies to print. The default is 2 copies. 3. Press the T arrow to decrease the number of copies (maximum is 99). 4. Press OK or PRINT to begin printing. You may notice a brief pause in printing between each label for more complex formats. When printing is finished, the number of copies to print returns to 2. Collating Multiple Copies When printing multiple copies of a label file containing more than one label, all the copies of a label are printed before the next label starts printing. You can choose to have the label file print collated, so each complete copy of the file prints before the second copy starts. The following example shows three copies of a label file containing three labels printed normally and collated. Normal A101 A101 A101 A102 A102 A102 A103 A103 A103 Collated A101 A102 A103 A101 A102 A103 A101 A102 A103 To collate multiple copies 1. Press SETTINGS. 2. Select Collate multi. copies and press OK. 3. Select On. 4. Press OK and then select Done (ESC). Pausing between Labels By default the printer pauses after printing each label so you can cut the label. You can turn this feature off to have the labels print continuously. To set the printer to print continuously 1. Press SETTINGS. 2. Select Pause to cut btw labels and press OK. 3. Select Off. 4. Press OK and then select Done (ESC). Advancing the Label Tape The default leader space for all labels is approximately 10 mm. To add additional blank space to the beginning or end of your label, you can feed the tape in 10 mm increments. To advance the tape 1. Press FEED (SHIFT + CUT). 2. Press OK to advance the tape. Adjusting Print Contrast Depending on the label material you choose, you may need to lighten or darken the print on the label. To adjust the print contrast 1. Press SETTINGS. 2. Select Print contrast and press OK. 3. Use the arrow keys to adjust the print contrast. 4. Press OK and then select Done (ESC). 5. Repeat as necessary until you are satisfied with the print quality. 14
-
 1
1 -
2
-
3
-
4
-
5
-
6
-
7
-
8
-
9
-
10
-
11
-
12
-
13
-
14
-
 15
15 -
 16
16 -
 17
17 -
 18
18 -
 19
19 -
 20
20 -
 21
21 -
 22
22 -
 23
23 -
 24
24 -
 25
25 -
26
-
27
-
28
-
29
-
30
-
31
-
32
 |
 |
