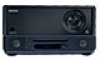
Epson MovieMate 72 User's Guide
Epson MovieMate 72 Manual
 |
View all Epson MovieMate 72 manuals
Add to My Manuals
Save this manual to your list of manuals |
Epson MovieMate 72 manual content summary:
- Epson MovieMate 72 | User's Guide - Page 1
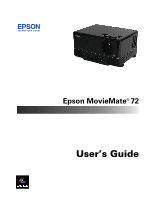
Epson MovieMate® 72 User's Guide - Epson MovieMate 72 | User's Guide - Page 2
subject to change without notice. Trademarks Epson is a registered trademark and Epson Exceed Your Vision is a registered logomark of Seiko Epson Corporation. Epson MovieMate and PrivateLine are registered trademarks and Extra Care is a service mark of Epson America, Inc. Pixelworks, DNX, and the - Epson MovieMate 72 | User's Guide - Page 3
and Warranty Optional Accessories About This Manual Epson MovieMate 72 Parts and Controls Playing Movies Choosing a Location Wall and Projection Screen Recommendations Viewing on a Wall Viewing on a Projection Screen Adjusting the Picture Adjusting the Sound Controlling Playback Pausing Searching - Epson MovieMate 72 | User's Guide - Page 4
with Other Equipment 23 Viewing Video from External Devices 23 Connecting a USB Device 27 Using a Subwoofer 28 Playing Epson MovieMate Audio Through an External Audio System 29 Connecting a Computer or Laptop 30 Doing More with Epson MovieMate 32 Playing Music and DivX Videos and - Epson MovieMate 72 | User's Guide - Page 5
Caring for Your Epson MovieMate 45 Protecting Epson MovieMate 45 Cleaning the Lens 45 Cleaning the Case 46 Cleaning and Replacing the Air Filter 46 Replacing the Lamp 48 Resetting the Lamp Timer 50 Storing Epson MovieMate 51 Transporting Epson MovieMate 51 Problem Solving 53 What - Epson MovieMate 72 | User's Guide - Page 6
with DTS digital surround sound ■ Long-life bulb providing up to 3000 hours of use ■ Two-year home service warranty Registration and Warranty Your Epson MovieMate comes with a basic two-year carry-in warranty. For details, see your Quick Guide. In addition, Epson® offers free Extra CareSM Home - Epson MovieMate 72 | User's Guide - Page 7
Optional Accessories Epson provides these replacement parts and optional accessories for the Epson MovieMate: Product Replacement lamp (ELPLP43) Replacement air filter (ELPAF15) Kensington® security lock Portable floor-standing and wall-mountable screens Ceiling-mountable screens Part number - Epson MovieMate 72 | User's Guide - Page 8
Epson MovieMate 72 Parts and Controls Front View Lens cover slide Remote control receiver Headphone jack USB port Disc slot Display window Back View Lens cover Eject button Lens Speaker Power inlet Air intake vent Security slot Speaker Adjustable foot Lamp cover release slot Air - Epson MovieMate 72 | User's Guide - Page 9
Zoom image Move image up or down Lamp warning light Temperature warning light Focus image Move image left or right Open cover to change lamp Turn Epson MovieMate on or off Reverse/ back Fast forward/ skip Stop Project from Play/Pause external equipment Control volume Turn image on or off - Epson MovieMate 72 | User's Guide - Page 10
Remote Control Turn Epson MovieMate on or off Note: The remote control buttons glow in the dark after being exposed to light for several minutes. Function/numerics toggle switch Eject DVD Project from external equipment Adjust picture for different lighting Fix image shape (if Epson MovieMate is - Epson MovieMate 72 | User's Guide - Page 11
Follow the instructions in this section to choose a location, play a DVD movie, and control playback. Choosing a Location You can use your Epson MovieMate just about anywhere-in the living room, bedroom, or even outside. You can use it with an optional floor-, wall-, or ceiling-mounted screen, or - Epson MovieMate 72 | User's Guide - Page 12
-degree angle to the surface). If the image is too low, too high, or off to the side, you can use the quick image adjustment dials to adjust the position (see page 15 for instructions). The farther you place Epson MovieMate from the screen or wall, the larger the image will be. The following - Epson MovieMate 72 | User's Guide - Page 13
When setting up Epson MovieMate, keep these considerations in mind: ■ Make sure you don't block the air vents on the sides. ■ Make sure you place Epson MovieMate within 10 feet (3 meters) of an electrical outlet, power strip, or extension cord. ■ Do not tilt Epson MovieMate more than 15 degrees - Epson MovieMate 72 | User's Guide - Page 14
usually up to 60 inches (152 cm) diagonal (the same height as an 80-inch [203-cm] diagonal 16:9 screen). Considering Screen Mounting Style Most screens are either floor-standing, wall-mounted, or ceiling-mounted. Consider these characteristics as you choose which type would be best for your viewing - Epson MovieMate 72 | User's Guide - Page 15
less than 1.0 gain is best. For rooms where you cannot control the light or will always have ambient light, you may want to select a screen surface with more than 1.0 gain to compensate for the additional brightness. Adjusting the Picture After you set up your Epson MovieMate and start your movie - Epson MovieMate 72 | User's Guide - Page 16
is still not high enough, you can extend the feet and tilt Epson MovieMate up. If Epson MovieMate is rotated so that the lens faces away from the disc slot, you can adjust the feet as shown: Caution: When rotating the top section, make sure you use both hands to gently turn the projector. Do not - Epson MovieMate 72 | User's Guide - Page 17
you tilt Epson MovieMate, the image will lose its rectangular shape. Use the Keystone buttons on the remote control to adjust the image shape. ■ Rotate the focus ring to sharpen the picture. Focus ring ■ To enlarge or reduce the aspect ratio of the picture, press the button on the remote control to - Epson MovieMate 72 | User's Guide - Page 18
, use the + or - Volume buttons on the control panel or remote control. You can also press the button on the remote control to temporarily turn off the sound. Controlling Playback You can use the buttons on the remote control or the Epson MovieMate control panel to pause, fast-forward, or replay - Epson MovieMate 72 | User's Guide - Page 19
break mode, the lamp turns off and the screen darkens. After 30 minutes, the power shuts off, and you need to press the button to turn it on again. Searching (Fast Forward or Reverse) ■ To move forward or backward through a video or music CD, press or on the remote control. You can also - Epson MovieMate 72 | User's Guide - Page 20
to use the numeric buttons, you need to set the toggle switch on the remote control to the -123 position. ■ After you set the toggle switch, you can simply press the ■ To temporarily stop the soundtrack (from the built-in speakers or headphones), press . The video continues to play. Press again to - Epson MovieMate 72 | User's Guide - Page 21
of movie (or music) you're playing. 1. To display the sound mode, press the button on the remote control. You see the current setting displayed on the screen. 2. To switch between Stereo and Dolby VS (Dolby virtual speaker mode), press again. 3. To change the audio mode, press . You see the current - Epson MovieMate 72 | User's Guide - Page 22
, you no longer hear any sound from the built-in speakers. However, you can still adjust the volume to the headphones using Epson MovieMate's volume controls on the control panel or remote control. Warning: Make sure the volume is not set too high, especially when you first plug in the headphones - Epson MovieMate 72 | User's Guide - Page 23
Optional subwoofer for rich, powerful bass tones ■ Audio input equipment such as an iPod or other MP3 player to play music through Epson MovieMate ■ quality. When you view video from an external source, you can use most of Epson MovieMate's controls, including adjusting color mode, volume, and - Epson MovieMate 72 | User's Guide - Page 24
, game console, camcorder, video or photo iPod, or digital camera. S-Video Connection L Audio R S-Video White Red For connecting a VCR, DVD player, or camcorder. 24 Using Epson MovieMate with Other Equipment - Epson MovieMate 72 | User's Guide - Page 25
L Audio R Adapter RCA stereo audio cable For connecting a cable or satellite TV receiver, DVR, or game console. HDMI Video Connection HDMI cable For connecting an HD cable or satellite TV receiver, HD DVR, or HD camcorder. 25 Using Epson MovieMate with Other Equipment - Epson MovieMate 72 | User's Guide - Page 26
automatically. If you need to change the aspect, press the button on the remote control and select Normal, Full, or Zoom (if available for the video source you're using). (Make sure the toggle switch on the remote control is set to the Func.- position.) 26 Using Epson MovieMate with Other Equipment - Epson MovieMate 72 | User's Guide - Page 27
a memory card. You can view photos or play music or DivX videos. Epson MovieMate supports the following types of files on USB devices: ■ MP3 ■ WMA ■ JPEG replace it after you remove the device. For instructions on playing MP3, WMA, JPEG, or DivX files, see page 32. 27 Using Epson MovieMate with - Epson MovieMate 72 | User's Guide - Page 28
subwoofer. 3. Turn the speaker side of the subwoofer toward your listeners for the best sound. 4. Play your movie, game, or other presentation. 5. See the instructions included with the subwoofer for more information. You can adjust the volume using Epson MovieMate's control panel or remote control - Epson MovieMate 72 | User's Guide - Page 29
Digital Output setting in the Audio Setup Page. Select Stream if you are connecting a DTS/Dolby Digital Decoder or PCM if you are connecting to equipment that is only compliant with linear PCM. For more information, see page 43. You can also use any of Epson MovieMate's audio controls, as described - Epson MovieMate 72 | User's Guide - Page 30
2. Connect the power cords and plug in all the equipment. 3. Open the lens cover and press the button on Epson MovieMate or on the remote control. 4. Press the button on Epson MovieMate or on the remote control. 5. When you see the menu, use the down-arrow or up-arrow button to select PC, then press - Epson MovieMate 72 | User's Guide - Page 31
an external display, you may need to disable the laptop display to view movies on Epson MovieMate. See your laptop documentation for instructions. 8. Normally, Epson MovieMate selects the correct aspect ratio automatically. If you need to change the aspect, press the button on the remote control and - Epson MovieMate 72 | User's Guide - Page 32
page 20. To use the numeric buttons, you need to set the toggle switch on the remote control to the -123 position. ■ To turn on the lamp when playing music, press . Press to turn the lamp off. Note: When you play music CDs, the lamp usually turns off automatically. 32 Doing More with Epson MovieMate - Epson MovieMate 72 | User's Guide - Page 33
are supported. lamp back on, press again. ■ When you play MP3 or WMA files, scrolling through the list of songs will pause the music until you highlight the next file. Note: You can use the Setup menu to change the way files are displayed. See page 42 for instructions. Doing More with Epson MovieMate - Epson MovieMate 72 | User's Guide - Page 34
you want and press to start playing it. 3. Select the JPEG file you want and press to start displaying the slideshow. 34 Doing More with Epson MovieMate - Epson MovieMate 72 | User's Guide - Page 35
are saved for up to 10 discs, even after you change the CD or DVD. 1. Press . You see the program screen, which allows you to set a playback sequence: 2. Set the toggle switch on the remote control to the -123 position. Doing More with Epson MovieMate 35 - Epson MovieMate 72 | User's Guide - Page 36
. 4. To begin playing your programmed sequence, select Start on the screen and press . 5. Set the toggle switch on the remote control back to the Func.- position. 6. To cancel the program, press . 7. To resume normal For a list of language codes, see page 66. 36 Doing More with Epson MovieMate - Epson MovieMate 72 | User's Guide - Page 37
remote control to the -123 position, then use the numeric buttons as described on page 20. ■ To display the next or previous menu page, press or when the menu is displayed. ■ To open the menu during playback, press displayed. repeatedly until the menu you want is Doing More with Epson MovieMate - Epson MovieMate 72 | User's Guide - Page 38
close the preview menu, select Exit and press . 3. Select the track you want to see using the arrow buttons and press . 38 Doing More with Epson MovieMate - Epson MovieMate 72 | User's Guide - Page 39
You can limit children's access, adjust the sound, and customize other features of Epson MovieMate. Many of these settings are available by pressing the Setup or Visual Setup buttons on the remote control. Locking DVDs You can lock up to 40 DVDs to prevent children from viewing them. When a disc - Epson MovieMate 72 | User's Guide - Page 40
at least 5 seconds. Warning: Do not allow young children or pets to look into the projector lens when Epson MovieMate is turned on. The lens projects bright light that may affect their vision. 1. Press on the remote control. You see the Visual Setup menu: 2. Press to highlight Option, then press to - Epson MovieMate 72 | User's Guide - Page 41
selection. 1. Press the button on the remote control. You see the Language Setup Page: 2. Press to highlight the setting you want, then press to display the list of languages available. OSD Language is the language used for Epson MovieMate's menus. Other settings may not be available, depending on - Epson MovieMate 72 | User's Guide - Page 42
to 70% or 40%. ■ DivX VOD code: Select this setting to display your video on demand registration code. This code allows you to purchase or rent videos through DivX video on demand services at www.divx.com/vod (and play them on Epson MovieMate). ■ MP3/JPEG Nav: When you insert a disc or USB - Epson MovieMate 72 | User's Guide - Page 43
Setup menu to adjust the signal format for external video equipment and set other video options. 1. Press on the remote control. You see the Visual Setup menu. 2. Press to highlight Option, then press to select it. 3. Press until you see the option you want to set. Doing More with Epson MovieMate 43 - Epson MovieMate 72 | User's Guide - Page 44
Auto when using external equipment. If no image appears or you see interference, select the appropriate signal. ■ Child Lock: Turn this setting on to lock the page 40 for more information. button on the control panel. See ■ High Altitude Mode: Turn this setting on if you use Epson MovieMate at an - Epson MovieMate 72 | User's Guide - Page 45
in this User's Guide. The only parts you should replace are the lamp and air filter. If another part needs replacing, contact Epson or a qualified servicer (see page 60). Follow the instructions in this section to clean the lens and case, clean and replace the air filter, replace the lamp, and store - Epson MovieMate 72 | User's Guide - Page 46
case. Never spray cleaners directly on Epson MovieMate. Cleaning and Replacing the Air Filter Clean the air filter and air intake vent when dust builds up or when you see the following message: The projector is overheating. Make sure nothing is blocking the air vents, and clean or replace the air - Epson MovieMate 72 | User's Guide - Page 47
3. If you need to clean or replace the filter, press up on the tab and lift off the cover. 4. Remove the old filter and install the new filter. 5. Replace the cover. Caring for Your Epson MovieMate 47 - Epson MovieMate 72 | User's Guide - Page 48
online at www.epsonstore.com (U.S. sales) or www.epson.ca (Canadian sales). Be sure to read the safety instructions in the Quick Guide before replacing the lamp. Follow these steps to replace the lamp: 1. Turn off the power and disconnect the power cord. 2. If the projector has been on, let it cool - Epson MovieMate 72 | User's Guide - Page 49
the lamp in place. (You can't remove these screws.) 5. Grasp the lamp as shown and pull it straight out. Note: The lamp in this product contains mercury. Please consult your state and local regulations regarding disposal or recycling. Do not put in the trash. Caring for Your Epson MovieMate 49 - Epson MovieMate 72 | User's Guide - Page 50
place. (Epson MovieMate won't work if the lamp cover is loose.) 8. After replacing the lamp, you need to reset the lamp timer, as described in the next section. Resetting the Lamp Timer 1. Connect the power cable and press the button to turn Epson MovieMate on. 2. Press on the remote control. You - Epson MovieMate 72 | User's Guide - Page 51
from the remote control. ■ Package Epson MovieMate in its original packaging or equivalent (as described in the following section). Transporting Epson MovieMate Note: Epson shall not be liable for any damages incurred during transportation. Epson MovieMate contains many glass and precision parts. If - Epson MovieMate 72 | User's Guide - Page 52
are hand-carrying Epson MovieMate, make sure all discs are ejected, the lens cover is closed, and the feet are retracted. ■ Lift Epson MovieMate as shown to the right. Make sure the top section is locked in place. Be careful not to open the interface cover while you are carrying Epson MovieMate. 52 - Epson MovieMate 72 | User's Guide - Page 53
Solving This section explains how to interpret Epson MovieMate's status lights, solve problems, and contact technical support. What To Do When the Lights Flash The lights on top of Epson MovieMate indicate its status and let you know when a problem occurs. If all lights are off, make sure the - Epson MovieMate 72 | User's Guide - Page 54
remote control or control panel to turn the lamp back on. The warning light is flashing orange. High-speed cooling is in process. If Epson MovieMate gets too hot again, projection stops automatically. Make sure Epson MovieMate is at least 8 inches (20 cm) away from the wall. Clean or replace the air - Epson MovieMate 72 | User's Guide - Page 55
of time. The power turns off automatically when Epson MovieMate is idle for more than 30 minutes. Press the button to turn on Epson MovieMate. For instructions on changing the Sleep setting, see page 40. No picture appears on the screen. ■ Make sure Epson MovieMate is turned on (the light is green - Epson MovieMate 72 | User's Guide - Page 56
're using a "universal" remote control, it might not work with Epson MovieMate. Epson does not support any third-party remote controls. Solving Picture and Sound Problems The picture is blurry or out of focus. ■ Adjust the focus using the focus ring. See page 15 for instructions. ■ There may be dirt - Epson MovieMate 72 | User's Guide - Page 57
, you may need to replace the lamp. See page 48. The colors on the screen don't look right. ■ Press the button on the remote control to select the best setting for your viewing environment. ■ Adjust the Color Saturation or Tint settings. See page 41. ■ If you're using external video equipment, check - Epson MovieMate 72 | User's Guide - Page 58
and white audio jacks to Epson MovieMate's audio ports (see page 23). ■ If you're using external equipment, you may need to adjust the Audio settings in the setup menu (see page 43). There is a problem with the sound quality. ■ Try pressing the button on the remote control and adjusting the sound - Epson MovieMate 72 | User's Guide - Page 59
■ Press the button on Epson MovieMate or the remote control to select the external video source. Allow a few seconds for Epson MovieMate to sync up. You see the message Signal not supported. Press the page 43). button on the remote control and check the Video Signal setting (see The picture is - Epson MovieMate 72 | User's Guide - Page 60
and Accessories You can purchase screens, carrying cases, or other accessories from an Epson authorized reseller. To find the nearest reseller, call 800-GO-EPSON (800-463-7766). Or you can purchase online at www.epsonstore.com (U.S. sales) or www.epson.ca (Canadian sales). 60 Problem Solving - Epson MovieMate 72 | User's Guide - Page 61
f=13.7 to 20.5 mm 1280 × 720 pixels × 3, 720p White light output 1200 lumens (ISO 21118 standard) Color light output 1200 lumens (ISO 21118 standard) Up to 1000:1 30 to 300 inches (0.76 to 7.6 m) 2.4 to 49.4 feet (0.72 to 13.66 meters) Stereo speakers (5 W × 4) 1:1.5 50% vertically, 25% horizontally - Epson MovieMate 72 | User's Guide - Page 62
Remote Control Range Approx. 23 feet (7 m) Battery AA × 2 Operating angle Horizontal: +/- 30° Vertical: +/- 15° Projection Lamp Type Part number Lamp life 140 W UHE (Ultra High Efficiency) ELPLP43/ V13H010L43 Approx. 3000 hours in Theatre Black mode only Note: Lamp life results will vary - Epson MovieMate 72 | User's Guide - Page 63
and Approvals United States FCC Part 15B Class B (DoC) UL60950-1 Canada ICES-003 Class B CSA C22.2 No.60950-1 Compatible Video Formats Composite video/S-Video Signal TV (NTSC) TV (PAL, SECAM) * Letterbox signal Component video Resolution 720 x 480 720 x 360* 720 x 576 720 x 432* Signal SDTV - Epson MovieMate 72 | User's Guide - Page 64
-60 1280 x 1024 960 x 720 1280 × 960** MAC13" 640 x 480 960 x 720 MAC16" 832 x 624 960 x 720 MAC19" 1024 x 768 960 x 720 * Only supported by models that include a VGA output port. ** Letterbox signal Wide aspect mode 1280 x 720 1280 x 720 1280 x 720 - - 1280 x 720 1280 x 720 1280 x 720 - Epson MovieMate 72 | User's Guide - Page 65
; DivX: Up to 3 mbps, 720 × 576 pixels, 30 fps optimum 11 kHz, 16 kHz, 22.05 kHz, 32 kHz, 44.1 kHz, 48 kHz Up to 3027 × 2048 Epson MovieMate can play multi-session recorded discs. Multiple bit rate files, WAV, and MPG files are not supported. Epson MovieMate supports baseline JPEG files created by - Epson MovieMate 72 | User's Guide - Page 66
Language Codes Abkhazian 6566 Afar Afrikaans Amharic Arabic Armenian Assamese Avestan Aymara Azerhaijani Bahasa Melayu Bashkir Belarusian 6565 6570 6577 6582 7289 6583 6569 6589 6590 7783 6665 6669 Bengali Bihari Bislama Bokmål, Norwegian Bosanski Brezhoneg Bulgarian 6678 6672 6673 7866 6683 - Epson MovieMate 72 | User's Guide - Page 67
62 Epson accessories, 7, 60 Home Service, 6 PrivateLine Support, 60 technical support, 7, 60 Epson MovieMate choosing location, 11 to 13 cleaning, 46 control panel, 9 dimensions, 62 distance from screen, 12, 61 lights, 53 to 55 maintenance, 45 to 51 operation problems, 55 to 56 parts, 8 positioning - Epson MovieMate 72 | User's Guide - Page 68
Fast forward, 19 File specifications, 65 File type setting, 42 Filter, see Air filter Focus ring, 16 Formats, video, 63 to 64 G Game console, connecting, 23 to 26 General specifications, 61 H Headphones, 22 Help, 7, 60 High altitude mode, 44, 54 Home Service, 6 Horizontal lens shift, 12, 15 I Image - Epson MovieMate 72 | User's Guide - Page 69
switching, 59 Speakers, Epson MovieMate, 61 Specifications compatible video formats, 63 to 64 electrical, 62 environmental, 62 file specifications, 65 general, 61 lamp, 62 language codes, 66 remote control, 62 Storing Epson MovieMate, 51 Subtitles, 36 Subwoofer, optional connection, 28 Support, see - Epson MovieMate 72 | User's Guide - Page 70
V VCR, connecting, 23 to 26 Ventilation, 13, 46, 54 Vents, 8 Vertical lens shift, 12, 15 Video camera, connecting, 23 to 26 Video, compatible formats, 63 to 64 Volume, adjusting, 18 W Wall projection, 13 to 15 Warranty, 6 WMA, 33, 42, 65 Z Zoom ring, 16 Zooming, 19 70 Index
-
 1
1 -
 2
2 -
 3
3 -
 4
4 -
 5
5 -
 6
6 -
 7
7 -
8
-
9
-
10
-
11
-
12
-
13
-
14
-
15
-
16
-
17
-
18
-
19
-
20
-
21
-
22
-
23
-
24
-
25
-
26
-
27
-
28
-
29
-
30
-
31
-
32
-
33
-
34
-
35
-
36
-
37
-
38
-
39
-
40
-
41
-
42
-
43
-
44
-
45
-
46
-
47
-
48
-
49
-
50
-
51
-
52
-
53
-
54
-
55
-
56
-
57
-
58
-
59
-
60
-
61
-
62
-
63
-
64
-
65
-
66
-
67
-
68
-
69
-
70
 |
 |
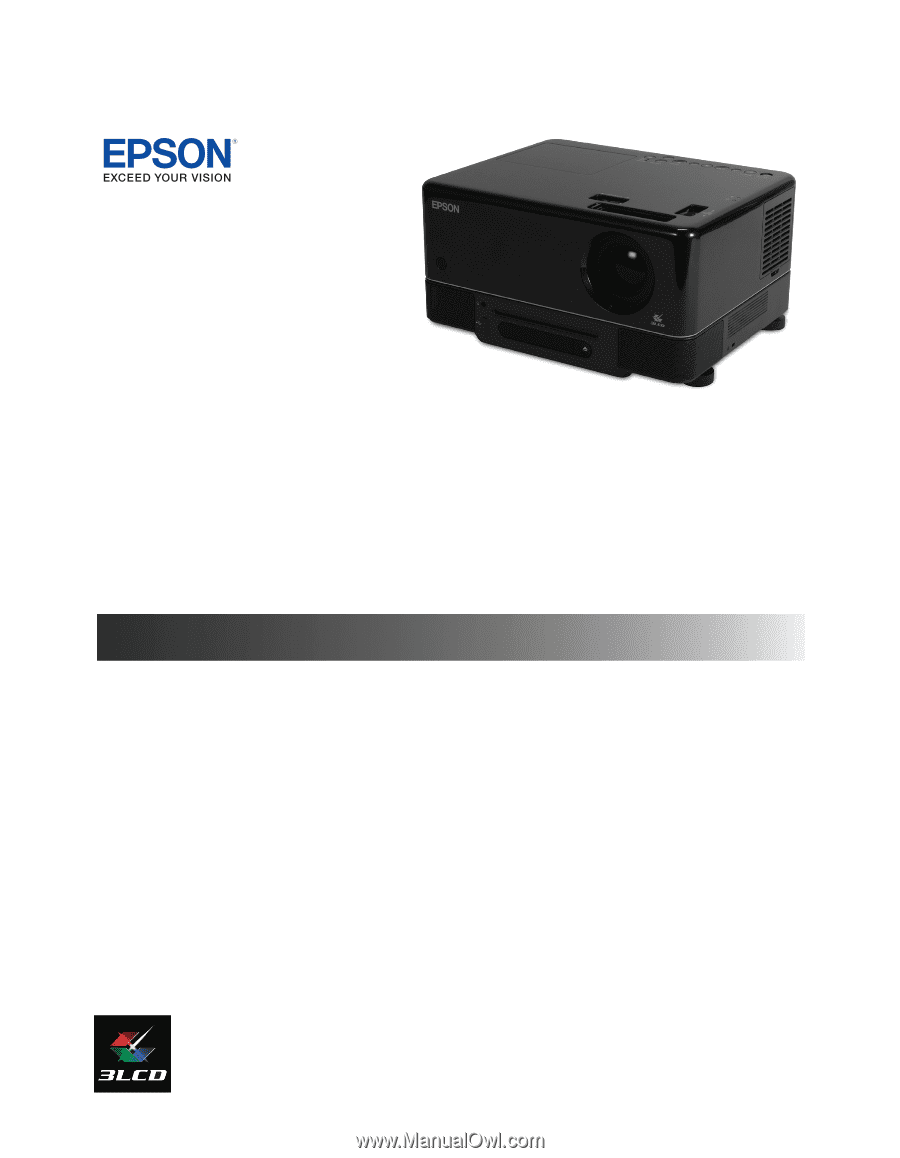
Epson MovieMate
®
72
User’s Guide