Epson RX700 Basics - Page 26
Restoring 4 ° 6 Photos, Load one or more sheets up to 20 of Epson Premium Glossy Photo Paper. - scans only part of sheet why
 |
UPC - 010343853775
View all Epson RX700 manuals
Add to My Manuals
Save this manual to your list of manuals |
Page 26 highlights
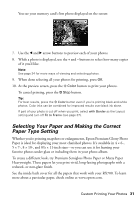
Restoring 4 × 6 Photos Follow these steps to restore faded 4 × 6-inch photos. You can place two photos on the scanner at once; a separate print will be made of each photo. Before starting, you'll need to have some Epson Premium Glossy Photo Paper in one of these sizes: 4 × 6-inch, 5 × 7-inch, 8 × 10-inch, or letter-size. 1. Press the Creative Projects button. 2. Select Reprint/Restore Photos then press OK. 3. Place one or two photos on the scanner glass, aligning them with the edges of the glass as shown. Then press OK. Note: If the edges of your photos are important, slide them about 1/8 inch away from the edges of the glass to ensure that the entire photo is copied. 4. Load one or more sheets (up to 20) of Epson Premium Glossy Photo Paper. 5. Select the Paper Size of the paper you loaded, turn Restoration ON, and then press OK. Your photos are scanned. 6. Use the l and r arrow buttons to preview each of your photos. While a photo is displayed, use the + and - buttons to select how many copies of it you'd like. Press OK when done. 7. At the preview screen, press the x Color button to print your color-restored photos. 26 Copying
-
 1
1 -
2
-
3
-
4
-
5
-
6
-
7
-
8
-
9
-
10
-
11
-
12
-
13
-
14
-
15
-
16
-
17
-
18
-
19
-
20
-
 21
21 -
 22
22 -
 23
23 -
 24
24 -
 25
25 -
 26
26 -
 27
27 -
 28
28 -
 29
29 -
 30
30 -
 31
31 -
32
-
33
-
34
-
35
-
36
-
37
-
38
-
39
-
40
-
41
-
42
-
43
-
44
-
45
-
46
-
47
-
48
-
49
-
50
-
51
-
52
-
53
-
54
-
55
-
56
-
57
-
58
-
59
-
60
-
61
-
62
-
63
-
64
-
65
-
66
-
67
-
68
-
69
-
70
-
71
-
72
-
73
-
74
-
75
-
76
-
77
-
78
-
79
-
80
-
81
-
82
-
83
-
84
-
85
-
86
-
87
-
88
-
89
-
90
-
91
-
92
-
93
-
94
-
95
-
96
-
97
-
98
 |
 |
