Epson WorkForce 610 Quick Guide - Page 14
paper you loaded. Press, options depend on
 |
UPC - 010343871878
View all Epson WorkForce 610 manuals
Add to My Manuals
Save this manual to your list of manuals |
Page 14 highlights
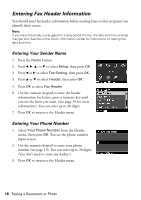
10. If you want to crop your photo and enlarge the resulting image area to fit onto your paper, press Display/Crop. ■ To resize the image area, press + or -. ■ To move the image area, use the arrow buttons. To check the zoomed image, press OK. Press OK again if you are satisfied with the changes, or press Back if you need to make further edits. If you are copying 2 photos, repeat this step for the other photo. 11. Press OK again to continue. 12. To change any of the settings displayed on the screen, press Menu and then OK to select Paper and Copy Settings. ■ To change the paper size, select Paper Size, press r, then press u or d to choose the size of paper you loaded. Press OK. (Paper Size options depend on the Paper Type setting you choose.) ■ To change the paper type, select Paper Type, press r, then press u or d to choose the setting for the paper you loaded. Then press OK. For this paper type Epson Premium Photo Paper Glossy Epson Premium Photo Paper Semi-gloss Epson Ultra Premium Photo Paper Glossy Epson Photo Paper Glossy Epson Presentation Paper Matte Epson Premium Presentation Paper Matte Epson Ultra Premium Presentation Paper Matte Choose this setting Prem. Glossy Ultra Glossy Glossy Matte ■ To change the print layout, select Borderless, then press r. Press u or d to choose On to expand the image all the way to the edge of the paper (slight cropping may occur) or Off to leave a small margin around the image. Then press OK. 14 Copying a Document or Photo
-
 1
1 -
2
-
3
-
4
-
5
-
6
-
7
-
8
-
 9
9 -
 10
10 -
 11
11 -
 12
12 -
 13
13 -
 14
14 -
 15
15 -
 16
16 -
 17
17 -
 18
18 -
 19
19 -
20
-
21
-
22
-
23
-
24
-
25
-
26
-
27
-
28
-
29
-
30
-
31
-
32
-
33
-
34
-
35
-
36
-
37
-
38
-
39
-
40
-
41
-
42
-
43
-
44
-
45
-
46
-
47
-
48
-
49
-
50
-
51
-
52
-
53
-
54
-
55
-
56
-
57
-
58
-
59
-
60
 |
 |
