Fluke Ti55FT-20 User Manual - Page 26
Camera Parts, Liquid Crystal Display LCD screen
 |
View all Fluke Ti55FT-20 manuals
Add to My Manuals
Save this manual to your list of manuals |
Page 26 highlights
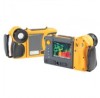
TiR2,TiR3,TiR4,Ti40,Ti45,Ti50,Ti55 Users Manual Table 2-1. Camera Parts - Descriptions Item Description A Mouse controller - Used to control the pointer position in images and text menus. B E select button - Performs mouse click, or "enter" function, for the pointer. C F Menu button - Used to access display screen menus. Note: Tap F once and a popup menu appears. A Programmable function button - Can be programmed to D perform different menu functions, see Programming Function Buttons later in this Chapter. B Programmable function button - Can be programmed to E perform different menu functions, see Programming Function Buttons later in this Chapter. C Programmable function button - Can be programmed to F perform different menu functions, see Programming Function Buttons later in this Chapter. D Power on or off button - Used to power camera on and off and G to place the camera in a low-power standby mode to conserve battery power. Solid green = power is on; Blinking green = standby mode enabled. H Auxiliary power port - Connection port for AC to DC power adapter. I Reset - Hidden switch to reset camera. Can be accessed with a paper clip. See, "Appendix B - Troubleshooting". J Battery latch - Used to remove battery. K Liquid Crystal Display (LCD) screen - Sunlight-readable color display for viewing images and accessing camera menu functions. G LEVEL & SPAN button - Used to rescale the color palette to the L maximum and minimum temperatures in current image and to adjust IR IR-Fusion® level. M Infrared lens - Germanium lens with manual focus. 2-4
-
 1
1 -
2
-
3
-
4
-
5
-
6
-
7
-
8
-
9
-
10
-
11
-
12
-
13
-
14
-
15
-
16
-
17
-
18
-
19
-
20
-
 21
21 -
 22
22 -
 23
23 -
 24
24 -
 25
25 -
 26
26 -
 27
27 -
 28
28 -
 29
29 -
 30
30 -
 31
31 -
32
-
33
-
34
-
35
-
36
-
37
-
38
-
39
-
40
-
41
-
42
-
43
-
44
-
45
-
46
-
47
-
48
-
49
-
50
-
51
-
52
-
53
-
54
-
55
-
56
-
57
-
58
-
59
-
60
-
61
-
62
-
63
-
64
-
65
-
66
-
67
-
68
-
69
-
70
-
71
-
72
-
73
-
74
-
75
-
76
-
77
-
78
-
79
-
80
-
81
-
82
-
83
-
84
-
85
-
86
-
87
-
88
-
89
-
90
-
91
-
92
-
93
-
94
-
95
-
96
-
97
-
98
-
99
-
100
-
101
-
102
-
103
-
104
-
105
-
106
-
107
-
108
-
109
-
110
-
111
-
112
-
113
-
114
-
115
-
116
-
117
-
118
-
119
-
120
-
121
-
122
-
123
-
124
-
125
-
126
-
127
-
128
-
129
-
130
-
131
-
132
 |
 |
