HP 5550 HP Deskjet 5550 Series printers - (English) Windows User's Guide - Page 49
preparing to print, printing, selecting image size
 |
UPC - 808736333603
View all HP 5550 manuals
Add to My Manuals
Save this manual to your list of manuals |
Page 49 highlights
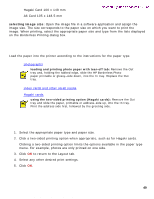
borderless_printing q Hagaki Card 100 x 148 mm q A6 Card 105 x 148.5 mm Newport Hykuna Windows UG Final selecting image size: Open the image file in a software application and assign the image size. The size corresponds to the paper size on which you want to print the image. When printing, select the appropriate paper size and type from the lists displayed on the Borderless Printing dialog box. preparing to print Load the paper into the printer according to the instructions for the paper type. q photographs loading and printing photo paper with tear-off tab: Remove the Out tray and, holding the tabbed edge, slide the HP Borderless Photo paper printable or glossy-side down, into the In tray. Replace the Out tray. q index cards and other small media q Hagaki cards using the two-sided printing option (Hagaki cards): Remove the Out tray and slide the paper, printable or address-side up, into the In tray. Print the address side first, followed by the greeting side. printing 1. Select the appropriate paper type and paper size. 2. Click a two-sided printing option when appropriate, such as for Hagaki cards. Clicking a two-sided printing option limits the options available in the paper type menu. For example, photos are only printed on one side. 3. Click OK to return to the Layout tab. 4. Select any other desired print settings. 5. Click OK. 49 file:///C|/Projects/Newport/Win_UG_Hykuna/ug_borderless_printing_fs.html (2 of 2) [5/9/2002 10:12:46 AM]
-
 1
1 -
2
-
3
-
4
-
5
-
6
-
7
-
8
-
9
-
10
-
11
-
12
-
13
-
14
-
15
-
16
-
17
-
18
-
19
-
20
-
21
-
22
-
23
-
24
-
25
-
26
-
27
-
28
-
29
-
30
-
31
-
32
-
33
-
34
-
35
-
36
-
37
-
38
-
39
-
40
-
41
-
42
-
43
-
 44
44 -
 45
45 -
 46
46 -
 47
47 -
 48
48 -
 49
49 -
 50
50 -
 51
51 -
 52
52 -
 53
53 -
 54
54 -
55
-
56
-
57
-
58
-
59
-
60
-
61
-
62
-
63
-
64
-
65
-
66
-
67
-
68
-
69
-
70
-
71
-
72
-
73
-
74
-
75
-
76
-
77
-
78
-
79
-
80
-
81
-
82
-
83
-
84
-
85
-
86
-
87
-
88
-
89
-
90
-
91
-
92
-
93
-
94
-
95
-
96
-
97
-
98
-
99
-
100
-
101
-
102
-
103
-
104
-
105
-
106
-
107
-
108
-
109
-
110
-
111
-
112
-
113
-
114
-
115
-
116
-
117
-
118
-
119
-
120
-
121
-
122
-
123
-
124
-
125
-
126
-
127
-
128
-
129
-
130
-
131
-
132
-
133
-
134
-
135
-
136
 |
 |