HP 5550 HP Deskjet 5550 Series printers - (English) Windows User's Guide - Page 64
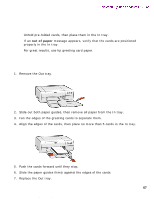
preparing to print large photographs, against the edges of the photo paper.
 |
UPC - 808736333603
View all HP 5550 manuals
Add to My Manuals
Save this manual to your list of manuals |
Page 64 highlights
photographs 7. Replace the Out tray. Newport Hykuna Windows UG Final preparing to print large photographs For high-quality photos, install a photo print cartridge in the printer. For instructions on installing a print cartridge, see replacing print cartridges. 1. Remove the Out tray. 2. Slide out both paper guides, then remove all paper from the tray. 3. Fan the edges of the photo paper to separate them, then align the photo paper edges. 4. Place no more than 20 sheets of photo paper-printable side down-in the tray. 5. Slide the paper guides firmly against the edges of the photo paper. 64 file:///C|/Projects/Newport/Win_UG_Hykuna/ug_photographs_fs.html (2 of 4) [5/9/2002 10:12:50 AM]
-
 1
1 -
2
-
3
-
4
-
5
-
6
-
7
-
8
-
9
-
10
-
11
-
12
-
13
-
14
-
15
-
16
-
17
-
18
-
19
-
20
-
21
-
22
-
23
-
24
-
25
-
26
-
27
-
28
-
29
-
30
-
31
-
32
-
33
-
34
-
35
-
36
-
37
-
38
-
39
-
40
-
41
-
42
-
43
-
44
-
45
-
46
-
47
-
48
-
49
-
50
-
51
-
52
-
53
-
54
-
55
-
56
-
57
-
58
-
 59
59 -
 60
60 -
 61
61 -
 62
62 -
 63
63 -
 64
64 -
 65
65 -
 66
66 -
 67
67 -
 68
68 -
 69
69 -
70
-
71
-
72
-
73
-
74
-
75
-
76
-
77
-
78
-
79
-
80
-
81
-
82
-
83
-
84
-
85
-
86
-
87
-
88
-
89
-
90
-
91
-
92
-
93
-
94
-
95
-
96
-
97
-
98
-
99
-
100
-
101
-
102
-
103
-
104
-
105
-
106
-
107
-
108
-
109
-
110
-
111
-
112
-
113
-
114
-
115
-
116
-
117
-
118
-
119
-
120
-
121
-
122
-
123
-
124
-
125
-
126
-
127
-
128
-
129
-
130
-
131
-
132
-
133
-
134
-
135
-
136
 |
 |

photographs
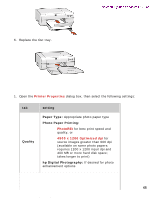
7.
Replace the Out tray.
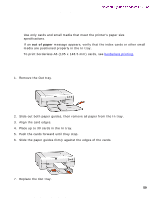
preparing to print large photographs
For high-quality photos, install a photo print cartridge in the printer.
For instructions on installing a print cartridge, see
replacing print
cartridges
.
1.
Remove the Out tray.
2.
Slide out both paper guides, then remove all paper from the tray.
3.
Fan the edges of the photo paper to separate them, then align the photo paper
edges.
4.
Place no more than 20 sheets of photo paper–printable side down–in the tray.
5.
Slide the paper guides
firmly
against the edges of the photo paper.
file:///C|/Projects/Newport/Win_UG_Hykuna/ug_photographs_fs.html (2 of 4) [5/9/2002 10:12:50 AM]
64