HP 722c (English) User's Guide - C5870-90010 - Page 48
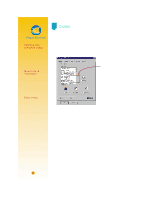
Banner, Setup
 |
View all HP 722c manuals
Add to My Manuals
Save this manual to your list of manuals |
Page 48 highlights
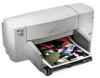
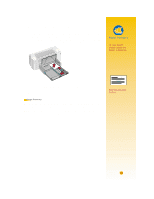
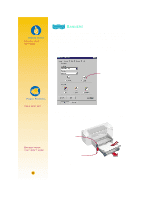
4 Get the banner paper ready for the printer: s From the stack of banner paper, tear off the number of sheets you need to print the banner. (You must have at least five sheets in the stack.) s Tear off the perforated strips, if there are any. s Fan the stack so that the pages don't stick together in the printer. 5 Put the paper in the IN drawer so that the unattached edge is at the top of the stack. Insert the stack edge first into the IN drawer until it stops. Unattached edge 6 Slide the paper adjusters so that they fit snugly against the edges of the paper stack. 7 Push the IN drawer back in. 8 Print the banner. You'll notice that the printer and banner paper go through some start-up movements before it starts printing. Also, banner printing takes a while; it might be several minutes before you see the results. What If THE BANNER HAS A BIG GAP OR A CREASE WHERE YOU DON'T EXPECT IT The printer might be picking up more than one sheet of paper at a time. Take the paper out, then fan the stack. Also be sure the top and bottom margins are set to zero in your banner program. Print the banner again. THE BANNER PAPER JAMS IN THE PRINTER • You might not have clicked Banner on the Setup tab in the HP print settings box. • Try putting in more than five, but fewer than 20, sheets of paper. • Make sure the banner switch is up. • See the online troubleshooting for the appropriate settings for specific software programs. • Make sure you remove all paper before loading the banner paper. 37
-
 1
1 -
2
-
3
-
4
-
5
-
6
-
7
-
8
-
9
-
10
-
11
-
12
-
13
-
14
-
15
-
16
-
17
-
18
-
19
-
20
-
21
-
22
-
23
-
24
-
25
-
26
-
27
-
28
-
29
-
30
-
31
-
32
-
33
-
34
-
35
-
36
-
37
-
38
-
39
-
40
-
41
-
42
-
 43
43 -
 44
44 -
 45
45 -
 46
46 -
 47
47 -
 48
48 -
 49
49 -
 50
50 -
 51
51 -
 52
52 -
 53
53 -
54
-
55
-
56
-
57
-
58
-
59
-
60
-
61
-
62
-
63
-
64
-
65
-
66
 |
 |