HP BL680c XenServer Virtual Machine Installation 4.1.0 - Page 12
Exporting a VM, Procedure 2.2. To export a VM using the CLI
 |
UPC - 884420396314
View all HP BL680c manuals
Add to My Manuals
Save this manual to your list of manuals |
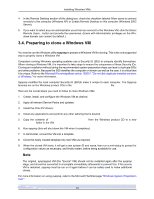
Page 12 highlights
Creating VMs Note Note that an exported VM that originated on one XenServer Host might or might not be able to be resumed on a different XenServer Host. For example, if a Windows VM created on a XenServer Host with an Intel VT-enabled CPU is exported, then imported to a XenServer Host with an AMDV CPU, it will not start. 2.6.1. Exporting a VM An existing VM can be exported via XenCenter or via the CLI. This section describes using the CLI. For details on exporting using XenCenter, see the XenCenter online Help. The following procedure assumes that you have multiple XenServer Hosts and that you are administering them using the CLI on a separate machine (that is, a machine that is not one of the XenServer Hosts) where you can maintain a library of export files. Avoid exporting a VM to a XenServer Host filesystem. Procedure 2.2. To export a VM using the CLI 1. If it is running, shut down VM that you want to export. 2. Export the VM: xe vm-export -h -u -pw vm= \ filename= Note Be sure to include the .xva extension when specifying the export filename. If the exported VM does not have this extension and you attempt to import it via XenCenter, it will fail to recognize the file as a valid XVA file. 3. The export process will probably take some time. When finished, the command prompt returns. 2.6.2. Importing a VM An existing exported VM file can be imported via XenCenter or via the CLI. This section describes using the CLI. For details on importing using XenCenter, see the XenCenter online Help. The following procedure assumes that you are administering the XenServer Host using the CLI on a separate machine (that is, a machine that is not one of your XenServer Hosts) where you maintain a library of export files. Procedure 2.3. To import a VM using the CLI 1. To import the VM to the default SR on the target XenServer Host: xe vm-import -h -u -pw \ filename= You can import the VM to another SR on the target XenServer Host by adding the optional sr-uuid parameter: 7
-
 1
1 -
2
-
3
-
4
-
5
-
6
-
 7
7 -
 8
8 -
 9
9 -
 10
10 -
 11
11 -
 12
12 -
 13
13 -
 14
14 -
 15
15 -
 16
16 -
 17
17 -
18
-
19
-
20
-
21
-
22
-
23
-
24
-
25
-
26
-
27
-
28
-
29
-
30
-
31
-
32
-
33
-
34
-
35
-
36
-
37
-
38
-
39
-
40
-
41
-
42
-
43
-
44
 |
 |
