HP BL680c XenServer Virtual Machine Installation 4.1.0 - Page 14
Installing Windows VMs, 3.1. Making the ISO available to XenServer Hosts
 |
UPC - 884420396314
View all HP BL680c manuals
Add to My Manuals
Save this manual to your list of manuals |
Page 14 highlights
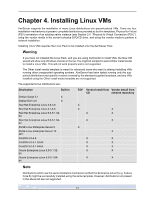
Chapter 3. Installing Windows VMs XenServer allows you to install Windows 2000 SP4, Windows Server 2003 (32-/64- bit), or Windows XP SP2 into a VM. Installing Windows VMs on XenServer Host requires hardware virtualization support (Intel VT or AMD-V). Installing a Windows VM can be broken down into two main steps: • installing the Windows operating system • installing the paravirtualized device drivers Windows VMs are installed by cloning an appropriate template from either XenCenter or the CLI. The templates for individual guests have predefined platform flags set which define the configuration of the virtual hardware. For example, all Windows VMs are installed with the ACPI Hardware Abstraction Layer (HAL). If you subsequently change one of these VMs to have multiple virtual CPUs, Windows automatically switches the HAL to multi-processor mode. The available Windows templates are: • Windows Vista: can be used to install Windows Vista 32-bit. The Enterprise edition is supported. • Windows Server 2003: can be used to install Windows Server 2003 32-bit SP0, SP1, and SP2. The Server, Enterprise, Data Centre, and SBS editions are supported. • Windows Server 2003 x64: can be used to install Windows Server 2003 64-bit. The Server, Enterprise, Data Centre, and SBS editions are supported. • Windows 2000 SP4: can be used to install Windows 2000 Server Service Pack 4. Earlier service packs are not supported. • Windows XP SP2: can be used to install Windows XP Service Pack 2. Earlier service packs are not supported. The Windows VM can be installed either from a install CD in a physical CD-ROM on the XenServer Host, or from an ISO image of your Windows media (see Appendix A, Creating ISO images for information on how to make an ISO image from a Windows install CD and make it available for use). 3.1. Making the ISO available to XenServer Hosts To make an ISO library available to XenServer Hosts, create an external NFS or SMB/CIFS share directory. The NFS or SMB/CIFS server must be set to allow root access to the share. For NFS shares, this is accomplished by setting the no_root_squash flag when you create the share entry in /etc/exports on the NFS server. Then either use XenCenter to attach the ISO library, or connect to the host console and type in: xe-mount-iso-sr host:/volume Additional arguments to the mount command may be passed in, for advanced use. 9
-
 1
1 -
2
-
3
-
4
-
5
-
6
-
7
-
8
-
 9
9 -
 10
10 -
 11
11 -
 12
12 -
 13
13 -
 14
14 -
 15
15 -
 16
16 -
 17
17 -
 18
18 -
 19
19 -
20
-
21
-
22
-
23
-
24
-
25
-
26
-
27
-
28
-
29
-
30
-
31
-
32
-
33
-
34
-
35
-
36
-
37
-
38
-
39
-
40
-
41
-
42
-
43
-
44
 |
 |
