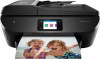
HP ENVY Photo 7800 User Guide
HP ENVY Photo 7800 Manual
 |
View all HP ENVY Photo 7800 manuals
Add to My Manuals
Save this manual to your list of manuals |
HP ENVY Photo 7800 manual content summary:
- HP ENVY Photo 7800 | User Guide - Page 1
HP ENVY Photo 7800 All-in-One series - HP ENVY Photo 7800 | User Guide - Page 2
- HP ENVY Photo 7800 | User Guide - Page 3
HP printer software (Windows) ...26 Use the HP Smart app to print, scan, and troubleshoot from an iOS, Android, or Windows 10 device 27 Turn the printer off ...28 3 Print ...29 Print using the HP Smart app ...30 Print documents using HP printer software ...31 Print photos using HP printer software - HP ENVY Photo 7800 | User Guide - Page 4
printhead 106 Check the estimated ink levels ...107 Replace the cartridges ...108 Order cartridges ...110 Use single-cartridge mode ...111 Store printing supplies ...112 Cartridge warranty information ...113 8 Network setup ...114 Set up the printer for wireless communication 115 Change network - HP ENVY Photo 7800 | User Guide - Page 5
...161 Get help from the HP Smart app ...162 Understand printer reports ...163 Solve problems using Web Services ...165 Maintain the printer ...166 Restore original factory defaults and settings 169 HP support ...171 Appendix A Technical information ...173 HP Company notices ...174 Specifications - HP ENVY Photo 7800 | User Guide - Page 6
vi ENWW - HP ENVY Photo 7800 | User Guide - Page 7
1 How do I? Learn how to use your HP ENVY Photo 7800 series ● Get started ● Print ● Copy and scan ● Fax ● Web Services ● Work with cartridges ● Network setup ● Solve a problem ENWW 1 - HP ENVY Photo 7800 | User Guide - Page 8
following topics: ● Accessibility ● HP EcoSolutions (HP and the Environment) ● Printer parts ● Control panel and status lights ● Paper basics ● Load paper ● Load original ● Update the printer ● Open the HP printer software (Windows) ● Use the HP Smart app to print, scan, and troubleshoot from an iOS - HP ENVY Photo 7800 | User Guide - Page 9
with mobility impairments, the HP software functions can be executed through keyboard commands. The HP software also supports Windows accessibility options such as StickyKeys, ToggleKeys, FilterKeys, and MouseKeys. The printer doors, buttons, paper trays, and paper-width guides can be operated by - HP ENVY Photo 7800 | User Guide - Page 10
through pressing (the Power button). To enter sleep mode after some time of inactivity Use the following instructions to change the period of inactivity before the printer sleeps. 1. From the printer control panel, do one of the following. ● Touch or swipe down the tab at the top of the screen to - HP ENVY Photo 7800 | User Guide - Page 11
Schedule Off or on the front left side of the printer. (the Power button) located If you improperly turn the printer off, the print carriage might not return to the correct position, causing problems with the cartridges and print quality issues. ENWW HP EcoSolutions (HP and the Environment) 5 - HP ENVY Photo 7800 | User Guide - Page 12
Setup ). 2. Touch Quiet Mode . 3. Turn on Quiet Mode . To create a schedule for Quiet Mode from the printer control panel 1. From the printer on or off from the printer software (Windows) 1. Open the HP printer software. For more information, see Open the HP printer software (Windows). 2. Click - HP ENVY Photo 7800 | User Guide - Page 13
● Change the print quality in the printer driver to a draft setting. The draft setting uses less ink. ● Do not clean the printhead unnecessarily. Doing so wastes ink and shortens the life of the cartridges. ● Recycle used original HP cartridges through HP Planet Partners. For more information, visit - HP ENVY Photo 7800 | User Guide - Page 14
Front and top views of HP ENVY Photo 7800 All-in-One series Feature 1 2 3 4 5 6 7 8 9 10 11 12 13 14 15 16 17 8 Chapter 2 Get started Description Lid Lid-backing Scanner glass Printer model name Cartridge access door Memory device area Cartridge access area cartridges Photo tray On button (also - HP ENVY Photo 7800 | User Guide - Page 15
Description Cartridge access door Printhead Cartridges NOTE: Cartridges should be kept in the printer to prevent possible print quality issues or printhead damage. Avoid removing supplies for extended periods of time. Back view Figure 2-2 Rear view of HP ENVY Photo 7800 All-in-One series Feature - HP ENVY Photo 7800 | User Guide - Page 16
Feature 4 5 Description Fax ports: 2-EXT (top) and 1-LINE (bottom) Power connection. Use only the power cord supplied by HP. 10 Chapter 2 Get started ENWW - HP ENVY Photo 7800 | User Guide - Page 17
message on the printer display. ● If wireless is turned off, the wireless light is off and the display screen shows Wireless Off. Control panel display icons Icon Purpose Copy : Opens the Copy menu where you can select a copy type or change the copy settings. Scan : Opens the Scan menu where - HP ENVY Photo 7800 | User Guide - Page 18
, or change fax settings. Setup : Opens the Setup menu where you can change preferences and use tools to perform maintenance functions. Help : Opens the Help menu where you can view How To videos, printer feature information, and tips. HP ePrint icon: Opens the Web Services Summary menu, where you - HP ENVY Photo 7800 | User Guide - Page 19
Ink icon: Shows estimated ink levels by cartridge. Displays a warning symbol if the ink level is less than the minimum expected ink level. NOTE: Ink change the printer settings To change the printer settings or print reports, use the options available on the Setup menu. 1. From the printer control - HP ENVY Photo 7800 | User Guide - Page 20
To open the Dashboard, touch or swipe down the tab at the top of a screen on the control panel. 14 Chapter 2 Get started ENWW - HP ENVY Photo 7800 | User Guide - Page 21
. Photo printing ● HP Premium Plus Photo Paper HP Premium Plus Photo Paper is HP's highest-quality photo paper for your best photos. With HP Premium Plus Photo Paper, you can print beautiful photos that are instant-dry so you can share them right off the printer. The printer supports several - HP ENVY Photo 7800 | User Guide - Page 22
HP paper supplies The printer is designed to work well with most types of office paper. Use HP paper for optimum print quality. To order HP papers and other supplies, go to www.hp best results, observe the following guidelines. ● Load only one type and one size of paper at a time into a tray or - HP ENVY Photo 7800 | User Guide - Page 23
feeder. ● To prevent jams, poor print quality, and other printing problems, avoid loading the following paper in the tray or document feeder: ● perforations ● Media that is heavily textured, embossed, or does not accept ink well ● Media that is too lightweight or stretches easily ● Media that - HP ENVY Photo 7800 | User Guide - Page 24
loaded media. If you do not see the photo tray, remove the output tray from the printer. 2. Load paper. ● Insert a stack of photo paper into the photo tray print side down. ● Slide the photo paper forward until it stops. ● Slide the paper-width guides inward until they stop at the edges of the - HP ENVY Photo 7800 | User Guide - Page 25
inward until they stop at the edges of the paper. 3. Push the paper tray back in. 4. Change or retain the paper settings on the printer display. To load legal paper 1. Pull out the paper tray, slide the paper-width guides outward, and then remove any previously loaded media. ENWW Load paper 19 - HP ENVY Photo 7800 | User Guide - Page 26
2. Unlock and open the front side of the paper tray. 3. Load paper. ● Insert a stack of paper into the paper tray with the short edge forward and the print side down. ● Slide the paper forward until it stops. 20 Chapter 2 Get started ENWW - HP ENVY Photo 7800 | User Guide - Page 27
edges of the paper. 4. Push the paper tray back in. 5. Change or retain the paper settings on the printer display. To load panorama photo paper 1. Pull out the paper tray, slide the paper-width guides outward, and then remove any previously loaded media. 2. Load paper. ● Insert a stack of panorama - HP ENVY Photo 7800 | User Guide - Page 28
tray back in. 4. Change or retain the paper settings on the printer display. To load envelopes 1. Pull out the paper tray, slide the paper-width guides outward, and then remove any previously loaded media. 2. Load envelopes ● Insert one or more envelopes in the center of the paper tray. The print - HP ENVY Photo 7800 | User Guide - Page 29
● Slide a stack of envelopes inward until it stops. ● Slide the paper-width guides inward against the stack of envelopes until they stop. 3. Push the paper tray back in. 4. Change or retain the paper settings on the printer display. ENWW Load paper 23 - HP ENVY Photo 7800 | User Guide - Page 30
right front corner of the glass. 3. Close the scanner lid. To load an original in the document feeder 1. Slide paper-width guides outwards. 2. Load original print-side up in the document feeder. 3. Slide paper-width guides inward until they stop at the edge of paper. 24 Chapter 2 Get started ENWW - HP ENVY Photo 7800 | User Guide - Page 31
to a network and Web Services has been enabled, the printer automatically checks for updates. To update the printer using the printer control panel 1. From the top of the screen, touch or swipe down the tab to open the Dashboard, touch ( Setup ) 2. Touch Printer Maintenance . 3. Touch Update the - HP ENVY Photo 7800 | User Guide - Page 32
options is provided throughout this guide. After installing the HP printer software, depending on your operating system, do one of the following: NOTE: If you are using HP Smart app instead of the printer software, see Use the HP Smart app to print, scan, and troubleshoot from an iOS, Android, or - HP ENVY Photo 7800 | User Guide - Page 33
, and troubleshoot from an iOS, Android, or Windows 10 device HP Smart (formerly known as HP All-in-One Printer Remote) helps you to set up, scan, print, share, and manage your HP printer. You can share documents and images through email, text messages, and popular cloud and social media services - HP ENVY Photo 7800 | User Guide - Page 34
until the power light turns off before unplugging the power cord or turning off a power strip. CAUTION: If you incorrectly turn the printer off, the print carriage might not return to the correct position, causing problems with the cartridges and print quality issues. 28 Chapter 2 Get started ENWW - HP ENVY Photo 7800 | User Guide - Page 35
the settings manually only when you want to change print quality, print on specific types of paper, or use special features. This section contains the following topics: ● Print using the HP Smart app ● Print documents using HP printer software ● Print photos using HP printer software ● Print on - HP ENVY Photo 7800 | User Guide - Page 36
input tray. For more information, see Load paper. 2. Open HP Smart. For more information, see Use the HP Smart app to print, scan, and troubleshoot from an iOS, Android, or Windows 10 device. 3. On the HP Smart Home screen, make sure your printer is selected. TIP: If you want to select a different - HP ENVY Photo 7800 | User Guide - Page 37
button might be called Properties, Options, Printer Setup, Printer Properties, Printer, or Preferences. NOTE: To set print settings for all print jobs, make the changes in the HP software provided with the printer. For more information on the HP software, see Printer management tools. 5. Select the - HP ENVY Photo 7800 | User Guide - Page 38
Print photos using HP printer software Make sure photo paper is loaded into the photo tray. To print a photo from the computer (Windows) 1. Load paper in the input tray. For more information, see Load paper. 2. From your software, select Print. 3. Make sure your printer is selected. 4. Click the - HP ENVY Photo 7800 | User Guide - Page 39
the photos you want to print, and touch Continue. 4. Touch (Edit) to change brightness, crop, or rotate the selected photo, or touch to set properties. 5. Touch Continue and preview the selected photo. 6. Touch Print to begin printing. (Print Settings) ENWW Print photos using HP printer software - HP ENVY Photo 7800 | User Guide - Page 40
button might be called Properties, Options, Printer Setup, Printer Properties, Printer, or Preferences. NOTE: To set print settings for all print jobs, make the changes in the HP software provided with the printer. For more information on the HP software, see Printer management tools. 5. Select the - HP ENVY Photo 7800 | User Guide - Page 41
4. From the pop-up menu, choose Paper Type/Quality, and verify the paper type setting is set to Plain Paper. 5. Click Print. ENWW Print on envelopes 35 - HP ENVY Photo 7800 | User Guide - Page 42
Setup, Printer Properties, Printer, or Preferences. NOTE: To set print settings for all print jobs, make the changes in the HP software provided with the printer. For more information on the HP software, see Printer management tools. 5. On the Printing Shortcut tab, select a shortcut which supports - HP ENVY Photo 7800 | User Guide - Page 43
selected. 3. Click the button that opens the Properties dialog box. Depending on your software application, this button might be called Properties, Options, Printer Setup, Printer Properties, Printer, or Preferences. 4. Select the appropriate options. Windows 10, Windows 8.1, and Windows 8 ● Click - HP ENVY Photo 7800 | User Guide - Page 44
● Paper Type: The appropriate paper type ● Quality: Maximum dpi 5. Select any other print settings that you want, and then click Print. 38 Chapter 3 Print ENWW - HP ENVY Photo 7800 | User Guide - Page 45
or later are supported by the HP Print Service Plugin. Devices running Android 4.3 or earlier can print using the HP ePrint app, available in the Google Play Store. ● Windows Mobile: Tap Print from the Device menu. No setup is required since the software is preinstalled. NOTE: If your printer is not - HP ENVY Photo 7800 | User Guide - Page 46
for more information. Use Original HP cartridges. Original HP cartridges are designed and tested with HP printers and papers to help you easily produce great results, time after time. NOTE: HP cannot guarantee the quality or reliability of non-HP supplies. Product service or repairs required as - HP ENVY Photo 7800 | User Guide - Page 47
HP printer software, click Print, Scan & Fax , and then click Set Preferences. For information how to open the printer software, see Open the HP printer software Landscape for horizontal prints. - Print on Both Sides Manually: Manually flip the pages after one side of the paper prints out so that you - HP ENVY Photo 7800 | User Guide - Page 48
pages only, or print all pages. - Reverse page order or Page Order: Allows you to print pages from front to back or in reverse order. Printer settings tips (OS X and macOS) ● On the Print dialog, use the Paper Size pop-up menu to select the size of paper loaded in the - HP ENVY Photo 7800 | User Guide - Page 49
4 Copy and scan ● Copy ● Scan ● Tips for copy and scan success ENWW 43 - HP ENVY Photo 7800 | User Guide - Page 50
in the document feeder. 3. From the printer control panel display, touch Copy . 4. Select Document , ID Card , or Photo. ● If you select Document or ID Photo: 1. Make sure you place your photo on the scanner glass according to the onscreen instruction. 2. Touch OK. 44 Chapter 4 Copy and scan - HP ENVY Photo 7800 | User Guide - Page 51
the HP printer software. TIP: If you have problems scanning documents, see Scan issues. ● Scan using the HP Smart app ● Scan using HP printer software ● Scan from the printer control panel ● Scan using Webscan Scan using the HP Smart app You can use the HP Smart app to scan documents or photos from - HP ENVY Photo 7800 | User Guide - Page 52
down list, if your printer supports scan from both the document HP Smart app to scan a printed document or photo with the device camera. You can then use HP Smart to edit, save, print or share the image. 1. Open HP Smart. For more information, see Use the HP Smart app to print, scan, and troubleshoot - HP ENVY Photo 7800 | User Guide - Page 53
the correct input source if your printer supports scan from both the document feeder and scanner glass. 4. When you have finished adjusting the scanned document or photo, save, share, or print it. Scan using HP printer software ● Scan to a computer ● Scan to email ● Scan documents as editable text - HP ENVY Photo 7800 | User Guide - Page 54
scan settings (Windows) . To scan an original from HP printer software (OS X and macOS) 1. Open HP Easy Scan. HP Easy Scan is located in the Applications folder. 2. Choose the type of scan profile you want. 3. Click Scan. Scan to email To scan a document or photo to email from HP printer software - HP ENVY Photo 7800 | User Guide - Page 55
3. In the printer software, click Scan a Document or Photo . 4. Select the type of scan you want and then click Scan . Choose Email as PDF or Email as JPEG to open your email software with the scanned file as an attachment. NOTE: The initial screen allows you to review and modify basic settings. - HP ENVY Photo 7800 | User Guide - Page 56
scanning device and the scan settings preset. 4. Follow the onscreen instructions to complete the scan. 5. When all of the pages have been scanned Click Save. Guidelines for scanning documents as editable text Use the following guidelines to ensure the software successfully converts your documents. - HP ENVY Photo 7800 | User Guide - Page 57
the right front corner of the scanner glass. 2. Open the HP printer software. For more information, see Open the HP printer software (Windows). 3. In the printer software, under Print, Scan & Fax , click Scan , and then click Scan a Document or Photo . 4. Click the More link in the top right corner - HP ENVY Photo 7800 | User Guide - Page 58
that you want to scan to. 4. Choose the type of scan you want. 5. Touch OK. Scan to a memory device You can scan directly to a memory card or USB flash drive from the printer control panel without using a computer or the HP printer software provided with the printer. To scan an original to a memory - HP ENVY Photo 7800 | User Guide - Page 59
Settings. 4. Select Webscan from EWS to enable Webscan. 5. Click Apply. To scan using Webscan Scanning using Webscan offers basic scan options. For additional scan options or functionality, see Scan using HP printer software . 1. Load the original print side up into the document feeder, or load - HP ENVY Photo 7800 | User Guide - Page 60
on, start the scan from the printer software. ● To avoid incorrect or missing scanned text, make sure the brightness is set appropriately in the software. ● If you want to scan a document with several pages into one file instead of multiple files, start the scan with the printer software instead of - HP ENVY Photo 7800 | User Guide - Page 61
for faxing. You can verify the fax is set up correctly by running the fax setup test from the printer control panel. ● Send a fax ● Receive a fax ● Set up phone book contacts ● Change fax settings ● Fax and digital phone services ● Fax on Voice over Internet Protocol ● Use reports ● Additional fax - HP ENVY Photo 7800 | User Guide - Page 62
fax a document directly from your computer without printing it first. To use this feature, make sure you have installed the HP printer software on your computer, the printer is connected to a working telephone line, and the fax function is set up and functioning correctly. 56 Chapter 5 Fax ENWW - HP ENVY Photo 7800 | User Guide - Page 63
black fax or a color fax), click the button that opens the Properties dialog box. Depending on your software application, this button might be called Properties, Options, Printer Setup, Printer, or Preferences. 5. After you have changed any settings, click OK. 6. Click Print or OK. 7. Enter the fax - HP ENVY Photo 7800 | User Guide - Page 64
send a black-and-white fax from memory. To send a fax using printer memory 1. Ensure that Scan and Fax Method is turned on. a. From the printer control panel display, touch Fax . b. Touch Setup , and then touch Preferences . c. Turn on Scan and Fax Method. 2. Load the original print side up into the - HP ENVY Photo 7800 | User Guide - Page 65
touch ( Phone Book ), and then touch number or group to dial. ( Call History ), or ( Local Phone Book ) to select a 6. Touch Send Fax . The printer scans the originals into memory and sends the fax when the receiving fax machine is available. Send a fax to multiple recipients You can send a fax - HP ENVY Photo 7800 | User Guide - Page 66
To change the ECM setting from the control panel 1. From the printer control panel display, touch Fax . 2. Touch Setup . 3. Touch Preferences . 4. Scroll to Error Correction Mode and turn the feature on or off. 60 Chapter 5 Fax ENWW - HP ENVY Photo 7800 | User Guide - Page 67
can pick up the handset to talk or listen for fax tones. You can receive faxes manually from a phone that is directly connected to the printer (on the 2-EXT port). To receive a fax manually 1. Make sure the printer is turned on and you have paper loaded in the main tray. 2. Remove any originals from - HP ENVY Photo 7800 | User Guide - Page 68
the oldest, printed faxes as it receives new faxes. If the memory becomes full of unprinted faxes, the printer stops answering incoming fax calls. NOTE: If you receive a fax that is too large, such as a very detailed color photo, it might not be stored in memory due to memory limitations. Causes the - HP ENVY Photo 7800 | User Guide - Page 69
fax is reduced to fit on one page, if possible. If this Setup . 3. Touch Preferences . 4. Scroll to Automatic Reduction and turn the feature on or off. Block unwanted fax numbers If you subscribe to a caller ID service through your phone provider, you can block specific fax numbers so the printer - HP ENVY Photo 7800 | User Guide - Page 70
of blocked junk fax numbers. To add a number to the junk fax list 1. From the printer control panel display, touch Fax . 2. Touch Setup . 3. Touch Preferences . 4. Touch Junk Fax Blocking . 5. Touch (Plus Sign). 6. Do one of the following. ● To select a fax number to block from the call history list - HP ENVY Photo 7800 | User Guide - Page 71
panel, you can also use tools available on your computer, such as the HP software included with the printer and the printer EWS. For more information, see Printer management tools. ● Create and edit a phone book contact ● Create and edit a group phone book contact ● Delete phone book contacts - HP ENVY Photo 7800 | User Guide - Page 72
set up group phone book contacts NOTE: Before you can create a group phone book contact, you must have already created at least one phone book contact. 1. From the printer control panel display, touch Fax . 2. Touch Phone Book . 3. Touch , touch ( Group ), and then touch (Plus Sign) to add a group - HP ENVY Photo 7800 | User Guide - Page 73
your name and fax number on the top of every fax you send. HP recommends that you set up the fax header by using the HP software provided with the printer. You can also set up the fax header from the printer control panel, as described here. NOTE: In some countries/regions, the fax header - HP ENVY Photo 7800 | User Guide - Page 74
by country/region.) In this setup, the answering machine answers the call and the printer monitors the line. If the printer detects fax tones, it receives the on one phone line. When you subscribe to this service, each number is assigned a different ring pattern. You can set up the printer to - HP ENVY Photo 7800 | User Guide - Page 75
Setup , and then touch Preferences . 3. Touch Auto Redial . 4. Turn on or off Busy Redial , No Answer Redial , or Connection Problem Redial . Set the fax speed You can set the fax speed used to communicate between your printer and other fax machines when sending and receiving faxes. If you use one - HP ENVY Photo 7800 | User Guide - Page 76
(ISDN) service If you experience problems sending and receiving faxes, try using a slower Speed . The following table provides the available fax speed settings. Fax speed setting Fast Medium Slow Fax speed v.34 (33600 bps) v.17 (14400 bps) v.29 (9600 bps) To set the fax speed 1. From the printer - HP ENVY Photo 7800 | User Guide - Page 77
. NOTE: HP does not guarantee that the printer will be compatible with all digital service lines or providers, in all digital environments, or with all digital-to-analog converters. It is always recommended that you discuss with the telephone company directly for the correct setup options based - HP ENVY Photo 7800 | User Guide - Page 78
. If you experience problems faxing, try using a slower fax speed or disabling the fax error-correction mode (ECM). However, if you turn off ECM, you cannot send and receive color faxes. If you have questions about Internet faxing, contact your Internet faxing services support department or your - HP ENVY Photo 7800 | User Guide - Page 79
from the control panel or the HP software. For more information, see Check the estimated ink levels . NOTE: Ink level alerts and indicators provide estimates for planning purposes only. When you receive a lowink alert, consider having a replacement cartridge available to avoid possible printing - HP ENVY Photo 7800 | User Guide - Page 80
is an error during transmission or reception. To set the printer to print fax error reports automatically 1. From the printer control panel display, touch Fax . 2. Touch Setup . 3. Touch Reports and touch Fax Error Reports. 4. Touch to select one of the following. On (Fax Send and Fax Receive) Off - HP ENVY Photo 7800 | User Guide - Page 81
Clear the fax log Clearing the fax log also deletes all faxes stored in memory. To clear the fax log 1. From the printer control panel display, touch Fax . 2. Touch Setup , and then touch Tools. 3. Touch Clear Fax Logs/Memory. Print the details of the last fax transaction The Last Fax Transaction - HP ENVY Photo 7800 | User Guide - Page 82
3. Touch 4. Touch ( Phone Book ). ( Call History ). 76 Chapter 5 Fax ENWW - HP ENVY Photo 7800 | User Guide - Page 83
all the steps in the Getting Started Guide, use the instructions in this section to complete your fax setup. Keep your Getting Started Guide for later use. In this section, you learn how to set up the printer so that faxing works successfully with equipment and services you might already have on the - HP ENVY Photo 7800 | User Guide - Page 84
with computer dial-up modem and voice mail Select the correct fax setup for your home or office To fax successfully, you need to know what types of equipment and services (if any) share the same phone line with the printer. This is important because you might need to connect some of your - HP ENVY Photo 7800 | User Guide - Page 85
computer software applications through a dial-up connection? ● Do you send and receive email messages printer. 3. From the following table, select the combination of equipment and services applicable to your home or office setting. Then look up the recommended fax setup. Step-by-step instructions - HP ENVY Photo 7800 | User Guide - Page 86
printer. You might need to connect the phone cord to your country/region adapter. To set up the printer with a separate fax line 1. Connect one end printer with DSL If you have a DSL service through your telephone company, and do not connect any equipment to the printer, use the instructions in - HP ENVY Photo 7800 | User Guide - Page 87
the printer with DSL 1. Obtain a DSL filter from your DSL provider. 2. Connect one end of setup. 3. Connect an additional phone cord from the DSL filter to the telephone wall jack. 4. Run a fax test. If you encounter problems setting up the printer with optional equipment, contact your local service - HP ENVY Photo 7800 | User Guide - Page 88
receive faxes with the printer. Refer to the documentation that came with your PBX phone system for instructions on how to turn problems setting up the printer with optional equipment, contact your local service provider or vendor for further assistance. Case D: Fax with a distinctive ring service - HP ENVY Photo 7800 | User Guide - Page 89
begins emitting fax reception tones to the sending fax machine and receives the fax. If you encounter problems setting up the printer with optional equipment, contact your local service provider or vendor for further assistance. Case E: Shared voice/fax line If you receive both voice calls and - HP ENVY Photo 7800 | User Guide - Page 90
the call and hear fax tones from a sending fax machine, you need to answer the fax call manually. If you encounter problems setting up the printer with optional equipment, contact your local service provider or vendor for further assistance. Case F: Shared voice/fax line with voice mail If you - HP ENVY Photo 7800 | User Guide - Page 91
in person to incoming fax calls, or the printer cannot receive faxes. You must initiate the manual fax before voicemail picks up the line. If you encounter problems setting up the printer with optional equipment, contact your local service provider or vendor for further assistance. Case G: Fax - HP ENVY Photo 7800 | User Guide - Page 92
. If you encounter problems setting up the printer with optional equipment, contact your local service provider or vendor for further assistance. Set up the printer with a computer DSL/ADSL modem If you have a DSL line and use that phone line to send faxes, follow these instructions to set up your - HP ENVY Photo 7800 | User Guide - Page 93
emitting fax reception tones to the sending fax machine and receives the fax. If you encounter problems setting up the printer with optional equipment, contact your local service provider or vendor for further assistance. Case H: Shared voice/fax line with computer modem There are two different - HP ENVY Photo 7800 | User Guide - Page 94
dial-up modem. 4. Connect one end of the phone cord to your telephone wall jack, then connect the other end to the port labeled 1-LINE on the back of the printer. NOTE: You might need to connect the phone cord to your country/region adapter. 5. If your modem software is set to receive - HP ENVY Photo 7800 | User Guide - Page 95
to set up your fax. If you encounter problems setting up the printer with optional equipment, contact your local service provider or vendor for further assistance. Shared voice/fax with computer DSL/ADSL modem Use these instructions if your computer has a DSL/ADSL modem 1 2 3 4 5 6 7 ENWW - HP ENVY Photo 7800 | User Guide - Page 96
same phone number with DSL service need to be connected to additional DSL filters to avoid noise when making voice calls. 2. Connect one end of the phone cord the fax. If you encounter problems setting up the printer with optional equipment, contact your local service provider or vendor for further - HP ENVY Photo 7800 | User Guide - Page 97
stops monitoring the line and your answering machine can record a voice message. If you encounter problems setting up the printer with optional equipment, contact your local service provider or vendor for further assistance. Case J: Shared voice/fax line with computer modem and answering machine - HP ENVY Photo 7800 | User Guide - Page 98
check your computer to see if it has one or two phone ports. NOTE: If your computer has only one phone port, you need to purchase a the back.) Figure 5-12 Example of a parallel splitter Figure 5-13 Back view of the printer 1 Telephone wall jack. 2 "IN" phone port on your computer. 3 "OUT" - HP ENVY Photo 7800 | User Guide - Page 99
4. Connect one end of of the printer. NOTE: printer. You can use standard phone cords for these connections. 6. If your modem software modem software, the printer cannot printer to the maximum number of rings supported problems setting up the printer with optional equipment, contact your local service - HP ENVY Photo 7800 | User Guide - Page 100
DSL/ADSL service need to be connected to additional DSL/ADSL filters, to avoid noise when making voice calls. 2. Connect one end of . 8. Change your Rings to Answer setting on the printer to the maximum number of rings supported by the printer. NOTE: The maximum number of rings varies by country - HP ENVY Photo 7800 | User Guide - Page 101
follow these instructions to set up your fax. If you encounter problems setting up the printer with optional equipment, contact your local service provider or (also called a coupler), as shown in the illustration. (A parallel splitter has one RJ-11 port on the front and two RJ-11 ports on the back - HP ENVY Photo 7800 | User Guide - Page 102
incoming fax calls, or the printer cannot receive faxes. If you encounter problems setting up the printer with optional equipment, contact your local service provider or vendor for further assistance. Test fax setup You can test your fax setup to check the status of the printer and to make sure it - HP ENVY Photo 7800 | User Guide - Page 103
To test fax setup via the printer control panel 1. Set up the printer for faxing according to your particular home or office setup instructions. 2. Make sure the cartridges are installed, and that full-size paper is loaded in the input tray before starting the test. 3. From the top of the screen, - HP ENVY Photo 7800 | User Guide - Page 104
6 Web Services ● What are Web Services? ● Set up Web Services ● Use Web Services ● Remove Web Services 98 Chapter 6 Web Services ENWW - HP ENVY Photo 7800 | User Guide - Page 105
, from any location. It's as simple as sending an email to the email address assigned to your printer when you enable Web Services on the printer. No special drivers or software are needed. If you can send an email, you can print from anywhere, using HP ePrint. NOTE: You can sign up for an account - HP ENVY Photo 7800 | User Guide - Page 106
. Follow the instructions on the information page to finish the setup. To set up Web Services using the HP printer software (Windows) 1. Open the HP printer software. For more information, see Open the HP printer software (Windows). 2. In the window that appears, double-click Print, Scan & Fax and - HP ENVY Photo 7800 | User Guide - Page 107
server. If you do not have the details, contact your network administrator or the person who set up the network. 5. When the printer is connected to the server, the printer prints an information page. Follow the instructions on the information page to finish the setup. ENWW Set up Web Services 101 - HP ENVY Photo 7800 | User Guide - Page 108
and then do one of the following. a. Touch ( Setup ), then touch Web Services Setup, and then touch Display Email Address. b. Touch ( Setup ), then touch Web Services Setup, and then touch Print Info.. The printer prints an information page that contains the printer code and instructions on how to - HP ENVY Photo 7800 | User Guide - Page 109
want to use. For more information about individual print app, visit HP Connected . This site might not be available in all countries/regions. To manage printer apps ● You can preview, add or remove printer apps from your printer with HP Connected . This site might not be available in all countries - HP ENVY Photo 7800 | User Guide - Page 110
Use the following instructions to remove Web Services. To remove Web Services using the printer control panel 1. From the top of the screen, touch or swipe down the tab to open the Dashboard, touch and then touch (Web Services Settings). ( HP ePrint ), 2. Touch Remove Web Services. To remove Web - HP ENVY Photo 7800 | User Guide - Page 111
print quality from the printer, you need to perform some simple maintenance procedures. This section contains the following topics: ● Information on cartridges and the printhead ● Check the estimated ink levels ● Replace the cartridges ● Order cartridges ● Use single-cartridge mode ● Store printing - HP ENVY Photo 7800 | User Guide - Page 112
help maintain HP cartridges and ensure consistent print quality. ● The instructions in this guide are for replacing cartridges, and are not intended for first time installation. ● Keep all cartridges in the original sealed packages until they are needed. ● Be sure to turn off the printer properly - HP ENVY Photo 7800 | User Guide - Page 113
the printer software (Windows) 1. Open the HP printer software. 2. In the printer software, click Estimated Levels at the top of the window. NOTE: Ink level alerts and indicators provide estimates for planning purposes only. When you receive a lowink alert, consider having a replacement cartridge - HP ENVY Photo 7800 | User Guide - Page 114
already have replacement cartridges for the printer, see Order cartridges . NOTE: At this time, some portions of the HP website are available in English only. NOTE: Not all cartridges are available in all countries/regions. NOTE: For information on recycling used ink supplies, see HP inkjet supplies - HP ENVY Photo 7800 | User Guide - Page 115
b. Remove plastic tape using the pull tab. c. Slide the new cartridge in the slot until it clicks. 4. Close the cartridge access door. NOTE: The HP printer software prompts you to align the cartridges when you print a document after installing a new cartridge. ENWW Replace the cartridges 109 - HP ENVY Photo 7800 | User Guide - Page 116
portions of the HP website are available in English only.) Ordering cartridges online is not supported in all countries/regions cartridge you are replacing. ● On a sticker inside the printer. Open the cartridge access door to locate the sticker. NOTE: The Setup cartridge that comes with the printer - HP ENVY Photo 7800 | User Guide - Page 117
the HP ENVY Photo 7800 series with only one cartridge. The singlecartridge mode is initiated when an cartridge is removed from the cartridge carriage. During single-cartridge mode, the printer can copy documents, copy photos, and print jobs from the computer. NOTE: When the HP ENVY Photo 7800 series - HP ENVY Photo 7800 | User Guide - Page 118
Store printing supplies Cartridges can be left in the printer for extended periods of time. However, to assure optimal cartridge health, be sure to turn off the printer properly when the printer is not in use. For more information, see Turn the printer off . 112 Chapter 7 Work with cartridges ENWW - HP ENVY Photo 7800 | User Guide - Page 119
is covered as long as the HP ink is not depleted and the end of warranty date has not been reached. The end of warranty date, in YYYY/MM format, may be found on the cartridge as indicated: For a copy of the HP Limited Warranty Statement for the printer, see the printed documentation that came - HP ENVY Photo 7800 | User Guide - Page 120
settings are available from the printer's home page (embedded web server or EWS). For more information, see Embedded web server. This section contains the following topics: ● Set up the printer for wireless communication ● Change network settings ● Use Wi-Fi Direct 114 Chapter 8 Network setup ENWW - HP ENVY Photo 7800 | User Guide - Page 121
on or off the wireless capability of the printer NOTE: If you encounter problems connecting the printer, see Network and connection issues. TIP: For more information about setting up and using the printer wirelessly, visit the HP Wireless Printing Center ( www.hp.com/go/wirelessprinting ). Before - HP ENVY Photo 7800 | User Guide - Page 122
and Android mobile devices.) NOTE: HP Smart uses Bluetooth for printer setup only. Printing using Bluetooth is not supported. 2. Open the HP Smart app. 3. Windows: On the home screen, click or tap Setup a new printer and follow the onscreen instructions to add a printer to your network. iOS/Android - HP ENVY Photo 7800 | User Guide - Page 123
computer is currently connected to a wireless network. 2. Open the HP Smart app. For information about how to open the app on a Windows 10 computer, see Use the HP Smart app to print, scan, and troubleshoot from an iOS, Android, or Windows 10 device. 3. Make sure your printer is selected. TIP: If - HP ENVY Photo 7800 | User Guide - Page 124
wireless capability and the Wireless light. 1. From the printer control panel, touch or swipe down the tab at the top of the screen to open the Dashboard, touch (the Wireless button), and then touch ( Settings ). 2. Touch Wireless Settings. 3. Turn on or off Wireless. 118 Chapter 8 Network setup - HP ENVY Photo 7800 | User Guide - Page 125
network components cannot connect with the printer. 1. From the printer control panel, touch or swipe down the tab at the top of the screen to open the Dashboard, touch ( Setup ), and then touch Network Setup. 2. Touch Ethernet Settings or Wireless Settings. 3. Touch Advanced Settings. ENWW Change - HP ENVY Photo 7800 | User Guide - Page 126
4. Touch IP Settings. A message appears warning that changing the IP address removes the printer from the network. Touch OK to continue. 5. To change the settings manually, touch Manual (Static), and then enter the appropriate information for the following settings: ● IP Address ● Subnet Mask ● - HP ENVY Photo 7800 | User Guide - Page 127
HP printer software. If you have not installed the HP printer software on the computer, connect to Wi-Fi Direct first and then install the printer software. Select Wireless when prompted by the printer software . To change connection method 1. From the printer control panel, touch or swipe down the - HP ENVY Photo 7800 | User Guide - Page 128
Wi-Fi Direct name from the list of wireless networks shown such as DIRECT-**- HP ENVY Photo-7800 (where ** are the unique characters to identify your printer). Enter the Wi-Fi Direct password when prompted. 4. Print your document. To print from a wireless-capable computer (Windows) 1. Make sure you - HP ENVY Photo 7800 | User Guide - Page 129
the Wi-Fi Direct name from the list of wireless networks shown such as DIRECT-**- HP ENVY Photo-7800 (where ** are the unique characters to identify your printer). Enter the Wi-Fi Direct password when prompted. 4. Proceed to step 5 if the printer has been installed and connected to the computer over - HP ENVY Photo 7800 | User Guide - Page 130
9 Printer management tools This section contains the following topics: ● The HP Smart app ● Toolbox (Windows) ● HP Utility (OS X and macOS) ● Embedded web server 124 Chapter 9 Printer management tools ENWW - HP ENVY Photo 7800 | User Guide - Page 131
settings. You can view ink status, printer and network information. You can also print diagnostic reports, access print quality tools, and view and change printer settings. For more information about the HP Smart app, see Use the HP Smart app to print, scan, and troubleshoot from an iOS, Android - HP ENVY Photo 7800 | User Guide - Page 132
along with the HP printer software if the computer meets system requirements. For information about system requirements, see Specifications. To open the Toolbox 1. Open the HP printer software. For more information, see Open the HP printer software (Windows). 2. Click Print, Scan & Fax . 3. Click - HP ENVY Photo 7800 | User Guide - Page 133
, and find website support information. NOTE: The features available in HP Utility vary depending on the selected printer. Ink level warnings and indicators provide estimates for planning purposes only. When an indicator shows lowink levels, consider having a replacement cartridge available to avoid - HP ENVY Photo 7800 | User Guide - Page 134
them manually. printer, if you disable cookies, you also disable one or more of the following features: ● Using some setup printer by touching printing a network configuration page. (Wireless) or (Ethernet) or by NOTE: The printer must be on a network and must have an IP address. 2. In a supported - HP ENVY Photo 7800 | User Guide - Page 135
it on. 4. From your wireless computer, turn wireless on, search for and connect to the Wi-Fi Direct name, for example: DIRECT-**- HP ENVY Photo-7800 (where ** are the unique characters to identify your printer). Enter the Wi-Fi Direct password when prompted. 5. In a supported web browser on your - HP ENVY Photo 7800 | User Guide - Page 136
is not connected to the network. TIP: If you are using a computer running Windows, you can visit the HP online support website at www.hp.com/support . This website provides information and utilities that can help you correct many common printer problems. 130 Chapter 9 Printer management tools ENWW - HP ENVY Photo 7800 | User Guide - Page 137
your problem, try using one of the support services listed in HP support to obtain assistance. This section contains the following topics: ● Jams and paper-feed issues ● Cartridge issues ● Printing issues ● Copy issues ● Scan issues ● Fax issues ● Network and connection issues ● Printer hardware - HP ENVY Photo 7800 | User Guide - Page 138
a paper jam Solve paper jam issues Use an HP online troubleshooting wizard. Instructions for clearing the jam in the printer or in the automatic document feeder and resolving issues with paper or the paper feed. NOTE: The HP online troubleshooting wizards may not be available in all languages - HP ENVY Photo 7800 | User Guide - Page 139
jams are likely to occur. b. Move the carriage to the far left of the printer, and do the same as in the previous step to remove any torn pieces of paper. 5. Close the cartridge access door. 6. If the problem is still not resolved, check the tray area. a. Pull out the input tray to - HP ENVY Photo 7800 | User Guide - Page 140
rollers and wheels for torn pieces of paper that might be remaining inside the printer. If you do not remove all of the pieces of paper from the printer, more paper jams are likely to occur. d. Carefully turn the printer up again. e. Push the paper tray back in. 7. Press (the Power button) again - HP ENVY Photo 7800 | User Guide - Page 141
get step-by-step instructions. NOTE: The HP online troubleshooting wizards may not be available in all languages. Read general instructions in the Help for bag. ● Do not use paper that is too thick or too thin for the printer. ● Make sure that the trays are loaded correctly and are not too full. - HP ENVY Photo 7800 | User Guide - Page 142
guides in the input tray to fit snugly against all paper. Make sure the paper-width guides paper when the printer is printing. Solve paper-feed problems What kind of problem are you having? make sure the paper guides are snug, but not by one or more label on the side or paper-width guide of the - HP ENVY Photo 7800 | User Guide - Page 143
cartridge contacts (see the following for details). If the problem is still not resolved, replace the cartridges. For information about replacing cartridges, see Replace the cartridges . To clean cartridge of the ink or other debris elsewhere on the cartridge. 6. On the inside of the printer, locate - HP ENVY Photo 7800 | User Guide - Page 144
error message has gone away. 10. If you still receive the error message, turn the product off, and then on again. NOTE: If one cartridge is causing problems, you can remove it and use the single-cartridge mode to operate the HP ENVY Photo 7800 series with only one cartridge. 138 Chapter 10 Solve - HP ENVY Photo 7800 | User Guide - Page 145
problems with print jobs not printing The HP Print and Scan Doctor is a utility that will try to diagnose and fix the issue automatically. NOTE: This utility is only available for Windows operating system. Use an HP online troubleshooting wizard. Get step-by-step instructions if the printer - HP ENVY Photo 7800 | User Guide - Page 146
Printer Offline. d. If you made any changes, try to print again. 4. Verify that the printer is set as the default printer. To verify that the printer is set as the default printer a. Depending on your operating system, do one double-click or double-tap Services. 140 Chapter 10 Solve a problem ENWW - HP ENVY Photo 7800 | User Guide - Page 147
, and click Restart to restart the service. b. Make sure the correct printer is set as the default printer. The default printer has a check mark in a black or green circle next to it. c. If the wrong printer is set as the default printer, right-click the correct printer and select Set as Default - HP ENVY Photo 7800 | User Guide - Page 148
the printer turned on, disconnect the power cord from the rear of the printer. 4. Unplug the power cord from the wall outlet. 5. Wait at least 15 seconds. 6. Plug the power cord back into the wall outlet. 7. Reconnect the power cord to the rear of the printer. 142 Chapter 10 Solve a problem ENWW - HP ENVY Photo 7800 | User Guide - Page 149
Fix print quality issues Step-by-step instructions for resolving most print quality issues Troubleshoot print quality issues online. Read general instructions in the Help for resolving print quality issues NOTE: To avoid print quality problems, always turn the printer off using (the Power button - HP ENVY Photo 7800 | User Guide - Page 150
. b. Open the HP printer software. For more information, see Open the HP printer software (Windows). c. In the printer software, click Print, Scan & Fax , and then click Maintain Your Printer to access the Printer Toolbox. d. In Printer Toolbox, click Align Cartridges on the Device Services tab. The - HP ENVY Photo 7800 | User Guide - Page 151
printer software, click Print, Scan & Fax and then click Maintain Your Printer to access the Printer Toolbox. d. Click Clean Cartridges on the Device Services tab. Follow the onscreen instructions. 8. If cleaning the cartridges does not solve the problem, contact HP support. Go to www.hp.com/support - HP ENVY Photo 7800 | User Guide - Page 152
the printhead. If print quality problems persist after cleaning and aligning, contact HP support. f. Click All Settings to return to the Information and Support pane. To improve print quality from the printer display 1. Make sure you are using original HP cartridges. 2. Make sure you have selected - HP ENVY Photo 7800 | User Guide - Page 153
to open the Dashboard, and then touch ( Setup ). c. Touch Printer Maintenance , select Clean Cartridges, and then follow the onscreen instructions. 7. If cleaning the cartridges does not solve the problem, contact HP support. Go to www.hp.com/support . This website provides information and utilities - HP ENVY Photo 7800 | User Guide - Page 154
Copy issues Troubleshoot copy problems Use an HP online troubleshooting wizard. Get step-by-step instructions if the printer does not create a copy, or if your printouts are low quality. NOTE: The HP online troubleshooting wizards may not be available in all languages. Tips for copy and scan success - HP ENVY Photo 7800 | User Guide - Page 155
Scan issues HP Print and Scan Doctor Solve scan problems The HP Print and Scan Doctor is a utility that will try to diagnose and fix the issue automatically. NOTE: This utility is only available for Windows operating system. Use an HP online troubleshooting wizard. Get step-by-step instructions if - HP ENVY Photo 7800 | User Guide - Page 156
touch Setup , touch Setup Wizard, and then follow the onscreen instructions. The printer displays the status of the test on the display and prints a report. 4. Review the report. ● If the fax test failed, review the solutions below. ● If the fax test passed and you are still having problems faxing - HP ENVY Photo 7800 | User Guide - Page 157
reviewing the troubleshooting information in this section. ● Try to send or receive a test fax. If you can send or receive a fax successfully, there might not be a problem. ● If you are running the test from the Fax Setup Wizard (Windows) or HP Utility (OS X and macOS), make sure the printer - HP ENVY Photo 7800 | User Guide - Page 158
● Connect one end of the phone cord to your telephone wall jack, then connect the other end to the port labeled 1-LINE on the back of the printer. 1 wall jack and the printer to make sure the phone cord is secure. ● If you are using a phone splitter, this can cause faxing problems. (A splitter is a - HP ENVY Photo 7800 | User Guide - Page 159
company and have them check the line. ● Connect one end of the phone cord to your telephone wall jack, then connect the other end to the port labeled 1-LINE on the back of the printer. ● If you are using a phone splitter, this can cause faxing problems. (A splitter is a two-cord connector that plugs - HP ENVY Photo 7800 | User Guide - Page 160
them back one at a time and rerunning the test each time, until you identify which piece of equipment is causing the problem. ● If the Fax Line Condition Test fails without the other equipment, connect the printer to a working phone line and continue reviewing the troubleshooting information in - HP ENVY Photo 7800 | User Guide - Page 161
(ECM) off and try faxing again. If the problem persists, contact your telephone company. ● If you are using a digital subscriber line (DSL) service, make sure that you have a DSL filter connected or you cannot fax successfully. ● Make sure the printer is not connected to a telephone wall jack that - HP ENVY Photo 7800 | User Guide - Page 162
contact your DSL provider for support. ● If you are using a phone splitter, this can cause faxing problems. (A splitter is a two manually; otherwise, the printer cannot receive the fax. ● If you have a voice mail service at the same phone number you use for fax calls, you must receive faxes manually - HP ENVY Photo 7800 | User Guide - Page 163
back one at a time and receiving a fax each time, until you identify which equipment is causing the problem. ● If you have a special ring pattern for your fax phone number (using a distinctive ring service through your telephone company), make sure that the Distinctive Ring feature on the printer is - HP ENVY Photo 7800 | User Guide - Page 164
that it is preventing your computer from connecting to the printer. NOTE: The HP Print and Scan Doctor and the HP online troubleshooting wizards may not be available in all languages. Read general instructions in the Help for wireless troubleshooting Check the network configuration or print the - HP ENVY Photo 7800 | User Guide - Page 165
impacting your network connection to the printer. If you know that antivirus or firewall software is preventing your computer from connecting to the printer, use the HP online firewall troubleshooter to help solve the problem. ● Learn more about using the HP Print and Scan Doctor. Click here to go - HP ENVY Photo 7800 | User Guide - Page 166
connections. ● Make sure the printer's power cord is connected firmly to a functioning power outlet. Resolve printer failure. ▲ Turn the printer off, then on. If that does not resolve the problem, contact HP. For more information about contacting HP support, see HP support. 160 Chapter 10 Solve - HP ENVY Photo 7800 | User Guide - Page 167
Get help from the printer control panel You can use the printer's help topics to learn more about the printer, and some help topics include animations that guide you through procedures, such as loading paper. To access the Help menu from the Home screen or contextual help for a screen, touch - HP ENVY Photo 7800 | User Guide - Page 168
Get help from the HP Smart app The HP Smart app provides alerts for printer issues (jams and other problems), links to help content, and options to contact support for additional assistance. 162 Chapter 10 Solve a problem ENWW - HP ENVY Photo 7800 | User Guide - Page 169
how to print a wireless test report, see Test the wireless connection Printer status report Use the printer status report to view current printer information and cartridge status. Also use the printer status report to help you troubleshoot problems with the printer. The printer status report also - HP ENVY Photo 7800 | User Guide - Page 170
Web Services information page Print the Web Services information page to help identify internet connectivity issues which can affect Web Services. 164 Chapter 10 Solve a problem ENWW - HP ENVY Photo 7800 | User Guide - Page 171
Solve problems using Web Services If you are having problems using Web Services, such as HP ePrint, check the following: ● Make sure the printer is connected to the Internet using an Ethernet or wireless connection. NOTE: You cannot use these web features if the printer is connected using a USB - HP ENVY Photo 7800 | User Guide - Page 172
quality of scans, and affect the accuracy of special features such as fitting copies to a certain page size. To clean the scanner glass WARNING! Before cleaning the printer, turn the printer off by the scanner. 3. Close the scanner lid, and turn on the printer. 166 Chapter 10 Solve a problem ENWW - HP ENVY Photo 7800 | User Guide - Page 173
up plain paper, you can clean the rollers and separator pad. To clean the rollers or separator pad WARNING! Before cleaning the printer, turn the printer off by pressing the power cord from the electrical socket. 1. Remove all originals from the document feeder tray. 2. Lift the document feeder - HP ENVY Photo 7800 | User Guide - Page 174
the residue does not come off using distilled water, try using isopropyl (rubbing) alcohol. 5. Close the cover of the document feeder. 168 Chapter 10 Solve a problem ENWW - HP ENVY Photo 7800 | User Guide - Page 175
to open the Dashboard, and then touch ( Setup ). 2. Touch Printer Maintenance . 3. Touch Restore. 4. Touch Restore Settings. 5. Select which function you would like to restore to the original factory settings: ● Copy ● Scan ● Fax ● Photo ● Network 6. Touch Restore. A message appears asking you - HP ENVY Photo 7800 | User Guide - Page 176
the printer network settings, previously configured wireless and HP online support website at www.hp.com/support for information and utilities that can help you correct many common printer problems. (Windows) Run the HP Print and Scan Doctor to diagnose and automatically fix printing, scanning - HP ENVY Photo 7800 | User Guide - Page 177
printer, such as HP ENVY Photo 7800 ) ● Product number (located near the cartridge access area) ● Serial number (located on the back or bottom of the printer) Register printer By taking just a few quick minutes to register, you can enjoy quicker service, more efficient support, and product support - HP ENVY Photo 7800 | User Guide - Page 178
Additional warranty options Extended service plans are available for the printer at additional costs. Go to www.hp.com/support , select your country/region and language, then explore the extended warranty options available for your printer. 172 Chapter 10 Solve a problem ENWW - HP ENVY Photo 7800 | User Guide - Page 179
regulatory information for the HP ENVY Photo 7800 series are provided in this section. For additional specifications, see the printed documentation that came with the HP ENVY Photo 7800 series. This section contains the following topics: ● HP Company notices ● Specifications ● Regulatory - HP ENVY Photo 7800 | User Guide - Page 180
permission of HP, except as allowed under the copyright laws. The only warranties for HP products and services are set HP Development Company, L.P. Microsoft and Windows are either registered trademarks or trademarks of Microsoft Corporation in the United States and/or other countries. Bluetooth - HP ENVY Photo 7800 | User Guide - Page 181
for the HP ENVY Photo 7800 series are provided in this section. For more product specifications, see the Product Data Sheet at www.hp.com/support . ● System requirements ● Environmental specifications ● Print specifications ● Scan specifications ● Copy specifications ● Cartridge yield ● Print - HP ENVY Photo 7800 | User Guide - Page 182
of the document and model. Cartridge yield Visit www.hp.com/go/learnaboutsupplies for more information on estimated cartridge yields. Print resolution For a list of supported print resolutions, visit the HP ENVY Photo 7800 series support website at www.hp.com/support. For information about printing - HP ENVY Photo 7800 | User Guide - Page 183
regulatory number should not be confused with the marketing name (HP ENVY Photo 7800 All-in-One series , etc.) or product numbers (K7R96A-K7R99A, K7S00A-K7S10A, and, if not installed and used in accordance with the instructions, may cause harmful interference to radio communications. However, there - HP ENVY Photo 7800 | User Guide - Page 184
any changes or modifications made to this device that are not expressly approved by HP may void the user's authority to operate the equipment. This device complies Regulatory Notice Products bearing the CE marking comply with one or more of the following EU Directives as may be applicable - HP ENVY Photo 7800 | User Guide - Page 185
Wireless functionality in Europe ● For products with 802.11 b/g/n or Bluetooth issues with existing radio services. - This product operates . European telephone network declaration (Modem/Fax) HP products with FAX capability comply with the requirements In the event of problems, you should contact - HP ENVY Photo 7800 | User Guide - Page 186
HP recommends a compliant plug, jack and 2-wire telephone cord to connect this product to the premises wiring and telephone network. See installation instructions uninterrupted service. If trouble is experienced with this equipment, please contact the manufacturer, or look elsewhere in this manual, - HP ENVY Photo 7800 | User Guide - Page 187
your FAX machine, you shoudl complete the steps described in the software. Notice to users of the Canadian telephone network Cet appareil est TAE N-Telefonstecker, der im Lieferumfang des HP All-in-One enthalten ist, an die Wandsteckdose (TAE 6) Code N an. Dieses HP-Fax kann als einzelnes Gerät und - HP ENVY Photo 7800 | User Guide - Page 188
Declaration of conformity 182 Appendix A Technical information ENWW - HP ENVY Photo 7800 | User Guide - Page 189
Regulatory information for wireless products This section contains the following regulatory information pertaining to wireless products: ● Exposure to radio frequency radiation ENWW Regulatory notices 183 - HP ENVY Photo 7800 | User Guide - Page 190
operation is minimized. This product and any attached external antenna, if supported, shall be placed in such a manner to minimize the potential . Notice to users in Canada (5 GHz) CAUTION: When using IEEE 802.11a wireless LAN, this product is restricted to indoor use, due to its operation in the - HP ENVY Photo 7800 | User Guide - Page 191
To avoid the possibility of exceeding the Industry Canada radio frequency exposure limits, human proximity to the antennas should not be less than 20 cm (8 inches). Conformément au Règlement d'Industrie Canada, cet émetteur radioélectrique ne peut fonctionner qu'avec une antenne d'un type et d'un - HP ENVY Photo 7800 | User Guide - Page 192
Notice to users in Thailand (5 GHz) This radio communication equipment has the electromagnetic field strength in compliance with the Safety Standard for the Use of Radio Communication Equipment on Human Health announced by the National Telecommunications Commission. 186 Appendix A Technical - HP ENVY Photo 7800 | User Guide - Page 193
California Perchlorate Material Notice ● The Table of Hazardous Substances/Elements and their Content (China) ● SEPA Ecolabel User Information (China) ● China Energy Label for Printer, Fax and Copier Eco-Tips HP is committed to helping customers reduce their environmental footprint. Please visit the - HP ENVY Photo 7800 | User Guide - Page 194
in many countries/regions, and lets you recycle used print cartridges and ink cartridges free of charge. For more information, go to the following website: www.hp.com/hpinfo/globalcitizenship/environment/recycle/ Power consumption HP printing and imaging equipment marked with the ENERGY STAR® logo - HP ENVY Photo 7800 | User Guide - Page 195
the recycling of waste electrical and electronic equipment. For more information, please contact your household waste disposal service, or go to http://www.hp.com/recycle. Chemical substances HP is committed to providing our customers with information about the chemical substances in our products as - HP ENVY Photo 7800 | User Guide - Page 196
that the restricted substance corresponds to the exemption. www.support.hp.com To access the latest user guides or manuals for your product, go to www.support.hp.com. Select Find your product, and then follow the onscreen instructions. EPEAT Most HP products are designed to meet EPEAT. EPEAT is - HP ENVY Photo 7800 | User Guide - Page 197
EPEAT registered products go to www.hp.com/hpinfo/globalcitizenship/environment/pdf/ epeat_printers. the life of the product. Any attempt to service or replace this battery should be performed by a qualified service technician. California Perchlorate Material Notice Perchlorate material - special - HP ENVY Photo 7800 | User Guide - Page 198
0 0 0 0 0 0 0 0 0 外部电源 X 0 0 0 0 SJ/T 11364 0 GB/T 26572 X GB/T 26572 X RoHS 立法。 PBDE) 0 0 0 0 0 0 0 0 0 0 0 0 SEPA Ecolabel User Information (China) 63.0 dB(A China Energy Label for Printer, Fax and Copier 192 Appendix A Technical information ENWW - HP ENVY Photo 7800 | User Guide - Page 199
GB 21521 1 3 1 2 GB 21521 W) 表示。 W) 表示。 W) 表示。 GB 21521 标准。 ENWW Environmental product stewardship program 193 - HP ENVY Photo 7800 | User Guide - Page 200
carriage jams 135 cartridge access door, locating 9 cartridges 9, 110 check ink levels 107 locating specifications 176 correct port test, fax 151 customer support warranty 172 D diagnostic page 163 dial tone 167 feeding problems, troubleshoot 167 double-sided printing 36 DSL, fax setup with parallel - HP ENVY Photo 7800 | User Guide - Page 201
test setup 96 troubleshoot 150 voice mail, set up (parallel phone systems) 84 wall jack test, failed 151 Fax screen 12 FoIP 72 forwarding faxes 63 G glass, scanner clean 166 locating 8 H hardware, fax setup test 151 header, fax 67 Help button 12 HP Utility (OS X and macOS) opening 127 I ink levels - HP ENVY Photo 7800 | User Guide - Page 202
printer status report information on 163 pulse dialing 69 R radio interference regulatory information 183 rear access panel illustration 9 receive faxes auto answer mode 67 automatically 61 blocking numbers 63 forwarding 63 manually 61 rings to answer 68 troubleshoot 154, 156 recycle ink cartridges - HP ENVY Photo 7800 | User Guide - Page 203
-feed problems 136 power 160 print 160 printer status report 163 receive faxes 154, 156 send faxes 154, 157 skewed pages 136 two-sided printing 36 volume fax sounds 70 W wall jack test, fax 151 warranty 172 Web Services information page 164 Webscan 53 websites accessibility information 3 wireless
-
 1
1 -
 2
2 -
 3
3 -
 4
4 -
 5
5 -
 6
6 -
 7
7 -
8
-
9
-
10
-
11
-
12
-
13
-
14
-
15
-
16
-
17
-
18
-
19
-
20
-
21
-
22
-
23
-
24
-
25
-
26
-
27
-
28
-
29
-
30
-
31
-
32
-
33
-
34
-
35
-
36
-
37
-
38
-
39
-
40
-
41
-
42
-
43
-
44
-
45
-
46
-
47
-
48
-
49
-
50
-
51
-
52
-
53
-
54
-
55
-
56
-
57
-
58
-
59
-
60
-
61
-
62
-
63
-
64
-
65
-
66
-
67
-
68
-
69
-
70
-
71
-
72
-
73
-
74
-
75
-
76
-
77
-
78
-
79
-
80
-
81
-
82
-
83
-
84
-
85
-
86
-
87
-
88
-
89
-
90
-
91
-
92
-
93
-
94
-
95
-
96
-
97
-
98
-
99
-
100
-
101
-
102
-
103
-
104
-
105
-
106
-
107
-
108
-
109
-
110
-
111
-
112
-
113
-
114
-
115
-
116
-
117
-
118
-
119
-
120
-
121
-
122
-
123
-
124
-
125
-
126
-
127
-
128
-
129
-
130
-
131
-
132
-
133
-
134
-
135
-
136
-
137
-
138
-
139
-
140
-
141
-
142
-
143
-
144
-
145
-
146
-
147
-
148
-
149
-
150
-
151
-
152
-
153
-
154
-
155
-
156
-
157
-
158
-
159
-
160
-
161
-
162
-
163
-
164
-
165
-
166
-
167
-
168
-
169
-
170
-
171
-
172
-
173
-
174
-
175
-
176
-
177
-
178
-
179
-
180
-
181
-
182
-
183
-
184
-
185
-
186
-
187
-
188
-
189
-
190
-
191
-
192
-
193
-
194
-
195
-
196
-
197
-
198
-
199
-
200
-
201
-
202
-
203
 |
 |

HP ENVY Photo 7800 All-in-One series