HP ENVY Photo 7800 User Guide - Page 56
Guidelines for scanning documents as editable text, Save as PDF
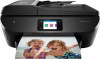 |
View all HP ENVY Photo 7800 manuals
Add to My Manuals
Save this manual to your list of manuals |
Page 56 highlights
3. Click the Scan button. A dialog appears requesting confirmation of your scanning device and the scan settings preset. 4. Follow the onscreen instructions to complete the scan. 5. When all of the pages have been scanned, select Save from the File menu. 6. Select the type of editable text you want from the Format pop-up menu. 7. Click Save. Guidelines for scanning documents as editable text Use the following guidelines to ensure the software successfully converts your documents. ● Make sure the scanner glass or document feeder window is clean. Smudges or dust on the scanner glass or document feeder window can prevent the software from converting the document to editable text ● Make sure the document is loaded correctly. Make sure the original is properly loaded and aligned with the marking on the right front corner of the glass. Make sure that the document is not skewed. ● Make sure the text on the document is clear. To successfully convert the document to editable text, the original must be clear and of high quality. The following conditions can cause the software to not convert the document successfully: ● The text on the original is faint or wrinkled. ● The text is too small. ● The structure of the document is too complex. ● The text is tightly spaced. For example, if the text that the software converts has missing or combined characters, "rn" might appear as "m." ● The text is on a colored background. Colored backgrounds can cause images in the foreground to blend too much. ● Choose the correct profile. Be sure to select a shortcut or preset that allows scanning as editable text. These options use scan settings designed to maximize the quality of your OCR scan. Windows: Use the Editable Text (OCR) or Save as PDF shortcuts. OS X and macOS: Use the Documents with Text preset. ● Save your file in the correct format. If you want to extract just the text from the document, without any of the formatting of the original, select a plain text format, such as Text (.txt) or TXT. If you want to extract the text, as well as some of the formatting of the original, select Rich Text Format, such as Rich Text (.rtf) or RTF, or searchable PDF format, such as Searchable PDF (.pdf) or Searchable PDF . 50 Chapter 4 Copy and scan ENWW
-
 1
1 -
2
-
3
-
4
-
5
-
6
-
7
-
8
-
9
-
10
-
11
-
12
-
13
-
14
-
15
-
16
-
17
-
18
-
19
-
20
-
21
-
22
-
23
-
24
-
25
-
26
-
27
-
28
-
29
-
30
-
31
-
32
-
33
-
34
-
35
-
36
-
37
-
38
-
39
-
40
-
41
-
42
-
43
-
44
-
45
-
46
-
47
-
48
-
49
-
50
-
 51
51 -
 52
52 -
 53
53 -
 54
54 -
 55
55 -
 56
56 -
 57
57 -
 58
58 -
 59
59 -
 60
60 -
 61
61 -
62
-
63
-
64
-
65
-
66
-
67
-
68
-
69
-
70
-
71
-
72
-
73
-
74
-
75
-
76
-
77
-
78
-
79
-
80
-
81
-
82
-
83
-
84
-
85
-
86
-
87
-
88
-
89
-
90
-
91
-
92
-
93
-
94
-
95
-
96
-
97
-
98
-
99
-
100
-
101
-
102
-
103
-
104
-
105
-
106
-
107
-
108
-
109
-
110
-
111
-
112
-
113
-
114
-
115
-
116
-
117
-
118
-
119
-
120
-
121
-
122
-
123
-
124
-
125
-
126
-
127
-
128
-
129
-
130
-
131
-
132
-
133
-
134
-
135
-
136
-
137
-
138
-
139
-
140
-
141
-
142
-
143
-
144
-
145
-
146
-
147
-
148
-
149
-
150
-
151
-
152
-
153
-
154
-
155
-
156
-
157
-
158
-
159
-
160
-
161
-
162
-
163
-
164
-
165
-
166
-
167
-
168
-
169
-
170
-
171
-
172
-
173
-
174
-
175
-
176
-
177
-
178
-
179
-
180
-
181
-
182
-
183
-
184
-
185
-
186
-
187
-
188
-
189
-
190
-
191
-
192
-
193
-
194
-
195
-
196
-
197
-
198
-
199
-
200
-
201
-
202
-
203
 |
 |
