HP L7580 Setup Guide - Page 22
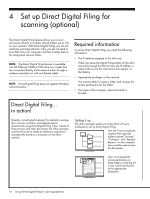
Step 3: Test and use Direct Digital Filing - scanner
 |
UPC - 882780620650
View all HP L7580 manuals
Add to My Manuals
Save this manual to your list of manuals |
Page 22 highlights
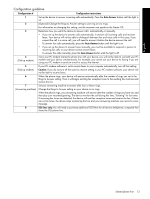
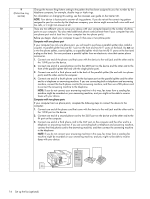
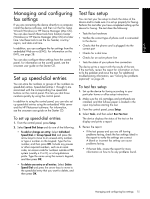
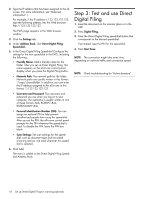
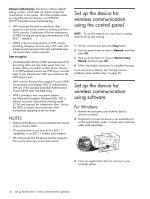
2. Type the IP address that has been assigned to the allin-one. (For more information, see "Required information".) For example, if the IP address is 123.123.123.123, type the following address into the Web browser: http://123.123.123.123 The EWS page appears in the Web browser window. 3. Click the Settings tab. 4. Under Address Book, click Direct Digital Filing Speed-dial.. 5. In the Direct Digital Filing Speed-dial Configure the settings for the new speed-dial in the EWS, including the following: • Friendly Name: Add a friendly name for the folder. After you set up Direct Digital Filing, this name appears on the all-in-one control panel display when you press the Digital Filing button. • Network Path: The network path for the folder. Network paths are usually written in this format: \\mypc\sharedfolder. In addition, you can enter the IP address assigned to the all-in-one in this format: \\123.123.123.123. • Username and Password: The username and password you use when you log on to your computer. The username is usually written in one of these formats: Bob, BOBSPC\Bob, BOBDOMAIN\Bob • Personal Identification Number (PIN): You can assign an optional PIN to help prevent unauthorized people from using the speed-dial. After you set the PIN, the all-in-one control panel prompts for the PIN whenever the speed-dial is used. To disable the PIN, leave the PIN box blank. • Scan Settings: Set scan settings for the speeddial, such as document type and two-sided scanning options, are used whenever this speeddial is selected. 6. Click Add. The entry is added to the Direct Digital Filing Speeddial Address Book. Step 3: Test and use Direct Digital Filing 1. Load the document on the scanner glass or in the ADF. 2. Press Digital Filing. 3. Press the Direct Digital Filing speed-dial button that corresponds to the desired speed-dial. If prompted, type the PIN for the speed-dial. 4. Press Start Scan. NOTE: The connection might take some time, depending on network traffic and connection speed. NOTE: Check troubleshooting for "Active directory". 18 Set up Direct Digital Filing for scanning (optional)
-
 1
1 -
2
-
3
-
4
-
5
-
6
-
7
-
8
-
9
-
10
-
11
-
12
-
13
-
14
-
15
-
16
-
 17
17 -
 18
18 -
 19
19 -
 20
20 -
 21
21 -
 22
22 -
 23
23 -
 24
24 -
 25
25 -
 26
26 -
 27
27 -
28
-
29
-
30
-
31
-
32
-
33
-
34
-
35
-
36
-
37
-
38
-
39
-
40
-
41
-
42
-
43
-
44
-
45
-
46
-
47
-
48
-
49
-
50
-
51
-
52
-
53
-
54
-
55
-
56
-
57
-
58
-
59
-
60
-
61
-
62
-
63
-
64
-
65
-
66
-
67
-
68
-
69
-
70
-
71
-
72
-
73
-
74
-
75
-
76
-
77
-
78
-
79
-
80
-
81
-
82
-
83
-
84
-
85
-
86
-
87
-
88
-
89
-
90
-
91
-
92
-
93
-
94
-
95
-
96
-
97
-
98
-
99
-
100
-
101
-
102
-
103
-
104
-
105
-
106
-
107
-
108
-
109
-
110
-
111
-
112
-
113
-
114
-
115
-
116
-
117
-
118
-
119
-
120
-
121
-
122
-
123
-
124
-
125
-
126
-
127
-
128
-
129
-
130
-
131
-
132
-
133
-
134
-
135
-
136
 |
 |