HP L7580 Setup Guide - Page 28
Solving Direct Digital Filing problems (optional), Add hardware addresses - scanning problems
 |
UPC - 882780620650
View all HP L7580 manuals
Add to My Manuals
Save this manual to your list of manuals |
Page 28 highlights
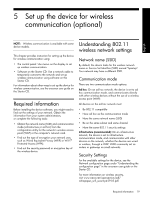
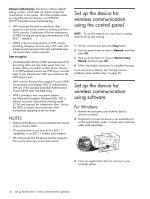
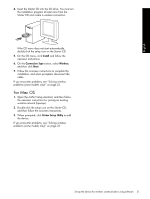
• The WAP filters hardware addresses (MAC addresses). See "Add hardware addresses to a wireless access point (WAP)" on page 24. • One of these settings in the device might be incorrect: communication mode, network name (SSID), channel (ad hoc networks only), authentication type, encryption. See "Understanding 802.11 wireless network settings" on page 19. • Print a document. If the document still does not print, then reset the device's network settings (see "Reset network configuration settings" on page 24) and reinstall the device software. If the wireless network settings are correct, the computer might be associated with another wireless network. Ensure that the computer is associated with the same wireless network as that of the device. Users can ensure this by checking the wireless settings on their respective computers. In addition, ensure that the computers have access to the wireless network. If the wireless network settings are incorrect, follow these steps to correct the device's settings: 1. Connect the device to your network with a network cable or to the computer using the network cable. 2. Open the device's embedded Web server. 3. Click the Networking tab, and then click Wireless (802.11) in the left pane. 4. Use the Wireless Setup wizard on the Wireless Setup tab to change the device's settings to match the settings of the network. 5. Close the device's embedded Web server, and then disconnect the network cable from the device. 6. Uninstall the device software completely, and then reinstall the software. Add hardware addresses to a wireless access point (WAP) MAC filtering is a security feature in which a wireless access point (WAP) is configured with a list of MAC addresses (also called "hardware addresses") of devices that are allowed to gain access to the network through the WAP. If the WAP does not have the hardware address of a device attempting to access the network, the WAP denies the device access to the network. If the WAP filters MAC addresses, then the device's MAC address must be added to the WAP's list of accepted MAC addresses. 1. Print the Network configuration page. See "To print the Network configuration page" on page 28. 2. Open the WAP's configuration utility, and add the device's hardware address to the list of accepted MAC addresses. Reset network configuration settings If the device is still unable to communicate with the network, reset the device's network settings. 1. Press Setup. Press an arrow button to move to Network, and then press OK. 2. Press an arrow button to move to Restore Network Defaults, and then press OK. 3. Print the Network configuration page and verify that the network settings have been reset. See "To print the Network configuration page" on page 28. By default, the network name (SSID) is "hpsetup" and the communication mode is "ad hoc". Solving Direct Digital Filing problems (optional) Unable to scan to network folder NOTE: The Direct Digital Filing feature does not support Windows Active Directory. The device is not set up correctly on the network Make sure that the device is set up properly and connected to the network. PING the device and make sure that it is responding. The network folder has not been set up correctly • Make sure the folder is created on the server. For more information, see the documentation available for your operating system. • Make sure the folder name uses only the letters A through Z (uppercase or lowercase) and the numbers 1 through 9. • Some common punctuation marks are also supported. However, do not use accented or special characters in the folder name. • Make sure the folder has been shared and that users can both read and write to the folder. For more 24 Troubleshooting
-
 1
1 -
2
-
3
-
4
-
5
-
6
-
7
-
8
-
9
-
10
-
11
-
12
-
13
-
14
-
15
-
16
-
17
-
18
-
19
-
20
-
21
-
22
-
 23
23 -
 24
24 -
 25
25 -
 26
26 -
 27
27 -
 28
28 -
 29
29 -
 30
30 -
 31
31 -
 32
32 -
 33
33 -
34
-
35
-
36
-
37
-
38
-
39
-
40
-
41
-
42
-
43
-
44
-
45
-
46
-
47
-
48
-
49
-
50
-
51
-
52
-
53
-
54
-
55
-
56
-
57
-
58
-
59
-
60
-
61
-
62
-
63
-
64
-
65
-
66
-
67
-
68
-
69
-
70
-
71
-
72
-
73
-
74
-
75
-
76
-
77
-
78
-
79
-
80
-
81
-
82
-
83
-
84
-
85
-
86
-
87
-
88
-
89
-
90
-
91
-
92
-
93
-
94
-
95
-
96
-
97
-
98
-
99
-
100
-
101
-
102
-
103
-
104
-
105
-
106
-
107
-
108
-
109
-
110
-
111
-
112
-
113
-
114
-
115
-
116
-
117
-
118
-
119
-
120
-
121
-
122
-
123
-
124
-
125
-
126
-
127
-
128
-
129
-
130
-
131
-
132
-
133
-
134
-
135
-
136
 |
 |