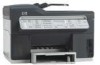
HP L7580 Setup Guide - Page 31
English, Philippines, Poland, Portugal, Russia, Saudi Arabia, Singapore, Spain, Taiwan, Thailand, USA - service manual
 |
UPC - 882780620650
View all HP L7580 manuals
Add to My Manuals
Save this manual to your list of manuals |
Page 31 highlights
English The device can send faxes, but If you are not using a distinctive ring service, check to make sure that the Distinctive Ring feature cannot receive faxes on the device is set to All Rings. If Auto Answer is set to Off, or you have a voice mail service at the same phone number you use for fax calls, you can only receive faxes manually. If you have a computer dial-up modem on the same phone line with the device, check to make sure that the software that came with your modem is not set to receive faxes automatically. If you have an answering machine on the same phone line with the device: • Check that the answering machine is working properly. • Make sure your setup looks like the second example in Table 3-1 on page 11. • Make sure the device is set to receive faxes automatically. • Make sure the Rings to Answer setting is set to a greater number of rings than the answering machine. • Disconnect the answering machine and then try receiving a fax. • Record a message that is approximately 10 seconds in duration. Speak slowly and at a low volume when recording your message. Leave at least 5 seconds of silence at the end of the voice message. Other equipment that uses the same phone line might be causing the test to fail. You can disconnect all the other devices and run the test again. If the Dial Tone Detection Test passes, then one or more of the other equipment is causing problems. Try adding them back one at a time and rerunning the test each time until you identify which piece of equipment is causing the problem. The device cannot send faxes, The device might be dialing too fast or too soon. For example, if you need to access an outside but can receive faxes line by dialing "9," try inserting pauses as follows: 9-XXX-XXXX (where XXX-XXXX is the fax number you are sending to). To enter a pause press Redial/Pause, or press the Space (#) button repeatedly, until a dash (-) appears on the display. The display always shows Phone Off Hook You are using the wrong phone cord. See the first two issues under "The device is having problems sending and receiving faxes" on page 26. The device is having problems This possible solution applies only in the countries/regions that receive a 2-wire phone cord in sending a manual fax the box with the device, including: Argentina, Australia, Brazil, Canada, Chile, China, Colombia, Greece, India, Indonesia, Ireland, Japan, Korea, Latin America, Malaysia, Mexico, Philippines, Poland, Portugal, Russia, Saudi Arabia, Singapore, Spain, Taiwan, Thailand, USA, Venezuela, and Vietnam. Make sure your setup looks like the first example in Table 3-1 on page 11. If you are sending a fax manually from your phone that is connected directly to the device, you must use the keypad on the telephone to send the fax. Fax tones are recorded on my See the fourth issue under "The device can send faxes, but cannot receive faxes" on page 27. answering machine The phone cord that came with If the phone cord that came with the device is not long enough, you can use a coupler to extend my device is not long enough the length. You can purchase a coupler at an electronics store that carries phone accessories. You also need another phone cord, which can be a standard phone cord that you might already have in your home or office. 1. Using the phone cord supplied in the box with the device, connect one end to the coupler, and then connect the other end to the port labeled 1-LINE on the back of the device. 2. Connect a second phone cord to the open port on the coupler and to the telephone wall jack. Solving fax problems (optional) 27
-
 1
1 -
2
-
3
-
4
-
5
-
6
-
7
-
8
-
9
-
10
-
11
-
12
-
13
-
14
-
15
-
16
-
17
-
18
-
19
-
20
-
21
-
22
-
23
-
24
-
25
-
 26
26 -
 27
27 -
 28
28 -
 29
29 -
 30
30 -
 31
31 -
 32
32 -
 33
33 -
 34
34 -
 35
35 -
 36
36 -
37
-
38
-
39
-
40
-
41
-
42
-
43
-
44
-
45
-
46
-
47
-
48
-
49
-
50
-
51
-
52
-
53
-
54
-
55
-
56
-
57
-
58
-
59
-
60
-
61
-
62
-
63
-
64
-
65
-
66
-
67
-
68
-
69
-
70
-
71
-
72
-
73
-
74
-
75
-
76
-
77
-
78
-
79
-
80
-
81
-
82
-
83
-
84
-
85
-
86
-
87
-
88
-
89
-
90
-
91
-
92
-
93
-
94
-
95
-
96
-
97
-
98
-
99
-
100
-
101
-
102
-
103
-
104
-
105
-
106
-
107
-
108
-
109
-
110
-
111
-
112
-
113
-
114
-
115
-
116
-
117
-
118
-
119
-
120
-
121
-
122
-
123
-
124
-
125
-
126
-
127
-
128
-
129
-
130
-
131
-
132
-
133
-
134
-
135
-
136
 |
 |