HP L7580 Setup Guide - Page 6
Set up the device, Before you begin - ink
 |
UPC - 882780620650
View all HP L7580 manuals
Add to My Manuals
Save this manual to your list of manuals |
Page 6 highlights
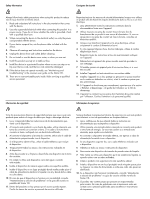
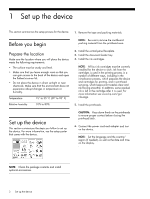
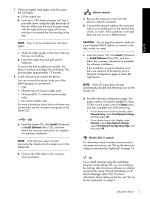
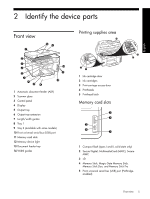
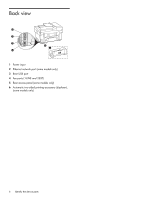
1 Set up the device This section summarizes the setup process for the device. 1. Remove the tape and packing materials. Before you begin Prepare the location Make sure the location where you will place the device meets the following requirements. • The surface must be sturdy and level. • Make sure that you leave enough room so that you can gain access to the back of the device and open the flatbed scanner lid. • Do not place the device in direct sunlight or near chemicals. Make sure that the environment does not experience abrupt changes in temperature or humidity. Temperature 15° to 35° C (59° to 95° F) Relative humidity 10% to 80% NOTE: Be sure to remove the cardboard packing material from the printhead area. 2. Install the control-panel faceplate. 3. Install the document feeder tray. 4. Install the ink cartridges. NOTE: All four ink cartridges must be correctly installed for the device to work. Ink from the cartridges is used in the printing process in a number of different ways, including in the initialization process, which prepares the device and cartridges for printing, and in printhead servicing, which keeps print nozzles clear and ink flowing smoothly. In addition, some residual ink is left in the cartridge after it is used. For more information see www.hp.com/go/ inkusage. 5. Install the printheads. Set up the device This section summarizes the steps you follow to set up the device. For more information, see the setup poster that came with the device. CAUTION: Press down firmly on the printheads to ensure proper contact before closing the printhead latch. 6. Connect the power cord and adapter and turn on the device. NOTE: Set the language and the country/ region (if needed), as well as the date and time, on the display. NOTE: Check the package contents and install optional accessories. 2 Set up the device
-
 1
1 -
 2
2 -
 3
3 -
 4
4 -
 5
5 -
 6
6 -
 7
7 -
 8
8 -
 9
9 -
 10
10 -
 11
11 -
 12
12 -
13
-
14
-
15
-
16
-
17
-
18
-
19
-
20
-
21
-
22
-
23
-
24
-
25
-
26
-
27
-
28
-
29
-
30
-
31
-
32
-
33
-
34
-
35
-
36
-
37
-
38
-
39
-
40
-
41
-
42
-
43
-
44
-
45
-
46
-
47
-
48
-
49
-
50
-
51
-
52
-
53
-
54
-
55
-
56
-
57
-
58
-
59
-
60
-
61
-
62
-
63
-
64
-
65
-
66
-
67
-
68
-
69
-
70
-
71
-
72
-
73
-
74
-
75
-
76
-
77
-
78
-
79
-
80
-
81
-
82
-
83
-
84
-
85
-
86
-
87
-
88
-
89
-
90
-
91
-
92
-
93
-
94
-
95
-
96
-
97
-
98
-
99
-
100
-
101
-
102
-
103
-
104
-
105
-
106
-
107
-
108
-
109
-
110
-
111
-
112
-
113
-
114
-
115
-
116
-
117
-
118
-
119
-
120
-
121
-
122
-
123
-
124
-
125
-
126
-
127
-
128
-
129
-
130
-
131
-
132
-
133
-
134
-
135
-
136
 |
 |