HP LaserJet Enterprise MFP M630 User Guide 1 - Page 73
Set up personal and network contacts, Open the HP Embedded Web Server EWS
 |
View all HP LaserJet Enterprise MFP M630 manuals
Add to My Manuals
Save this manual to your list of manuals |
Page 73 highlights
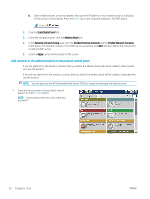
10. On the Outgoing E-mail Servers (SMTP) dialog, do one of the following: ● Select I know my SMTP server address or host name, enter the information, and then click Next. The Outgoing E-mail Servers (SMTP) dialog refreshes. ● Select Search network for outgoing e-mail server, click Next, select the appropriate server from the Finding SMTP servers list, and then click Next. The Outgoing E-mail Servers (SMTP) dialog refreshes. NOTE: This option finds outgoing SMTP servers inside your firewall only. 11. On the Set the basic information necessary to connect to the server dialog, set the options to use. Click Next. NOTE: The port number is set to 25 by default. You do not need to change it. NOTE: If you are using Google™ Gmail for email service, select the Enable SMTP SSL Protocol check box. If you are using Microsoft® Outlook with Google™ Gmail email service, also follow the instructions in Configure Microsoft Outlook with Google Gmail on page 64. 12. On the Server Authentication Requirements dialog, select whether the email server requires authentication. Click Next. 13. On the Server Usage dialog, select the appropriate usage options. Click Next. 14. On the Summary and Test dialog, enter a valid emial address in the Send a test e-mail to field, and then click Test. 15. Review the Summary dialog and click Finish. 16. On the E-mail Setup dialog, click Apply to complete the setup. Set up personal and network contacts You can send email to a list of recipients by using the address book. Depending on how the product is configured, you might have one or more of the following address book viewing options. ● All Contacts: Lists all the contacts that are available to you. ● Personal Contacts: Lists all the contacts that are associated with your user name. These contacts are not visible to other people who use the product. NOTE: You must be signed in to the product to see the Personal Contacts list. ● Local Contacts: Lists all the contacts that are stored in the product memory. These contacts are visible to all people who use the product. To use this feature, first use the HP Embedded Web Server (EWS) to enable the personal contacts and network contacts address books. Ask the system administrator for assistance with the following steps: 1. Open the HP Embedded Web Server (EWS): a. From the Home screen on the product control panel, touch the Network button to display the IP address or host name. ENWW Set up Scan to Email 61
-
 1
1 -
2
-
3
-
4
-
5
-
6
-
7
-
8
-
9
-
10
-
11
-
12
-
13
-
14
-
15
-
16
-
17
-
18
-
19
-
20
-
21
-
22
-
23
-
24
-
25
-
26
-
27
-
28
-
29
-
30
-
31
-
32
-
33
-
34
-
35
-
36
-
37
-
38
-
39
-
40
-
41
-
42
-
43
-
44
-
45
-
46
-
47
-
48
-
49
-
50
-
51
-
52
-
53
-
54
-
55
-
56
-
57
-
58
-
59
-
60
-
61
-
62
-
63
-
64
-
65
-
66
-
67
-
 68
68 -
 69
69 -
 70
70 -
 71
71 -
 72
72 -
 73
73 -
 74
74 -
 75
75 -
 76
76 -
 77
77 -
 78
78 -
79
-
80
-
81
-
82
-
83
-
84
-
85
-
86
-
87
-
88
-
89
-
90
-
91
-
92
-
93
-
94
-
95
-
96
-
97
-
98
-
99
-
100
-
101
-
102
-
103
-
104
-
105
-
106
-
107
-
108
-
109
-
110
-
111
-
112
-
113
-
114
-
115
-
116
-
117
-
118
-
119
-
120
-
121
-
122
-
123
-
124
-
125
-
126
-
127
-
128
-
129
-
130
-
131
-
132
-
133
-
134
-
135
-
136
-
137
-
138
-
139
-
140
-
141
-
142
-
143
-
144
-
145
-
146
-
147
-
148
-
149
-
150
-
151
-
152
-
153
-
154
-
155
-
156
-
157
-
158
-
159
-
160
-
161
-
162
-
163
-
164
-
165
-
166
-
167
-
168
-
169
-
170
-
171
-
172
-
173
-
174
-
175
-
176
-
177
-
178
-
179
-
180
-
181
-
182
-
183
-
184
-
185
-
186
-
187
-
188
-
189
-
190
-
191
-
192
-
193
-
194
-
195
-
196
-
197
-
198
-
199
-
200
-
201
-
202
-
203
-
204
-
205
-
206
-
207
-
208
-
209
-
210
-
211
-
212
-
213
-
214
-
215
-
216
 |
 |
