HP Officejet 4500 Getting Started Guide - Page 14
Windows, Print, Properties, Options, Printer Setup, Preferences, Send Fax, Mac OS X, Fax Recipients - not printing
 |
View all HP Officejet 4500 manuals
Add to My Manuals
Save this manual to your list of manuals |
Page 14 highlights
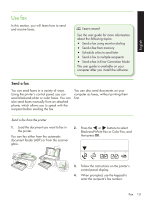
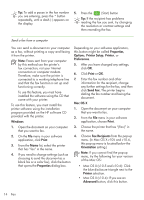
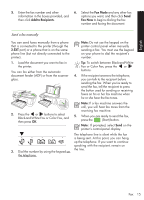
Tip: To add a pause in the fax number you are entering, press the * button repeatedly, until a dash (-) appears on the display. 5. Press the (Start) button Tip: If the recipient has problems reading the fax you sent, try changing the resolution or contrast settings and then resending the fax. Send a fax from a computer You can send a document on your computer as a fax, without printing a copy and faxing it from the printer. Note: Faxes sent from your computer by this method use the printer's fax connection, not your Internet connection or computer modem. Therefore, make sure the printer is connected to a working telephone line and that the fax function is set up and functioning correctly. To use this feature, you must have installed the software using the CD that came with your printer. To use this feature, you must install the printer software using the installation program provided on the HP software CD provided with the printer. Windows 1. Open the document on your computer that you want to fax. 2. On the File menu in your software application, click Print. 3. From the Name list, select the printer that has "fax" in the name. 4. If you need to change settings (such as choosing to send the document as a black fax or a color fax), click the button that opens the Properties dialog box. Depending on your software application, this button might be called Properties, Options, Printer Setup, Printer, or Preferences. 5. After you have changed any settings, click OK. 6. Click Print or OK. 7. Enter the fax number and other information for the recipient, change any further settings for the fax, and then click Send Fax. The printer begins dialing the fax number and faxing the document. Mac OS X 1. Open the document on your computer that you want to fax. 2. From the File menu in your software application, choose Print. 3. Choose the printer that has "(Fax)" in the name. 4. Choose Fax Recipients from the pop-up menu. (In Mac OS X v105 and v10.6, this pop-up menu is located below the Orientation setting.) Note: If you cannot find the pop-up menu, try the following for your version of the Mac OS: • Mac OS X (v10.5 and v10.6): Click the blue disclosure triangle next to the Printer selection. • Mac OS X (v10.4): If you see an Advanced button, click this button. 14 Fax
-
 1
1 -
2
-
3
-
4
-
5
-
6
-
7
-
8
-
 9
9 -
 10
10 -
 11
11 -
 12
12 -
 13
13 -
 14
14 -
 15
15 -
 16
16 -
 17
17 -
 18
18 -
 19
19 -
20
-
21
-
22
-
23
-
24
-
25
-
26
-
27
-
28
-
29
-
30
-
31
-
32
-
33
-
34
-
35
-
36
-
37
-
38
-
39
-
40
-
41
-
42
-
43
-
44
-
45
-
46
-
47
-
48
-
49
-
50
-
51
-
52
-
53
-
54
-
55
-
56
-
57
-
58
-
59
-
60
-
61
-
62
-
63
-
64
-
65
-
66
-
67
-
68
-
69
-
70
-
71
-
72
-
73
-
74
-
75
-
76
-
77
-
78
-
79
-
80
-
81
-
82
-
83
-
84
-
85
-
86
-
87
-
88
-
89
-
90
-
91
-
92
-
93
-
94
-
95
-
96
-
97
-
98
-
99
-
100
-
101
-
102
-
103
-
104
-
105
-
106
-
107
-
108
-
109
-
110
-
111
-
112
-
113
-
114
-
115
-
116
-
117
-
118
-
119
-
120
-
121
-
122
-
123
-
124
-
125
-
126
 |
 |
