HP Officejet Pro L7400 User Guide - Page 61
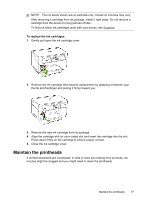
Maintain the printheads, Press down firmly on the cartridge to ensure proper contact.
 |
View all HP Officejet Pro L7400 manuals
Add to My Manuals
Save this manual to your list of manuals |
Page 61 highlights
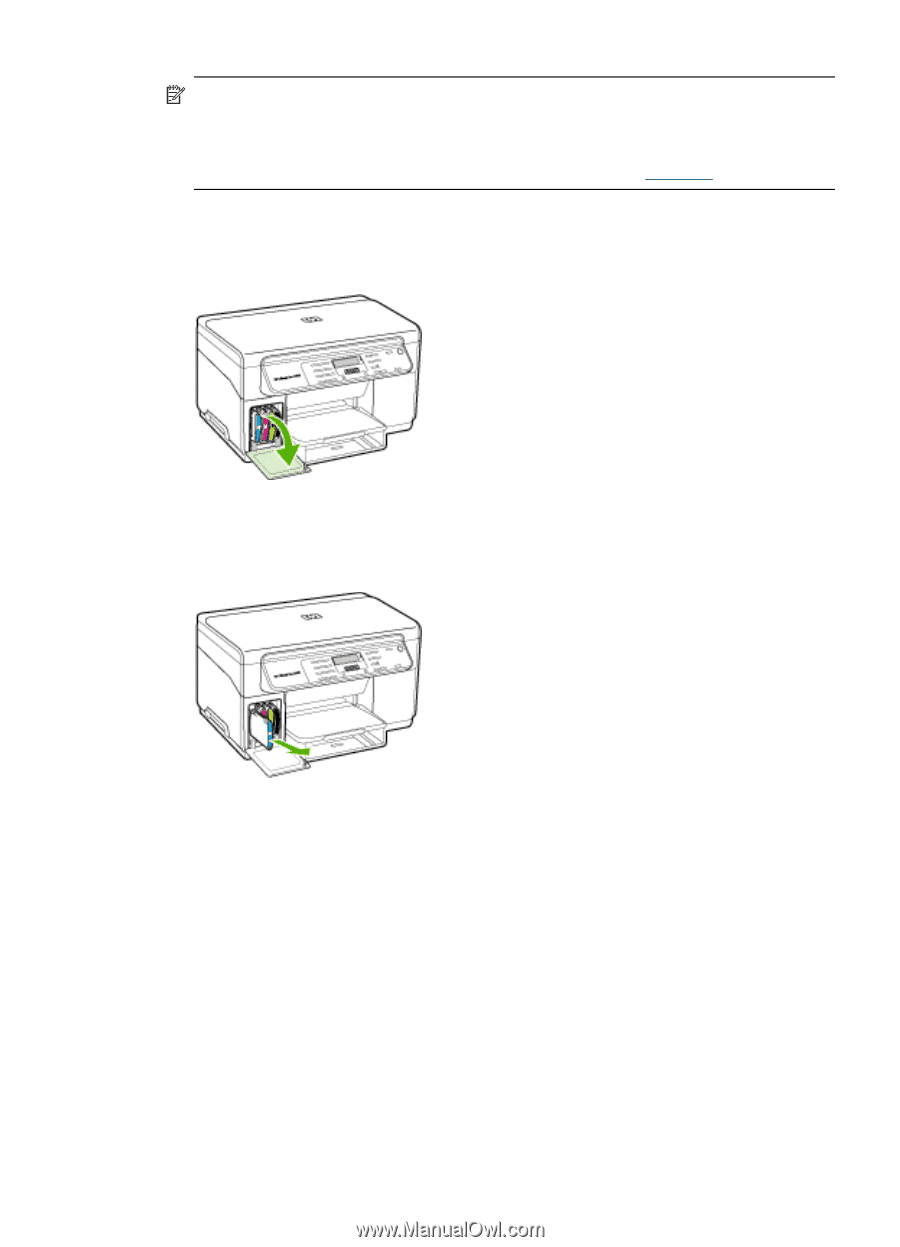
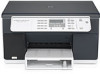
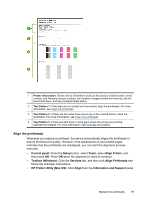
NOTE: The ink levels shown are an estimate only. Actual ink volumes may vary. After removing a cartridge from its package, install it right away. Do not remove a cartridge from the device for long periods of time. To find out which ink cartridges work with your device, see Supplies. To replace the ink cartridges 1. Gently pull open the ink cartridge cover. 2. Remove the ink cartridge that requires replacement by grasping it between your thumb and forefinger and pulling it firmly toward you. 3. Remove the new ink cartridge from its package. 4. Align the cartridge with its color-coded slot and insert the cartridge into the slot. Press down firmly on the cartridge to ensure proper contact. 5. Close the ink cartridge cover. Maintain the printheads If printed characters are incomplete, or dots or lines are missing from printouts, ink nozzles might be clogged and you might need to clean the printheads. Maintain the printheads 57
-
 1
1 -
2
-
3
-
4
-
5
-
6
-
7
-
8
-
9
-
10
-
11
-
12
-
13
-
14
-
15
-
16
-
17
-
18
-
19
-
20
-
21
-
22
-
23
-
24
-
25
-
26
-
27
-
28
-
29
-
30
-
31
-
32
-
33
-
34
-
35
-
36
-
37
-
38
-
39
-
40
-
41
-
42
-
43
-
44
-
45
-
46
-
47
-
48
-
49
-
50
-
51
-
52
-
53
-
54
-
55
-
 56
56 -
 57
57 -
 58
58 -
 59
59 -
 60
60 -
 61
61 -
 62
62 -
 63
63 -
 64
64 -
 65
65 -
 66
66 -
67
-
68
-
69
-
70
-
71
-
72
-
73
-
74
-
75
-
76
-
77
-
78
-
79
-
80
-
81
-
82
-
83
-
84
-
85
-
86
-
87
-
88
-
89
-
90
-
91
-
92
-
93
-
94
-
95
-
96
-
97
-
98
-
99
-
100
-
101
-
102
-
103
-
104
-
105
-
106
-
107
-
108
-
109
-
110
-
111
-
112
-
113
-
114
-
115
-
116
-
117
-
118
-
119
-
120
 |
 |