HP Pro SFF 280 G9 Desktop PC Maintenance and Service Guide - Page 45
System board connections, Computer Setup.
 |
View all HP Pro SFF 280 G9 Desktop PC manuals
Add to My Manuals
Save this manual to your list of manuals |
Page 45 highlights
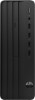
● Solid-state drive (see Solid-state drive on page 29) ● Processor (see Processor on page 34) Remove the system board: 1. Disconnect all cables from the system board, and make note of their locations for installation. 2. Remove the seven Torx screws (1) that secure the system board to the computer. 3. Lift the front of the board up, and then pull it toward the front and out of computer (2). NOTE: Computer appearance might vary. To install the system board, reverse the removal procedures. NOTE: When replacing the system board, you must change the chassis serial number in the BIOS. When replacing the system board, you must reprogram the SMBIOS information about the affected computer. Failure to reprogram the board can result in eventual failure, such as an activation failure (requiring reactivation of the computer) or a system recovery failure. You can update the SMBIOS information in Computer Setup. System board connections Use this illustration and table to determine system board connection locations. 38 Chapter 4 Removal and replacement procedures
-
 1
1 -
2
-
3
-
4
-
5
-
6
-
7
-
8
-
9
-
10
-
11
-
12
-
13
-
14
-
15
-
16
-
17
-
18
-
19
-
20
-
21
-
22
-
23
-
24
-
25
-
26
-
27
-
28
-
29
-
30
-
31
-
32
-
33
-
34
-
35
-
36
-
37
-
38
-
39
-
 40
40 -
 41
41 -
 42
42 -
 43
43 -
 44
44 -
 45
45 -
 46
46 -
 47
47 -
 48
48 -
 49
49 -
 50
50 -
51
-
52
-
53
-
54
-
55
-
56
-
57
-
58
-
59
-
60
-
61
-
62
-
63
-
64
-
65
-
66
-
67
-
68
-
69
-
70
-
71
-
72
-
73
-
74
-
75
-
76
-
77
-
78
-
79
-
80
-
81
-
82
-
83
-
84
-
85
-
86
-
87
-
88
-
89
-
90
-
91
-
92
-
93
-
94
-
95
-
96
-
97
-
98
-
99
-
100
-
101
-
102
-
103
-
104
-
105
-
106
-
107
-
108
-
109
-
110
-
111
-
112
-
113
-
114
-
115
-
116
 |
 |
