HP Tc4200 HP Compaq tc4200 Tablet PC - Maintenance and Service Guide - Page 62
Recovering the BIOS, My Computer - recovery disk
 |
View all HP Tc4200 manuals
Add to My Manuals
Save this manual to your list of manuals |
Page 62 highlights
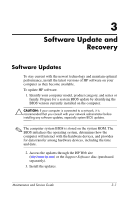
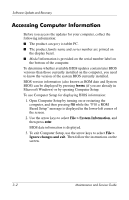
Software Update and Recovery 2. In the left pane of the Windows Explorer window: a. Click My Computer and then your hard drive designation. The hard drive designation is typically Local Disk (C:). b. Using the hard drive path you recorded earlier, open the folder on your hard drive that contains the update. 3. Double-click the file with an .exe extension (for example, filename.exe). The BIOS installation begins. 4. Complete the installation by following the instructions on the screen. ✎ After a message on the screen reports a successful installation, you may delete the downloaded file from your hard drive. Recovering the BIOS ✎ The BIOS recovery procedure requires a USB diskette drive and a formatted diskette. The BIOS can be recovered if the flash memory is corrupted. Flash memory corruption can occur if the notebook powers down while the BIOS is being updated. When the notebook is turned on, the boot block portion of the flash memory performs an integrity check on the rest of the BIOS image and enters recovery mode if the image is corrupt. BIOS recovery can be forced on a non-functioning notebook by turning on the notebook while pressing and holding the Windows logo key + B on the nonfunctioning notebook keyboard until the caps lock light blinks. Maintenance and Service Guide 3-5
-
 1
1 -
2
-
3
-
4
-
5
-
6
-
7
-
8
-
9
-
10
-
11
-
12
-
13
-
14
-
15
-
16
-
17
-
18
-
19
-
20
-
21
-
22
-
23
-
24
-
25
-
26
-
27
-
28
-
29
-
30
-
31
-
32
-
33
-
34
-
35
-
36
-
37
-
38
-
39
-
40
-
41
-
42
-
43
-
44
-
45
-
46
-
47
-
48
-
49
-
50
-
51
-
52
-
53
-
54
-
55
-
56
-
 57
57 -
 58
58 -
 59
59 -
 60
60 -
 61
61 -
 62
62 -
 63
63 -
 64
64 -
 65
65 -
 66
66 -
 67
67 -
68
-
69
-
70
-
71
-
72
-
73
-
74
-
75
-
76
-
77
-
78
-
79
-
80
-
81
-
82
-
83
-
84
-
85
-
86
-
87
-
88
-
89
-
90
-
91
-
92
-
93
-
94
-
95
-
96
-
97
-
98
-
99
-
100
-
101
-
102
-
103
-
104
-
105
-
106
-
107
-
108
-
109
-
110
-
111
-
112
-
113
-
114
-
115
-
116
-
117
-
118
-
119
-
120
-
121
-
122
-
123
-
124
-
125
-
126
-
127
-
128
-
129
-
130
-
131
-
132
-
133
-
134
-
135
-
136
-
137
-
138
-
139
-
140
-
141
-
142
-
143
-
144
-
145
-
146
-
147
-
148
-
149
-
150
-
151
-
152
-
153
-
154
-
155
-
156
-
157
-
158
-
159
-
160
-
161
-
162
-
163
-
164
-
165
-
166
-
167
-
168
-
169
-
170
-
171
-
172
-
173
-
174
-
175
-
176
-
177
-
178
-
179
-
180
-
181
-
182
-
183
-
184
-
185
-
186
-
187
-
188
-
189
-
190
-
191
-
192
-
193
-
194
-
195
-
196
-
197
-
198
-
199
 |
 |
