HP TouchSmart tx2-1109au HP TouchSmart tx2 Notebook PC - Maintenance and Servi - Page 67
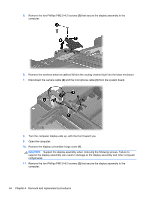
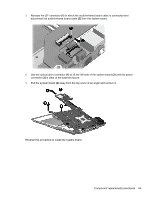
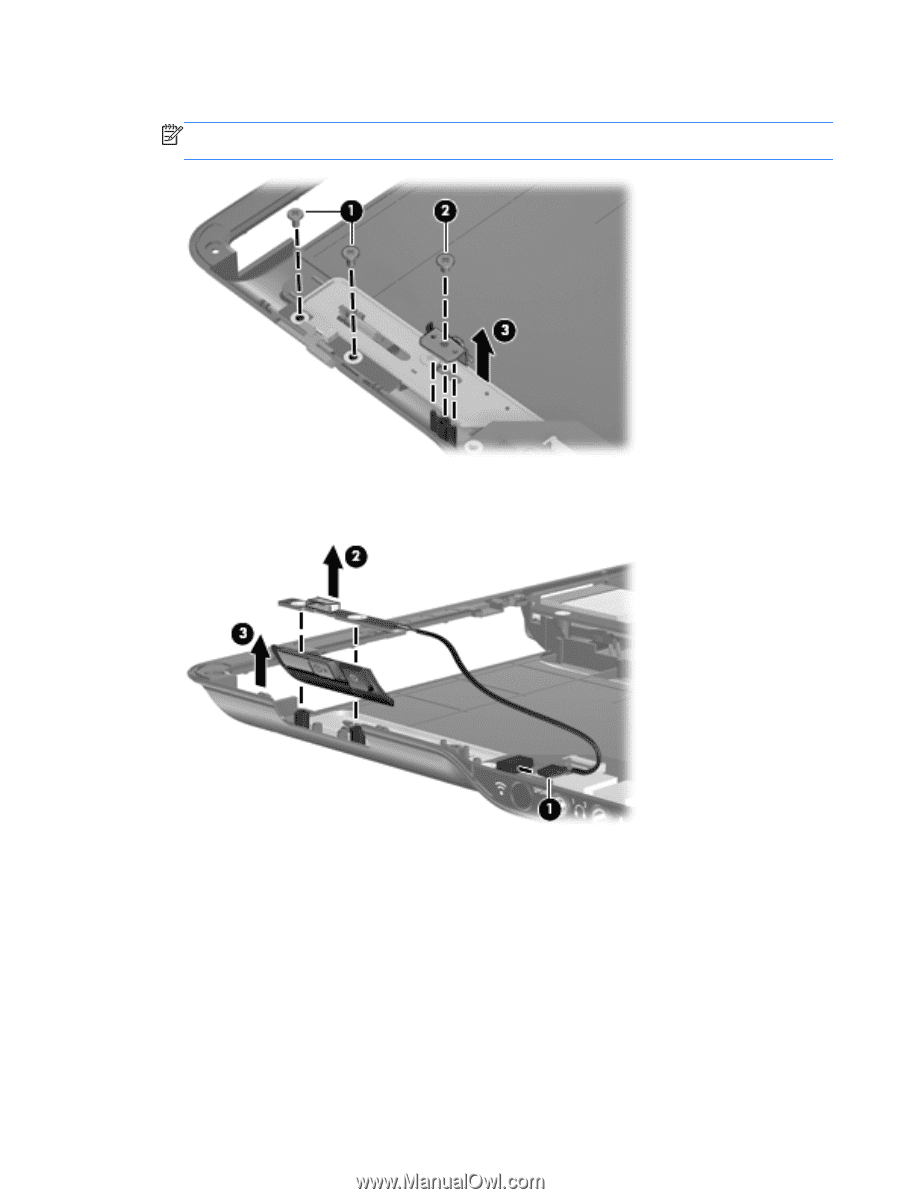
and power switch actuator, from the base enclosure.
 |
View all HP TouchSmart tx2-1109au manuals
Add to My Manuals
Save this manual to your list of manuals |
Page 67 highlights
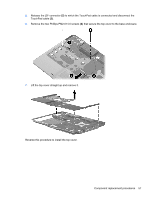
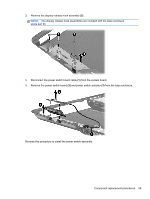
3. Remove the display release hook assembly (3). NOTE: The display release hook assemblies are included with the base enclosure spare part kit. 4. Disconnect the power switch board cable (1) from the system board. 5. Remove the power switch board (2) and power switch actuator (3) from the base enclosure. Reverse this procedure to install the power switch assembly. Component replacement procedures 59
-
 1
1 -
2
-
3
-
4
-
5
-
6
-
7
-
8
-
9
-
10
-
11
-
12
-
13
-
14
-
15
-
16
-
17
-
18
-
19
-
20
-
21
-
22
-
23
-
24
-
25
-
26
-
27
-
28
-
29
-
30
-
31
-
32
-
33
-
34
-
35
-
36
-
37
-
38
-
39
-
40
-
41
-
42
-
43
-
44
-
45
-
46
-
47
-
48
-
49
-
50
-
51
-
52
-
53
-
54
-
55
-
56
-
57
-
58
-
59
-
60
-
61
-
 62
62 -
 63
63 -
 64
64 -
 65
65 -
 66
66 -
 67
67 -
 68
68 -
 69
69 -
 70
70 -
 71
71 -
 72
72 -
73
-
74
-
75
-
76
-
77
-
78
-
79
-
80
-
81
-
82
-
83
-
84
-
85
-
86
-
87
-
88
-
89
-
90
-
91
-
92
-
93
-
94
-
95
-
96
-
97
-
98
-
99
-
100
-
101
-
102
-
103
-
104
-
105
-
106
-
107
-
108
-
109
-
110
-
111
-
112
-
113
-
114
-
115
-
116
-
117
-
118
-
119
-
120
-
121
-
122
-
123
 |
 |
3.
Remove the display release hook assembly
(3)
.
NOTE:
The display release hook assemblies are included with the base enclosure
spare part kit.
4.
Disconnect the power switch board cable
(1)
from the system board.
5.
Remove the power switch board
(2)
and power switch actuator
(3)
from the base enclosure.
Reverse this procedure to install the power switch assembly.
Component replacement procedures
59