Honeywell 3800LR-12 User Manual - Page 152
Replacing the Interface Cable, Troubleshooting
 |
View all Honeywell 3800LR-12 manuals
Add to My Manuals
Save this manual to your list of manuals |
Page 152 highlights
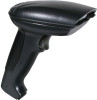
Replacing the Interface Cable The standard interface cable is attached to the scanner with an 10-pin modular connector. When properly seated, the connector is held in the 3800 scanner's handle by a flexible retention tab. The 3900 connector is located in the pod at the end of the 3900 cable. The interface cable is designed to be field replaceable. • •Order replacement cables from Hand Held Products or from an authorized distributor. • •When ordering a replacement cable, specify the cable part number of the original interface cable. To Replace the Interface Cable: 1. Turn the power to the host system OFF. 2. Disconnect the scanner's cable from the terminal or computer. 3. Locate the small hole on the side of the scanner's handle (3800), or on the underside of the connector pod (3900). This is the cable release. 4. Straighten one end of a paper clip. 5. Insert the end of the paper clip into the small hole and press in. This depresses the retention tab, releasing the connector. Pull the connector out while maintaining pressure on the paper clip, then remove the paper clip. 6. Replace with the new cable. Insert the connector into the opening and press firmly. The connector is keyed to go in only one way, and will click into place. Cable Release Troubleshooting The scanner automatically performs self-tests whenever you turn it on. If your scanner is not functioning properly, review the following Troubleshooting Guide to try to isolate the problem. Is the power on? Is the red illumination beam on? If the red illumination beam isn't illuminated, check that: 1. The cable is connected properly. 14 - 2 3800/3900 User's Guide
-
 1
1 -
2
-
3
-
4
-
5
-
6
-
7
-
8
-
9
-
10
-
11
-
12
-
13
-
14
-
15
-
16
-
17
-
18
-
19
-
20
-
21
-
22
-
23
-
24
-
25
-
26
-
27
-
28
-
29
-
30
-
31
-
32
-
33
-
34
-
35
-
36
-
37
-
38
-
39
-
40
-
41
-
42
-
43
-
44
-
45
-
46
-
47
-
48
-
49
-
50
-
51
-
52
-
53
-
54
-
55
-
56
-
57
-
58
-
59
-
60
-
61
-
62
-
63
-
64
-
65
-
66
-
67
-
68
-
69
-
70
-
71
-
72
-
73
-
74
-
75
-
76
-
77
-
78
-
79
-
80
-
81
-
82
-
83
-
84
-
85
-
86
-
87
-
88
-
89
-
90
-
91
-
92
-
93
-
94
-
95
-
96
-
97
-
98
-
99
-
100
-
101
-
102
-
103
-
104
-
105
-
106
-
107
-
108
-
109
-
110
-
111
-
112
-
113
-
114
-
115
-
116
-
117
-
118
-
119
-
120
-
121
-
122
-
123
-
124
-
125
-
126
-
127
-
128
-
129
-
130
-
131
-
132
-
133
-
134
-
135
-
136
-
137
-
138
-
139
-
140
-
141
-
142
-
143
-
144
-
145
-
146
-
 147
147 -
 148
148 -
 149
149 -
 150
150 -
 151
151 -
 152
152 -
 153
153 -
 154
154 -
 155
155 -
 156
156 -
 157
157 -
158
-
159
-
160
-
161
-
162
-
163
-
164
-
165
-
166
-
167
-
168
 |
 |
