JVC DLA-G20U DLA-G20U User instruction manual (2.6MB)
JVC DLA-G20U - D-ila Projector Manual
 |
View all JVC DLA-G20U manuals
Add to My Manuals
Save this manual to your list of manuals |
JVC DLA-G20U manual content summary:
- JVC DLA-G20U | DLA-G20U User instruction manual (2.6MB) - Page 1
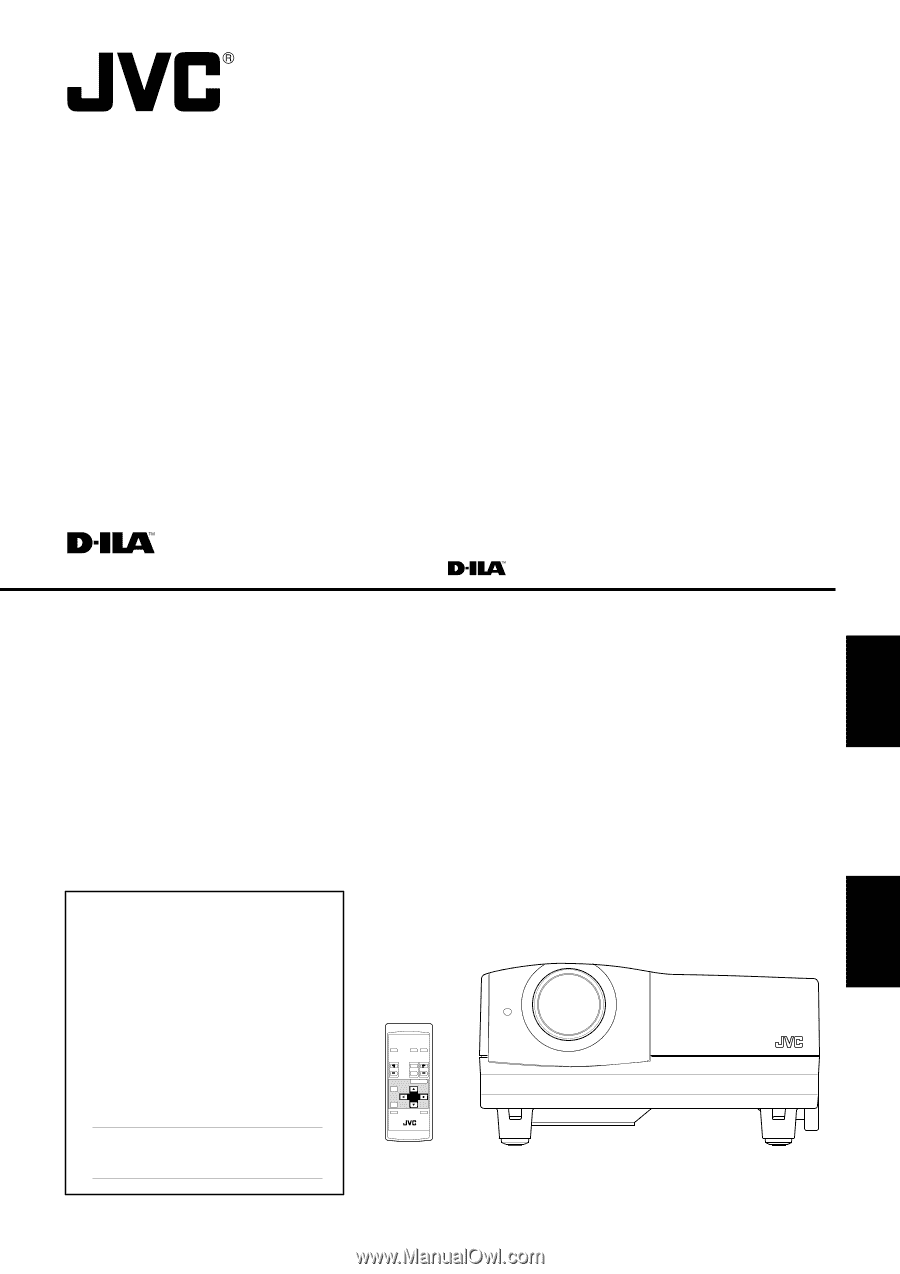
PROJECTOR MANUEL D'INSTRUCTIONS : PROJECTEUR DLA-G20U INSTRUCTIONS ENGLISH FRANÇAIS For customer Use: Enter below the Serial No. information. Model No. No de modèle Serial No. No de série DLA-G20U OPERATE COMPUTER VIDEO VOL. PAGE BACK T ZOOM W FOCUS MENU/ENTER PRESET QUICK ALIGN. - JVC DLA-G20U | DLA-G20U User instruction manual (2.6MB) - Page 2
ENGLISH INSTRUCTIONS PROJECTOR DLA-G20U 1 - JVC DLA-G20U | DLA-G20U User instruction manual (2.6MB) - Page 3
the safeguards incorporated into this product, observe the following basic rules for its installation, use and service. Please read these "Important Safeguards" carefully before use. - All the safety and operating instructions should be read before the product is operated. - The safety and operating - JVC DLA-G20U | DLA-G20U User instruction manual (2.6MB) - Page 4
unit) of this projector. If you drop or impart a shock to the lamp, or discard it as is, there is the possibility of explosion, leading to personal injury. Use special care when handling the lamp. For any unclear points, consult your product dealer. - Use only the accessory cord designed for this - JVC DLA-G20U | DLA-G20U User instruction manual (2.6MB) - Page 5
to Various Devices 19 Signals that Can Be Input to the Projector .......... 19 Connecting to Video Devices 20 Connecting to Hi-Vision -Source Lamp ......... 61 Resetting the Lamp Use Time 63 Cleaning and Replacing the Filter ......... 64 Troubleshooting 65 Specifications 67 * This manual is - JVC DLA-G20U | DLA-G20U User instruction manual (2.6MB) - Page 6
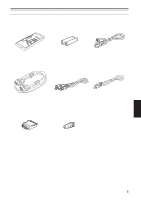
Accessories The following accessories are included with this projector. Check for them; if any item is missing, please contact your dealer. Remote control unit (RM-M10G) AAA/R03-size dry cell battery (×2) (for checking - JVC DLA-G20U | DLA-G20U User instruction manual (2.6MB) - Page 7
lamp is on or the cooling fan is operating. This could cause personal injury. How to use the carrying handle 6 Adjustable foot (for horizontal angle adjustment) By extending the feet, the projector fitted on to prevent the lens becoming dirty when the projector is not used. q Remote sensor When - JVC DLA-G20U | DLA-G20U User instruction manual (2.6MB) - Page 8
Left-hand side w ALQIGUNICK -2 + 3 SETTINGCOMPUTER VIDEEMOERGENCY TEMP LAMP STAND BY w Control panel For details, refer to "Control at the shortest position when shipped from the factory.Turn the foot to make the projector level. Adjustment can be made in the range of + 1.5° and - 1.5° from - JVC DLA-G20U | DLA-G20U User instruction manual (2.6MB) - Page 9
or malfunction. y Opening for replacing the light-source lamp For replacing the light-source lamp, refer to "Replacing the Light-Source Lamp" on page 61. u Fixing foot i Position selecting screw for ceiling mounting When using the projector in an upside-down, ceilingmounted position (inverted top - JVC DLA-G20U | DLA-G20U User instruction manual (2.6MB) - Page 10
indicator ON : After the light-source lamp has been used for 2 more than approx. 900 hours. Blinking : Replace the lamp. Refer to "Replacing the Light- 3 Source Lamp" on page 61. 4 5 TEMP indicator ON: The temperature inside the projector has abnormally 5 risen. 6 Note 7 • While the - JVC DLA-G20U | DLA-G20U User instruction manual (2.6MB) - Page 11
BY LAMP TEMP EMERGENCY ¢VIDEO 1 p QUICK ALIGN. button While a menu screen is shown, use this Use this button to select a device such as a video deck connected to the AV IN terminal of the projector POS. manually (see pages 32, 38 and 39). Y/C VIDEO YPBPR 8 COMPUTER button Use this button - JVC DLA-G20U | DLA-G20U User instruction manual (2.6MB) - Page 12
from both L and R. 5 AUDIO OUT (audio output) terminal (stereo mini jack) Of input signals inputted to the projector, the audio signal of the device being projected is output. Volume should be adjusted using the VOL. (+/-) buttons on the remote control or VOLUME on the setting menu. When a cable is - JVC DLA-G20U | DLA-G20U User instruction manual (2.6MB) - Page 13
is composite sync (Cs) or G on sync signal. In that case, use separate sync signals for vertical sync (V) and horizontal sync (H). p AUDIO input to COMPUTER -2 is selected, the audio signal input is reproduced by the projector's speakers. Also, signals can be output from the AUDIO OUT (audio output - JVC DLA-G20U | DLA-G20U User instruction manual (2.6MB) - Page 14
ZOOM (T/W) button Use these buttons to increase or decrease the screen size. (The projector's projection lens is an electrically driven zoom lens of about . and V. POS. manually (see pages 32, 38 and 39). p PRESET button While making adjustment on the main or setting menu, use this button to reset - JVC DLA-G20U | DLA-G20U User instruction manual (2.6MB) - Page 15
skin could become rough. • Do not put batteries into fire or try to recharge them. • Batteries run for six months to one year in normal use. But the batteries supplied are for confirming operation and may not run that long. When the remote control starts failing to work properly, replace the - JVC DLA-G20U | DLA-G20U User instruction manual (2.6MB) - Page 16
placed on its side. Avoid using the projector placed on its side. This could cause a malfunction. • Use the projector within the installed angle. Avoid using the projector inclined ±30° or more right-to-left or left-to-right. This could cause color variation or harm the lamp life. • Do not block the - JVC DLA-G20U | DLA-G20U User instruction manual (2.6MB) - Page 17
with the extended center line of the projector's lens. That way, the lower edge of the picture projected guide and should be used as a reference. • When projecting at the maximum projection distance (20 m/65.6 ft), we recommend that the projector be used with the zoom on the Tele (T). • If sunlight or lamp - JVC DLA-G20U | DLA-G20U User instruction manual (2.6MB) - Page 18
Installing the Projector (Cont.) Relationship between Projection Distances and Projection Screen Sizes s For 4 : 3 aspect ratio screens Projection distance 8.2 ft (2.5 m) 9.84 ft (3.0 m) Projection screen size (diagonal length) Minimum projection - JVC DLA-G20U | DLA-G20U User instruction manual (2.6MB) - Page 19
. To revert to normal desltop setting, turn the "position selecting screw for ceiling mounting" back to the initial position (factoryshipped). [When using the projector in an upside-down, ceiling mounting position (inverted top-to-bottom and right-to-left)] s Turn the "position selecting screw for - JVC DLA-G20U | DLA-G20U User instruction manual (2.6MB) - Page 20
projector and connected devices. * Read the manual which comes with each device thoroughly. Signals that Can Be Input to the Projector The following signals can be input to the projector above may require adjustment depending on the video board used. • When a signal other than listed above is - JVC DLA-G20U | DLA-G20U User instruction manual (2.6MB) - Page 21
to Various Devices (Cont.) Connecting to Video Devices Before connection, be sure to turn off both the projector and video device. • Read the manual which comes with each video device thoroughly. • Use the supplied AV connection cable. An AV connection cable with an S video terminal is not supplied - JVC DLA-G20U | DLA-G20U User instruction manual (2.6MB) - Page 22
be sure to turn off both the projector and other devices to be connected. • Read the manual thoroughly which comes with the device to the REMOTE terminal of the projector. * Obtain connection cables as required. * For details, consult a authorized your dealer or service center. • Desktop type - JVC DLA-G20U | DLA-G20U User instruction manual (2.6MB) - Page 23
Computer Devices Before connection, be sure to turn off both the projector and computer devices. • Read the manual which comes with each device thoroughly. s Connection to an IBM PC or IBM-compatible computer • Use the supplied computer connection cable. Also, prepare cables required for connecting - JVC DLA-G20U | DLA-G20U User instruction manual (2.6MB) - Page 24
to Computer Devices (Cont.) Before connection, be sure to turn off both the projector and computer devices. • Read the manual which comes with each device thoroughly. s Connection to Macintosh • Use the supplied Personal computer connection cable and the supplied conversion adapter for Mac - JVC DLA-G20U | DLA-G20U User instruction manual (2.6MB) - Page 25
be damaged. • Do not insert or pull out the plugs with a wet hand. CAUTION • Since the power requirement of the projector is high, be sure to insert the power plug directly into a wall outlet. s To use the projector • Remove the lens cap. * The lens cap has a string attached and it is fixed to the - JVC DLA-G20U | DLA-G20U User instruction manual (2.6MB) - Page 26
projector is being used or immediately after it has been used. This could cause a malfunction. • Since the projector uses a high-intensity lamp of the light-source lamp is finished (the lamp lights, it takes about 40 seconds for the lamp to go off. To turn the lamp to operate the projector. If it goes - JVC DLA-G20U | DLA-G20U User instruction manual (2.6MB) - Page 27
's buttons STAND BY STAND BY indicator OPERATE indicator LAMP TEMP EMERGENCY VIDEO COMPUTER SETTING +3 QUICK ALIGN -2 OPERATE button 2, 1 1, 2 MAIN POWER switch The following describes the basic procedure for normal use of the projector. 1. Turning on the Power 1 Turn on the MAIN POWER switch - JVC DLA-G20U | DLA-G20U User instruction manual (2.6MB) - Page 28
this projector while operating it; otherwise, the light-source lamp goes off (the EMERGENCY indicator lights up). If the shock turns off the light-source lamp , since this projector has only a single audio input terminal, reconnect audio input in accordance with the AV device to be used. 3. Adjust - JVC DLA-G20U | DLA-G20U User instruction manual (2.6MB) - Page 29
Basic Operations (Cont.) s Remote control unit OPERATE COMPUTER VIDEO VOL. PAGE BACK T ZOOM W FOCUS MENU/ENTER FOCUS (+/-) buttons 4. Adjust focus s Adjust focus with the remote control's FOCUS (+/-) buttons. s To focus on farther points: Press the FOCUS (+) button. s To focus on nearer - JVC DLA-G20U | DLA-G20U User instruction manual (2.6MB) - Page 30
ALIGN. button s Projector's button STAND BY LAMP TEMP EMERGENCY VIDEO using the quick alignment function: Use a bright, still-picture screen. It may not function correctly on a dark or motion-picture screen. If the condition adjusted by using the quick alignment function is not good, manually - JVC DLA-G20U | DLA-G20U User instruction manual (2.6MB) - Page 31
Basic Operations (Cont.) s Projector button STAND BY LAMP TEMP EMERGENCY VIDEO COMPUTER SETTING +3 QUICK ALIGN -2 SETTING 32. • Press the projector's SETTING button. The setting menu is displayed on the screen. Projector SETTING s To display the MAIN menu The main menu is used to adjust or set the - JVC DLA-G20U | DLA-G20U User instruction manual (2.6MB) - Page 32
When no menu is displayed, pressing PAGE BACK button will show the channel now being used on the upper right corner of the screen. Also, the channel can be switched to BACK Note • Before you can operate the projector, channels must be set up beforehand. For details, refer to "Setting up Channels" - JVC DLA-G20U | DLA-G20U User instruction manual (2.6MB) - Page 33
the main menu (pages 35 to 59). • For computer-related inputs, use of the quick alignment function allows automatic adjustment of TRACKING, PHASE, H. POS. and V. POS. (See pages 29, 38 and 39). 1 Press the SETTING button of the projector. • The setting menu is displayed on the screen. 2 Press the - JVC DLA-G20U | DLA-G20U User instruction manual (2.6MB) - Page 34
the length of sleep time. A set sleep time after input signal is depleted, the projector goes into a stand-by state. Sleep time can be selected from 10, 20, be cleared.) LAMP TIME : Indicates the accumulated used hours of the light-source lamp. SOURCE : Normally used in AUTO. If use in AUTO is - JVC DLA-G20U | DLA-G20U User instruction manual (2.6MB) - Page 35
ILA device, the video image is then enlarged to a virtually full screen size of D-ILA sleep time after input signal is depleted, the projector goes into a stand-by state. Sleep time can LAMP TIME : Indicates accumulated used hours of the light-source lamp. SOURCE : Normally used in AUTO. If use - JVC DLA-G20U | DLA-G20U User instruction manual (2.6MB) - Page 36
/ENTER PRESET QUICK ALIGN. Cursor buttons AV MUTING PAGE BACK button For projector's menus, the setting menu and the main menu are available. Here, switch to the source and line which he has set up. If you are using a switcher, you can also specify switcher numbers. For details, see pages 49 to - JVC DLA-G20U | DLA-G20U User instruction manual (2.6MB) - Page 37
W FOCUS MENU/ENTER PRESET QUICK ALIGN. Cursor buttons AV MUTING PAGE BACK button AUTO is set for the color system when the projector is shipped from the factory. Normally, use it in AUTO. If operation in AUTO is unstable such as with color not being shown, set to a dedicated color system in - JVC DLA-G20U | DLA-G20U User instruction manual (2.6MB) - Page 38
DISPLAY SIZE DECODER AUTO(NTSC(480i)) LANGUAGE ENGLISH Language display Italian French Memo About language display English is selected when the projector is shipped from the factory. The languages in the menu display are the following six : (Japanese), ENGLISH, DEUTSCH (German), ESPA - JVC DLA-G20U | DLA-G20U User instruction manual (2.6MB) - Page 39
Operating the Main Menu (Cont.) Adjusting the Pixel Clock s Remote control unit OPERATE COMPUTER VIDEO MENU/ENTER button VOL. PAGE BACK T ZOOM W FOCUS MENU/ENTER PRESET QUICK ALIGN. Cursor buttons AV MUTING PAGE BACK button The pixel clock should be adjusted mainly for computer-related - JVC DLA-G20U | DLA-G20U User instruction manual (2.6MB) - Page 40
Operating the Main Menu (Cont.) Adjusting the Screen Position s Remote control unit OPERATE COMPUTER VIDEO MENU/ENTER button VOL. PAGE BACK T ZOOM W FOCUS MENU/ENTER PRESET QUICK ALIGN. Cursor buttons AV MUTING Adjust the position of the screen if it is displaced. 1 Press the MENU/ENTER - JVC DLA-G20U | DLA-G20U User instruction manual (2.6MB) - Page 41
Operating the Main Menu (Cont.) Adjusting Picture Quality s Remote control unit OPERATE COMPUTER VIDEO MENU/ENTER button VOL. PAGE BACK T ZOOM W FOCUS MENU/ENTER PRESET QUICK ALIGN. Cursor buttons AV MUTING PAGE BACK button Adjust brightness, contrast, etc. so you have the desired screen. - JVC DLA-G20U | DLA-G20U User instruction manual (2.6MB) - Page 42
Operating the Main Menu (Cont.) Adjusting Picture Quality (Cont.) sRemote control unit OPERATE COMPUTER VIDEO MENU/ENTER button VOL. PAGE BACK T ZOOM W FOCUS MENU/ENTER PRESET QUICK ALIGN. Cursor buttons AV MUTING PAGE BACK button sSubmenu items [PICTURE menu] PICTURE (NTSC(480i)) - JVC DLA-G20U | DLA-G20U User instruction manual (2.6MB) - Page 43
Operating the Main Menu (Cont.) Adjusting Picture Quality (Cont.) sRemote control unit OPERATE COMPUTER VIDEO MENU/ENTER button VOL. PAGE BACK T ZOOM W FOCUS MENU/ENTER PRESET QUICK ALIGN. Cursor buttons AV MUTING PAGE BACK button sSubmenu items [PICTURE menu] Adjustment item Button - JVC DLA-G20U | DLA-G20U User instruction manual (2.6MB) - Page 44
Operating the Main Menu (Cont.) Adjusting Sound Quality s Remote control unit OPERATE COMPUTER VIDEO MENU/ENTER button VOL. PAGE BACK T ZOOM W FOCUS MENU/ENTER PRESET QUICK ALIGN. Cursor buttons AV MUTING Adjust the quality (treble/bass) of sound. 1 Press the MENU/ENTER button. • The main - JVC DLA-G20U | DLA-G20U User instruction manual (2.6MB) - Page 45
BOTTOM INV. • CLAMP • RESIZE • BACK COLOR • COLOR TEMPERATURE • ASPECT CHANGE • SLEEP TIME • LAMP TIME Memo About the lamp use time (LAMP TIME) The lamp use time indicates the accumulated used hours of the light-source lamp and cannot be set or adjusted. When you have replaced with a new light - JVC DLA-G20U | DLA-G20U User instruction manual (2.6MB) - Page 46
CLAMP RESIZE BACK COLOR COLOR TEMP. ASPECT CHANGE SLEEP TIME LAMP TIME NO ON OFF OFF BP ON BLUE MIDDLE 4:3 on the sink tip (ST). Normally, the clamp is used at BP. If, with some PCs or workstations, by video image is smaller than that of D-ILA device, projection takes place on a small screen size - JVC DLA-G20U | DLA-G20U User instruction manual (2.6MB) - Page 47
REV. TOP BOTTOM INV. CLAMP RESIZE BACK COLOR COLOR TEMP. ASPECT CHANGE SLEEP TIME LAMP TIME NO ON OFF OFF BP ON BLUE MIDDLE 4:3 30 Min. 10 H. Notes 4 :3 video picture, which is not wide video picture, on the projector's screen using the aspect change function, the upper and lower parts of the video - JVC DLA-G20U | DLA-G20U User instruction manual (2.6MB) - Page 48
deck, etc, the picture may be disturbed or intermitted, depending on the device. • When inputting 480p or 720p-DTV-format signal in COMP 2 input mode, use the dedicated source mode "SDTV(480p)" or "HDTV(720p)". (In AUTO, 480p or 720p signal can not be detected.) 1 Press the MENU/ENTER button. • The - JVC DLA-G20U | DLA-G20U User instruction manual (2.6MB) - Page 49
special video signals that cannot be adjusted in "AUTO" mode or dedicated source mode, using "USER SOURCE SETUP" (see page 58). • When the projector was shipped from the factory, "HD 1035 i _ R" and "HD1035 i _ Y" were already registered. Notes • The selected item is shown in magenta color. Items - JVC DLA-G20U | DLA-G20U User instruction manual (2.6MB) - Page 50
ENGLISH Submenu item [CHANNEL] When you set up channels, you can select a line and multiple sources (up to 30) for each channel. If you are using a switcher and set a switcher numbers, you can also select each channel from the switcher side. Memo • With multiple sources having been set on channels - JVC DLA-G20U | DLA-G20U User instruction manual (2.6MB) - Page 51
The selected item (displayed in text) is shown in magenta color on the screen. • The LINE item set up in this step uses the input terminal selected when you choose a channel, using such as a "direct channel". PAGE BACK button 7 Press the MENU/ENTER button to set (fix). • The display returns to the - JVC DLA-G20U | DLA-G20U User instruction manual (2.6MB) - Page 52
SETUP" menu appears. • The registered user source names are indicated with check marks. • The source set up on the "USER SOURCE SETUP" menu is used for the user source name to be set here. SOURCE USER1 USER2 USER3 USER4 USER5 USER6 USER7 USER8 HD1035i_R HD1035i_Y ENGLISH (User source Setup menu - JVC DLA-G20U | DLA-G20U User instruction manual (2.6MB) - Page 53
Operating the Main Menu (Cont.) Setting Up Channels (Cont.) s Remote control unit OPERATE COMPUTER VIDEO MENU/ENTER button 2. Press the MENU/ENTER button to set. • When the item is set, a check mark is placed next to its user name, which is registered as a "SOURCE". • If you place the cursor on - JVC DLA-G20U | DLA-G20U User instruction manual (2.6MB) - Page 54
are input. • For dedicated source signals (corresponding frequency, etc.) for computer signals, see page 19. Note • If used in combination with a dedicated switcher, the channels of the projector can be automatically switched in conjunction with the switching of the swticher. As an example, if you - JVC DLA-G20U | DLA-G20U User instruction manual (2.6MB) - Page 55
can changing channels where lines and sources have been set up. The channels can be switched by using either a "direct channel" or the "Channel setup/selection" menu. s To changing channels using a "Direct Channel" : 1 Press the PAGE BACK when no menu is displayed. • The channel number is shown on - JVC DLA-G20U | DLA-G20U User instruction manual (2.6MB) - Page 56
Operating the Main Menu (Cont.) Changing Channels (Cont.) s Remote control unit OPERATE COMPUTER VIDEO MENU/ENTER button VOL. PAGE BACK T ZOOM W FOCUS MENU/ENTER PRESET QUICK ALIGN. Cursor buttons AV MUTING PAGE BACK button sMain menu YPBPR CH: 1 NTSC(480i) PIXEL CLOCK POSITION - JVC DLA-G20U | DLA-G20U User instruction manual (2.6MB) - Page 57
Operating the Main Menu (Cont.) Setting up (or Change) User Sources s Remote control unit A maximum of 10 types of information can be registered regarding the source being input and projected through line connection. Memo OPERATE COMPUTER VIDEO MENU/ENTER button Before setting up a user - JVC DLA-G20U | DLA-G20U User instruction manual (2.6MB) - Page 58
Operating the Main Menu (Cont.) Setting up (or Change) User Sources (Cont.) s Remote control unit To set up (change) user names OPERATE COMPUTER VIDEO MENU/ENTER button The procedure for setting up or changing user names given to user sources is described below. 1 Press the MENU/ENTER button - JVC DLA-G20U | DLA-G20U User instruction manual (2.6MB) - Page 59
Operating the Main Menu (Cont.) Setting up (or Change) User Sources (Cont.) s Remote control unit OPERATE COMPUTER VIDEO MENU/ENTER button 6 Press the MENU/ENTER button. • The "USER NAME" setup menu appears. If a user name is not registered to the selected number ("No"), the source area of - JVC DLA-G20U | DLA-G20U User instruction manual (2.6MB) - Page 60
the following procedure: 1. Adjust "H PIXEL" and "V PIXEL" on the Display Size adjustment menu. 2. Perform automatic adjustment using "Quick Alignment" function (see page 29). 3. Fine-adjust the horizontal and vertical positions on the "Position" menu (see page 39). Then, fine-adjust "H CENTER" and - JVC DLA-G20U | DLA-G20U User instruction manual (2.6MB) - Page 61
the main power switch and disconnect the power cord from both the projector and the wall outlet. Place the main power switch to the OFF [‡] position. 2 Loosen the fuse holder to remove it. To loosen the fuse holder, use a Philips screwdriver. 3 Remove the fuse from the fuse holder you just removed - JVC DLA-G20U | DLA-G20U User instruction manual (2.6MB) - Page 62
Replacing the Light-Source Lamp The light-source lamp has its service life. It is approximately 1000 hours. When the light-source lamp approaches the end of its service life, its degradation progresses rapidly. When the lamp's used hours exceed 900 hours, the projector's LAMP indicator comes on. - JVC DLA-G20U | DLA-G20U User instruction manual (2.6MB) - Page 63
is activated to prevent the projector from operating. • If the claw on the lamp-replacement opening cover is damaged, the projector may not possibly operate. Then, replace with a new lamp-replacement opening cover. • After replacing the lamp, be sure to reset the lamp use time (see page 63). 62 - JVC DLA-G20U | DLA-G20U User instruction manual (2.6MB) - Page 64
CAUTIONS • After replacing with a new light-source lamp, be sure to reset the lamp use time. When the lamp use time indicates 1000 hours, and if it is not reset, the projector does not operate. (The light-source lamp does not turn on.) • Reset the lamp use time only when you have replaced with a new - JVC DLA-G20U | DLA-G20U User instruction manual (2.6MB) - Page 65
dealer where you have purchased the projector or Service center. 1 Turn off the MAIN POWER switch. After the projector goes into stand-by state with screw with a flat-end screwdriver. CAUTIONS • Put on rubber gloves when using neutral detergent. • After you have washed the filter in water, make - JVC DLA-G20U | DLA-G20U User instruction manual (2.6MB) - Page 66
Troubleshooting Solutions to common problems related to your projector are described here. If none of the solutions presented here solves the problem, unplug the projector and consult a authorized dealer or service center. Symptom Probable cause Corrective action Power is not supplied. • Is the - JVC DLA-G20U | DLA-G20U User instruction manual (2.6MB) - Page 67
Troubleshooting 't a wrong source (forced mode) problem still persists, set it to the and NOTES on page 25. * This projector is equipped with a microcomputer that may lens Sould be cleaned off with commercially available blowers or lens cleaning paper (for cleaning glasses and cameras). Do not use - JVC DLA-G20U | DLA-G20U User instruction manual (2.6MB) - Page 68
(1323cm) [maximum] measured diagonally (*with aspect ratio : 4 : 3) • Light-source lamp 550 W xenon lamp Electrical system • Color system • Resolution • Scanning frequency NTSC, NTSC4.43, PAL, SECAM (* Automatic switching / manual switching) 1365 dots × 1024 dots (*S-XGA full resolution, during - JVC DLA-G20U | DLA-G20U User instruction manual (2.6MB) - Page 69
RS-232C-interface specified control terminal for controlling this projector with a personal computer. : 1-line, mini-jack specifications are subject to change without notice. * D-ILA devices are manufactured with a very high-precision mentioned herein are used for identification purposes - JVC DLA-G20U | DLA-G20U User instruction manual (2.6MB) - Page 70
Specifications (Cont.) Outside dimensions s Top 20 (505)*1 Unit: Inch (mm) *1: Protrusion excluded 14-1/2 (367) 15-3/8 (388) φ4-1/8 (φ102) 5-1/4 (133)*1 s Front 20 (505)*1 s Side 15-5/8 (388) 8-1/8 (204) 8-3/8 (211) 10-1/2 (264) 2-1/8 (53) 15-1/2 (392) 2-5/8 (64) 10-1/8 (256) 2-5/8 (68) - JVC DLA-G20U | DLA-G20U User instruction manual (2.6MB) - Page 71
Specifications (Cont.) Pin assignment (Specifications for terminals) s Y/C terminal 4 3 2 1 Pin number 1 2 3 4 Signal name GND (Y) GND (C) Y C s RS-232C terminal 1 6 2 7 8 3 4 9 5 Pin number 1 2 3 4 5 Signal name N/C RD TD N/C GND Pin number 6 7 8 9 Signal name N/C N/C N/C N/C s - JVC DLA-G20U | DLA-G20U User instruction manual (2.6MB) - Page 72
MANUEL D'INSTRUCTIONS PROJECTEUR DLA-G20U 1 FRANÇAIS - JVC DLA-G20U | DLA-G20U User instruction manual (2.6MB) - Page 73
ou modification non approuvés par JVC peut annuler l'autorisation de l'utilisateur écran. L'image vidéo pourrait brûler le dispositif D-ILA. Faites particulièrement attention lors de la projection d'images monté conformément aux instructions du fabricant et doit utiliser un support recommandé par le - JVC DLA-G20U | DLA-G20U User instruction manual (2.6MB) - Page 74
travers les ouvertures car ils pourraient l'intérieur de la lampe source de lumière (module lampe) toucher des points de tension dangereuse ou créer un de pas normalement en suivant Consultez votre revendeur. les instructions de fonctionnement. Ajustez uniquement les commandes couvertes par le - JVC DLA-G20U | DLA-G20U User instruction manual (2.6MB) - Page 75
ou changement de taille d'affichage .... 59 Remplacement du fusible 60 Remplacement de la lampe source de lumière 61 Remise à zéro de la durée d'utilisation de la lampe 63 Nettoyage et remplacement du filtre ..... 64 Guide de dépannage 65 Spécifications 67 * Ce mode d'emploi est divisé en deux - JVC DLA-G20U | DLA-G20U User instruction manual (2.6MB) - Page 76
Accessoires Les accessoires suivants sont fournis avec ce projecteur. Vérifiez s'ils sont bien tous présents. Si l'un de ces accessoires manquait, veuillez contacter votre revendeur. Télécommande (RM-M10G) Piles sèches AAA/R03 (×2) (pour vérifier le fonctionnement) Cordon d'alimentation [env. 2,5 - JVC DLA-G20U | DLA-G20U User instruction manual (2.6MB) - Page 77
. ATTENTION • Lors du transport du projecteur, ne le bousculez pas. Faites attention de bien le tenir. • Ne le déplacez pas quand la lampe est allumée ou quand le ventilateur de refroidissement fonctionne. Cela pourrait blesser quelqu'un. Comment utiliser la poignée de transport 6 Pied ajustable - JVC DLA-G20U | DLA-G20U User instruction manual (2.6MB) - Page 78
Commandes et fonctions (suite) Face gauche w ALQIGUNICK -2 + 3 SETTINGCOMPUTER VIDEEMOERGENCY TEMP LAMP STAND BY e r w Panneau de commande Pour plus de détails, référez-vous à "Panneau de commande" (page 9). e Panneau de connexion Pour les détails, référez-vous à "Panneau de - JVC DLA-G20U | DLA-G20U User instruction manual (2.6MB) - Page 79
Commandes et fonctions (suite) Surface inférieure t y u i t Zone d'entrée d'air (filtre) L'air entre par cette zone pour refroidir la lampe source de lumière. Si cette zone est bloquée ou s'il y a quelque chose qui empêche l'entrée d'air placé autour du projecteur, la chaleur risque - JVC DLA-G20U | DLA-G20U User instruction manual (2.6MB) - Page 80
d'attente. Clignote: Quand l'appareil est en mode de refroidissement. Mémo À propos du mode de refroidissement: Ce projecteur a une fonction pour refroidir la lampe qui a chauffé pendant une période fixe de temps (environ 120 secondes) après que la projection est finie. Cette fonction est appelée le - JVC DLA-G20U | DLA-G20U User instruction manual (2.6MB) - Page 81
et fonctions (suite) Panneau de commande (suite) STAND BY LAMP TEMP EMERGENCY ¢VIDEO COMPUTER SETTING +3 QUICK ALIGN -2 1 -ALIGNMENT est affiché sur l'écran et la fonction 7 d'ajustement rapide entre en service (TRACK, PHASE, POSITION H. et POSITION V. sont automatiquement 8 ajustés). Quand l' - JVC DLA-G20U | DLA-G20U User instruction manual (2.6MB) - Page 82
Commandes et fonctions (suite) Panneau de connexion w 12 AUDIO Y/C VIDEO q PC p AUDIO AUDIO R L Y 9 G H/CS R PB/B-Y 3 B COMPUTER OUT V PR/R-Y REMOTE AUDIO OUT RS-232C 4 8 7 65 FRANÇAIS 1 Prise d'entrée Y/C (S vidéo) (Mini DIN 4 broches) Connectez cette prise à la prise - JVC DLA-G20U | DLA-G20U User instruction manual (2.6MB) - Page 83
Commandes et fonctions (suite) Panneau de connexion (suite) w 12 AUDIO Y/C VIDEO q PC p AUDIO AUDIO R L Y 9 G H/CS R PB/B-Y 3 B COMPUTER OUT V PR/R-Y REMOTE AUDIO OUT RS-232C 4 8 7 65 9 Prises COMPUTER IN (entrée de l'ordinateur) -2 (BNC) Ce sont des prises pour les - JVC DLA-G20U | DLA-G20U User instruction manual (2.6MB) - Page 84
Commandes et fonctions (suite) Télécommande 1 e w q p 9 OPERATE COMPUTER VIDEO VOL. PAGE BACK T ZOOM W FOCUS MENU/ENTER PRESET QUICK ALIGN. AV MUTING 2 3 4 5 6 7 8 1 Emetteur de signaux de télécommande 2 Touche COMPUTER Utilisez cette touche pour choisir l'appareil connecté aux prises d' - JVC DLA-G20U | DLA-G20U User instruction manual (2.6MB) - Page 85
Commandes et fonctions (suite) Mise en place des piles Installez les piles dans la télécommande. Si la télécommande a commencé à fonctionner irrégulièrement, remplacez les piles. 1 Ouvrez le couvercle arrière. Tout en appuyant sur le couvercle arrière, faites-le glisser dans la direction de la fl - JVC DLA-G20U | DLA-G20U User instruction manual (2.6MB) - Page 86
inclinaison de plus de ±30° de droite à gauche ou de gauche à droite. Cela causerait une variation de couleur et réduirait la vie de la lampe. • Ne bloquez pas les évents de sortie d'air. N'utilisez rien qui puisse enfermer le projecteur en bloquant les évents de sortie d'air. Laissez suffisamment - JVC DLA-G20U | DLA-G20U User instruction manual (2.6MB) - Page 87
est d'environ 91.8% de celle du format d'image. Cette valeur est un guide est devrait être utilisée comme référence. • Lors de la projection à en position téléobjectif (T). • Si la lumière du soleil ou d'une lampe atteint directement l'écran de projection, l'image devient blanchâtre et assombrie. - JVC DLA-G20U | DLA-G20U User instruction manual (2.6MB) - Page 88
Installation du projecteur (suite) Relation entre les distances de projection et la taille de l'écran s Pour les écrans au format d'image 4:3 Distance de projection 2.5 m (8,2 pieds) 3,0 m (9,84 pieds) Taille de l'écran de projection (longueur de la diagonale) Taille d'écran de projection - JVC DLA-G20U | DLA-G20U User instruction manual (2.6MB) - Page 89
Installation du projecteur (suite) Plage et distance effective de la télécommande La distance de fonctionnement de la télécommande est d'environ 10 m (32,8 pieds) pour une réception directe. la télécommande peut être par réflexion sur l'écran, etc. Quand vous utilisez la télécommande par réflexion - JVC DLA-G20U | DLA-G20U User instruction manual (2.6MB) - Page 90
Connexions de divers appareils * Avant la connexion, assurez-vous de mettre hors tension le projecteur et les appareils connectés. * Lisez attentivement le manuel fourni avec chaque appareil. Signaux pouvant être entrés dans le projecteur Les signaux suivants peuvent être entrés dans le projecteur - JVC DLA-G20U | DLA-G20U User instruction manual (2.6MB) - Page 91
Connexions de divers appareils (suite) Connexion à des appareils vidéo Avant la connexion, assurez-vous de mettre hors tension le projecteur et l'appareil vidéo. • Lisez attentivement le mode d'emploi fourni avec chaque appareil vidéo. • Utilisez le câble de connexion audio/vidéo fourni. Le câble de - JVC DLA-G20U | DLA-G20U User instruction manual (2.6MB) - Page 92
prise REMOTE du projecteur. * Des câbles de connexion sont nécessaires. * Pour plus de détails, consultez un revendeur autorisé ou un centre de service. • Ordinateur de bureau Y/C AUDIO PC À la prise RS-232C AUDIO R AUDIO L G H/CS R • Ordinateur portable Câble de connexion inversée RS-232C - JVC DLA-G20U | DLA-G20U User instruction manual (2.6MB) - Page 93
Connexions de divers appareils (suite) Connexion à des ordinateurs Avant la connexion, assurez-vous de mettre hors tension le projecteur et les ordinateurs. • Lisez attentivement le mode d'emploi fourni avec chaque appareil. s Connexion à un ordinateur IBM PC ou compatible • Utilisez le câble de - JVC DLA-G20U | DLA-G20U User instruction manual (2.6MB) - Page 94
Connexions de divers appareils (suite) Connexion à des ordinateurs (suite) Avant la connexion, assurez-vous de mettre hors tension le projecteur et les ordinateurs. • Lisez attentivement le mode d'emploi fourni avec chaque appareil. s Connexion à un Macintosh • Utilisez le câble de connexion d' - JVC DLA-G20U | DLA-G20U User instruction manual (2.6MB) - Page 95
Connexions de divers appareils (suite) Connexion du cordon d'alimentation (fourni) Après que tous les appareils ont été connectés, connectez le cordon d'alimentation du projecteur. Ne le mettez pas encore sous tension à l'aide de l'interrupteur MAIN POWER. 1 Insérez le cordon d'alimentation dans la - JVC DLA-G20U | DLA-G20U User instruction manual (2.6MB) - Page 96
quand l'appareil n'est pas sous tension: • Si le filtre ou le couvercle de remplacement de la lampe est mal placé, le projecteur ne se met pas sous tension. Vérifiez qu'ils sont correctement installés. et consultez un revendeur autorisé ou un centre de service pour le faire réparer. 25 FRANÇAIS - JVC DLA-G20U | DLA-G20U User instruction manual (2.6MB) - Page 97
26 Remarques • Après la mise sous tension, l'écran peut apparaître brouillé pendant quelques secondes, mais ce n'est pas un mauvais fonctionnement. • Si lampe source de lumiére ne s'allume pas, essayez d'appuyer une seconde fois ou plus sur la touche OPERATE. s Mise hors tension 1 Appuyez sur la - JVC DLA-G20U | DLA-G20U User instruction manual (2.6MB) - Page 98
. AV MUTING ATTENTION • NE FRAPPEZ PAS ce projecteur pendant qu'il fonctionne; sinon, la lampe source de lumière risquerait de s'éteindre (l'indicateur EMERGENCY s'allume). Si le choc éteint la lampe source de lumière - Mettez l'appareil hors tension en appuyant sur l'interrupteur MAIN POWER, puis - JVC DLA-G20U | DLA-G20U User instruction manual (2.6MB) - Page 99
Fonctionnement de base (suite) s Télécommande OPERATE COMPUTER VIDEO VOL. PAGE BACK T ZOOM W FOCUS MENU/ENTER Touches FOCUS (+/-) 4. Ajustement de la mise au point s Ajustez la mise au point avec les touches FOCUS (+/-) de la télécommande. s Pour faire la mise au point sur un point plus é - JVC DLA-G20U | DLA-G20U User instruction manual (2.6MB) - Page 100
. PAGE BACK T ZOOM W FOCUS MENU/ENTER PRESET QUICK ALIGN. AV MUTING Touche AV MUTING Touche QUICK ALIGN. s Touches du projecteur STAND BY LAMP TEMP EMERGENCY VIDEO COMPUTER SETTING +3 QUICK ALIGN -2 Touches QUICK ALIGN. ¶ Pour utiliser les autres fonctions s Pour couper l'image vidéo et le - JVC DLA-G20U | DLA-G20U User instruction manual (2.6MB) - Page 101
Fonctionnement de base (suite) s Touches du projecteur STAND BY LAMP TEMP EMERGENCY VIDEO COMPUTER SETTING +3 QUICK ALIGN -2 Touche SETTING s Télécommande OPERATE COMPUTER VIDEO VOL. PAGE BACK T ZOOM W FOCUS MENU/ENTER PRESET QUICK ALIGN. AV MUTING - JVC DLA-G20U | DLA-G20U User instruction manual (2.6MB) - Page 102
Fonctionnement de base (suite) s Télécommande OPERATE COMPUTER VIDEO VOL. PAGE BACK T ZOOM W FOCUS MENU/ENTER PRESET QUICK ALIGN. AV MUTING Touche PAGE BACK s Pour afficher "CHANNEL" Si aucun menu n'est affiché, une pression sur touche PAGE BACK indique le canal actuellement utilisé dans - JVC DLA-G20U | DLA-G20U User instruction manual (2.6MB) - Page 103
Utilisation du menu de réglage Réglages de base s Touches du projecteur EMERGENCY VIDEO COMPUTER SETTING +3 QUICK ALIGN. -2 s Menu de réglage Touche SETTING Touches QUICK ALIGN. REGLAGE TRACK PHASE POSITION H. POSITION V. FOCUS ZOOM VOLUME 0 0 0 0 - + W T 0 Ici, nous faisons les ajustement - JVC DLA-G20U | DLA-G20U User instruction manual (2.6MB) - Page 104
(OUI) ou hors (NON) service l'effacement automatique des menus. AFF SOURCE : Met en (ON) ou hors (OFF) service l'affichage de la ligne pendant avant mise hors tension est nul.) TEMPS LAMPE : Indique le nombre d'heures accumulées d'utilisation de la lampe. SOURCE CHANNEL : Normalement utilisé sur - JVC DLA-G20U | DLA-G20U User instruction manual (2.6MB) - Page 105
NON) service l'effacement automatique des menus. AFF SOURCE : Met en (ON) ou hors (OFF) service l'affichage appareil D-ILA, l'image vidéo est alors agrandie à la taille plein écran de l'appareil D-ILA et nul.) TEMPS LAMPE : Indique le nombre d'heures accumulées d'utilisation de la lampe. SOURCE - JVC DLA-G20U | DLA-G20U User instruction manual (2.6MB) - Page 106
Utilisation du menu principal (suite) Utilisation du menu principal (Fonctionnement de base du menu principal) s Télécommande OPERATE COMPUTER VIDEO Touche MENU/ ENTER VOL. PAGE BACK T ZOOM W FOCUS MENU/ENTER PRESET QUICK ALIGN. AV MUTING Touches de curseur Touche PAGE BACK s Menu - JVC DLA-G20U | DLA-G20U User instruction manual (2.6MB) - Page 107
Utilisation du menu principal (suite) Modification du système de couleur s Télécommande OPERATE COMPUTER VIDEO Touche MENU/ ENTER VOL. PAGE BACK T ZOOM W FOCUS MENU/ENTER PRESET QUICK ALIGN. AV MUTING Touches de curseur AUTO est réglé pour le système de couleur quand le projecteur est - JVC DLA-G20U | DLA-G20U User instruction manual (2.6MB) - Page 108
Utilisation du menu principal (suite) Modification de la langue d'affichage s Télécommande OPERATE COMPUTER VIDEO Touche MENU/ ENTER VOL. PAGE BACK T ZOOM W FOCUS MENU/ENTER PRESET QUICK ALIGN. AV MUTING Touches de curseur La langue sur l'affichage du menu est réglée sur l'anglais à l' - JVC DLA-G20U | DLA-G20U User instruction manual (2.6MB) - Page 109
Utilisation du menu principal (suite) Ajustement de l'horloge pixel s Télécommande OPERATE COMPUTER VIDEO Touche MENU/ ENTER VOL. PAGE BACK T ZOOM W FOCUS MENU/ENTER PRESET QUICK ALIGN. AV MUTING Touches de curseur L'horloge pixel doit être principalement ajustée pour les entrées d' - JVC DLA-G20U | DLA-G20U User instruction manual (2.6MB) - Page 110
Utilisation du menu principal (suite) Ajustement de la position de l'écran s Télécommande OPERATE COMPUTER VIDEO Touche MENU/ ENTER VOL. PAGE BACK T ZOOM W FOCUS MENU/ENTER PRESET QUICK ALIGN. AV MUTING Touches de curseur Ajustez la position de l'écran s'il est décalé. 1 Appuyez sur la - JVC DLA-G20U | DLA-G20U User instruction manual (2.6MB) - Page 111
Utilisation du menu principal (suite) Ajustement de la qualité de l'image s Télécommande OPERATE COMPUTER VIDEO Touche MENU/ ENTER VOL. PAGE BACK T ZOOM W FOCUS MENU/ENTER PRESET QUICK ALIGN. AV MUTING Touches de curseur Ajustez la luminosité, le contraste, etc. de façon à obtenir l'é - JVC DLA-G20U | DLA-G20U User instruction manual (2.6MB) - Page 112
Utilisation du menu principal (suite) Ajustement de la qualité de l'image (suite) sTélécommande OPERATE COMPUTER VIDEO Touche MENU/ ENTER VOL. PAGE BACK T ZOOM W FOCUS MENU/ENTER PRESET QUICK ALIGN. AV MUTING Touches de curseur Touche PAGE BACK sÉléments de sous-menu [Menu IMAGE] - JVC DLA-G20U | DLA-G20U User instruction manual (2.6MB) - Page 113
Utilisation du menu principal (suite) Ajustement de la qualité de l'image (suite) sTélécommande OPERATE COMPUTER VIDEO Touche MENU/ ENTER VOL. PAGE BACK T ZOOM W FOCUS MENU/ENTER PRESET QUICK ALIGN. AV MUTING Touches de curseur Touche PAGE BACK sÉléments de sous-menu [Menu IMAGE] - JVC DLA-G20U | DLA-G20U User instruction manual (2.6MB) - Page 114
Utilisation du menu principal (suite) Ajustement de la qualité du son s Télécommande OPERATE COMPUTER VIDEO Touche MENU/ ENTER VOL. PAGE BACK T ZOOM W FOCUS MENU/ENTER PRESET QUICK ALIGN. AV MUTING Touches de curseur Ajustez la qualité du son (aigus/graves). 1 Appuyez sur la touche MENU - JVC DLA-G20U | DLA-G20U User instruction manual (2.6MB) - Page 115
du menu OPTIONS sont affichés. OPTIONS MENU ARRET AUTO AFF SOURCE INVERS D-G INVERS H-B CLAMP REDIMENSION COULEUR FOND TEMP. COULEUR CHG FORMAT VEILLE TEMPS LAMPE NON ON OFF OFF BP ON BLEU NORMAL 4:3 30 Min. 10 Hrs. (Menu OPTIONS) 4 Choisissez l'élément à régler (ajuster) avec les touches de - JVC DLA-G20U | DLA-G20U User instruction manual (2.6MB) - Page 116
REDIMENSION COULEUR FOND TEMP. COULEUR CHG FORMAT VEILLE TEMPS LAMPE NON ON OFF OFF BP ON BLEU NORMAL 4:3 30 vous mettez la fonction REDIMENSION en service (ON), permettant à l'écran d'ê plus petit que celui (résolution) de l'appareil D-ILA, la projection est faite sur une petite taille d'écran - JVC DLA-G20U | DLA-G20U User instruction manual (2.6MB) - Page 117
de sous-menu [Menu OPTIONS] OPTIONS MENU ARRET AUTO AFF SOURCE INVERS D-G INVERS H-B CLAMP REDIMENSION COULEUR FOND TEMP. COULEUR CHG FORMAT VEILLE TEMPS LAMPE NON ON OFF OFF BP ON BLEU NORMAL 4:3 30 Min. 10 Hrs. Élément ajusté Touche Contenu de l'ajustement COULEUR FOND 2/3 Règle la couleur - JVC DLA-G20U | DLA-G20U User instruction manual (2.6MB) - Page 118
Utilisation du menu principal (suite) Changement (Sélection) de source s Télécommande OPERATE COMPUTER VIDEO Touche MENU/ ENTER VOL. PAGE BACK T ZOOM W FOCUS MENU/ENTER PRESET QUICK ALIGN. AV MUTING Touches de curseur Touche PAGE BACK sMenu principal VIDEO CH: 1 NTSC(480i) HORLOGE - JVC DLA-G20U | DLA-G20U User instruction manual (2.6MB) - Page 119
Utilisation du menu principal (suite) Changement (Sélection) de source (suite) s Télécommande 5 Appuyez sur la touche MENU/ENTER pour le régler (valider). OPERATE COMPUTER VIDEO Touche MENU/ ENTER VOL. PAGE BACK T ZOOM W FOCUS MENU/ENTER PRESET QUICK ALIGN. AV MUTING Touches de curseur - JVC DLA-G20U | DLA-G20U User instruction manual (2.6MB) - Page 120
Utilisation du menu principal (suite) Réglage des canaux s Télécommande OPERATE COMPUTER VIDEO Touche MENU/ ENTER VOL. PAGE BACK T ZOOM W FOCUS MENU/ENTER PRESET QUICK ALIGN. AV MUTING Touches de curseur Touche PAGE BACK Quand vous réglez les canaux, vous pouvez choisir une ligne et des - JVC DLA-G20U | DLA-G20U User instruction manual (2.6MB) - Page 121
Utilisation du menu principal (suite) Réglage des canaux (suite) s Télécommande OPERATE COMPUTER VIDEO Touche MENU/ ENTER VOL. PAGE BACK T ZOOM W FOCUS MENU/ENTER PRESET QUICK ALIGN. AV MUTING Touches de curseur Touche PAGE BACK 5 Appuyez sur la touche MENU/ENTER pour valider ( - JVC DLA-G20U | DLA-G20U User instruction manual (2.6MB) - Page 122
Utilisation du menu principal (suite) Réglage des canaux (suite) s Télécommande OPERATE COMPUTER VIDEO Touche MENU/ ENTER VOL. PAGE BACK T ZOOM W FOCUS MENU/ENTER s Pour préciser une source, "SOURCE": 1 Appuyez sur la touche de déplacement du curseur 3 pour atteindre "SOURCE". • The main - JVC DLA-G20U | DLA-G20U User instruction manual (2.6MB) - Page 123
Utilisation du menu principal (suite) Réglage des canaux (suite) s Télécommande OPERATE COMPUTER VIDEO Touche MENU/ ENTER VOL. PAGE BACK T ZOOM W FOCUS MENU/ENTER 2. Appuyez sur la touche ENTER/MENU pour valider. • Lorsque le poste est défini, il est accompagné d'une coche et mis en mémoire - JVC DLA-G20U | DLA-G20U User instruction manual (2.6MB) - Page 124
Utilisation du menu principal (suite) Réglage des canaux (suite) s Télécommande OPERATE COMPUTER VIDEO Touche MENU/ ENTER VOL. PAGE BACK T ZOOM W FOCUS MENU/ENTER PRESET QUICK ALIGN. AV MUTING Touches de curseur s Pour préciser un numéro de commutation "SWNo": 1 Appuyez sur la touche de - JVC DLA-G20U | DLA-G20U User instruction manual (2.6MB) - Page 125
Utilisation du menu principal (suite) Changement de canal s Télécommande OPERATE COMPUTER VIDEO Touche MENU/ ENTER VOL. PAGE BACK T ZOOM W FOCUS MENU/ENTER Vous pouvez changer de canal si les lignes et les sources ont été précisées. Le canal peut être choisi soit par le moyen "direct" soit - JVC DLA-G20U | DLA-G20U User instruction manual (2.6MB) - Page 126
Utilisation du menu principal (suite) Changement de canal (suite) s Télécommande OPERATE COMPUTER VIDEO Touche MENU/ ENTER VOL. PAGE BACK T ZOOM W FOCUS MENU/ENTER PRESET QUICK ALIGN. AV MUTING Touches de curseur Touche PAGE BACK sMenu principal VIDEO CH: 1 NTSC(480i) HORLOGE PIXEL - JVC DLA-G20U | DLA-G20U User instruction manual (2.6MB) - Page 127
Utilisation du menu principal (suite) Réglage (ou changement) de source utilisateur s Télécommande OPERATE COMPUTER VIDEO Touche MENU/ ENTER VOL. PAGE BACK T ZOOM W FOCUS MENU/ENTER PRESET QUICK ALIGN. AV MUTING Touches de curseur Touche PAGE BACK Tout au plus 10 informations peuvent ê - JVC DLA-G20U | DLA-G20U User instruction manual (2.6MB) - Page 128
Utilisation du menu principal (suite) Réglage (ou changement) de source utilisateur (suite) s Télécommande OPERATE COMPUTER VIDEO Touche MENU/ ENTER VOL. PAGE BACK T ZOOM W FOCUS MENU/ENTER Pour définir (changer) le nom utilisateur La méthode pour définir ou changer le nom donné à une - JVC DLA-G20U | DLA-G20U User instruction manual (2.6MB) - Page 129
Utilisation du menu principal (suite) Réglage (ou changement) de source utilisateur (suite) s Télécommande OPERATE COMPUTER VIDEO Touche MENU/ ENTER 6 Appuyez sur la touche MENU/ENTER. • Le menu de définition de "USER NAME" s'affiche. Si aucun nom n'est en mémoire pour le numéro choisi ("No"), - JVC DLA-G20U | DLA-G20U User instruction manual (2.6MB) - Page 130
Utilisation du menu principal (suite) Réglage ou changement de taille d'affichage s Télécommande OPERATE COMPUTER VIDEO Touche MENU/ ENTER VOL. PAGE BACK T ZOOM W FOCUS MENU/ENTER PRESET QUICK ALIGN. AV MUTING Touches de curseur Il est possible de régler la taille de l'image affichée ( - JVC DLA-G20U | DLA-G20U User instruction manual (2.6MB) - Page 131
Remplacement du fusible Le projecteur renferme un fusible qui permet de protéger sa source d'alimentation. Si le fusible saute, remplacez-le. Si vous mettez l'appareil sous tension et qu'il ne s'allume pas, vérifiez le fusible. Pour remplacer le fusible, procurezvous un fusible d'une intensité - JVC DLA-G20U | DLA-G20U User instruction manual (2.6MB) - Page 132
ée. Si vous avez des questions, consultez le revendeur autorisé où vous avez acheté la lampe de remplacement ou le centre de service le plus proche. 1 Retirez le couvercle de l'ouverture pour le remplacement de la lampe en desserrant les vis. Dévissez les deux vis avec un tournevis plat. Vis - JVC DLA-G20U | DLA-G20U User instruction manual (2.6MB) - Page 133
. Ne touchez jamais la partie en métal ou la surface frontale en verre. Poignée Vis 4 Replacez le couvercle de l'ouverture pour le remplacement de la lampe et serrez les vis. Serrez les deux vis avec un tournevis plat. Couvercle d'ouverture pour le remplacement de la - JVC DLA-G20U | DLA-G20U User instruction manual (2.6MB) - Page 134
de lumière ne s'allume pas.) • Remettez à zéro la durée d'utilisation de la lampe uniquement quand vous avez remplacé la lampe par une lampe neuve. Ne remettez jamais à zéro la durée à moitié de la vie de la lampe. Sinon, vous ne pourriez plus savoir à quel moment la remplacer, les performances se - JVC DLA-G20U | DLA-G20U User instruction manual (2.6MB) - Page 135
ou si vous avez besoin d'informations à propos de ce filtre, consultez le revendeur autorisé où vous avez acheté le projecteur ou le centre de service le plus proche. 1 Mettez l'appareil hors tension avec l'interrupteur MAIN POWER. Après que le projecteur est mis en mode d'attente avec l'indicateur - JVC DLA-G20U | DLA-G20U User instruction manual (2.6MB) - Page 136
Guide de dépannage Les solutions aux problèmes communs relatifs à votre projecteur sont décrits ici. Si aucune des solutions présentées ici ne résout le problème, débranchez le projecteur et consultez un revendeur autorisé ou un centre de service. Symptôme Cause probable Correction à apporter - JVC DLA-G20U | DLA-G20U User instruction manual (2.6MB) - Page 137
Guide de dépannage (suite) Symptôme L'image vidéo est anormalment somber ou claire. Les couleurs sont mauvaises ou instables. La partie supérieure des images vidéo - JVC DLA-G20U | DLA-G20U User instruction manual (2.6MB) - Page 138
de projection Appareil 3D-ILA, 1 objectif, 3 méthodes à obturation optique des 3 couleurs primaires. • Appareil D-ILA 0,9 pouces (env. [maximum] mesuré en diagonal (*avec un format d'image: 4 : 3) • Lampe source de lumière Lampe au xénon 550 W Système électrique • Système de couleur • Ré - JVC DLA-G20U | DLA-G20U User instruction manual (2.6MB) - Page 139
(38.1 livres) • Accessoires (Référez-vous à la page 5.) * La conception et les spécifications sont sujettes à changement sans notification. * Les appareils D-ILA sont fabriqués avec une technologie de haute précision, permettant à 99.99% des pixels d'être effectifs. Seulement 0,01% ou moins des - JVC DLA-G20U | DLA-G20U User instruction manual (2.6MB) - Page 140
(suite) Dimensions extérieures s Dessus 505 (20)*1 Unité: mm (pouces) *1: Protubérances exclues 367(14-1/2) 388(15-3/8) STAND BY LAMP TEMP EMERGENCY VIDEO COMPUTER SETTING +3 QUICK ALIGN -2 264(10-1/2) φ102(φ 4-1/8) 133(5-1/4)*1 s Avant 505(20)*1 s Côté 388(15-3/8) 204(8-1/8) 211 - JVC DLA-G20U | DLA-G20U User instruction manual (2.6MB) - Page 141
Spécifications (suite) Affectation des broches (Spécification pour les prises) s Prise Y/C 4 3 2 1 No de broche Nom du signal 1 Masse (Y) 2 Masse (C) 3 Y 4 C s Prise RS-232C 1 6 2 7 8 3 4 9 5 No de broche Nom du signal 1 NC 2 RD 3 TD 4 NC 5 Masse No de broche Nom - JVC DLA-G20U | DLA-G20U User instruction manual (2.6MB) - Page 142
VICTOR COMPANY OF JAPAN, LIMITED © 1999 VICTOR COMPANY OF JAPAN, LIMITED Printed in Japan LCT0600-001B 1299-K-M-VP PROJECTOR DLA-G20U
-
 1
1 -
 2
2 -
 3
3 -
 4
4 -
 5
5 -
 6
6 -
 7
7 -
8
-
9
-
10
-
11
-
12
-
13
-
14
-
15
-
16
-
17
-
18
-
19
-
20
-
21
-
22
-
23
-
24
-
25
-
26
-
27
-
28
-
29
-
30
-
31
-
32
-
33
-
34
-
35
-
36
-
37
-
38
-
39
-
40
-
41
-
42
-
43
-
44
-
45
-
46
-
47
-
48
-
49
-
50
-
51
-
52
-
53
-
54
-
55
-
56
-
57
-
58
-
59
-
60
-
61
-
62
-
63
-
64
-
65
-
66
-
67
-
68
-
69
-
70
-
71
-
72
-
73
-
74
-
75
-
76
-
77
-
78
-
79
-
80
-
81
-
82
-
83
-
84
-
85
-
86
-
87
-
88
-
89
-
90
-
91
-
92
-
93
-
94
-
95
-
96
-
97
-
98
-
99
-
100
-
101
-
102
-
103
-
104
-
105
-
106
-
107
-
108
-
109
-
110
-
111
-
112
-
113
-
114
-
115
-
116
-
117
-
118
-
119
-
120
-
121
-
122
-
123
-
124
-
125
-
126
-
127
-
128
-
129
-
130
-
131
-
132
-
133
-
134
-
135
-
136
-
137
-
138
-
139
-
140
-
141
-
142
 |
 |
ENGLISH
FRANÇAIS
DLA-G20U
INSTRUCTIONS
PROJECTOR
MANUEL D’INSTRUCTIONS : PROJECTEUR
OPERATE
VOL.
PAGE
BACK
PRESET
ZOOM
FOCUS
COMPUTER
VIDEO
QUICK
ALIGN.
AV
MUTING
RM-M10G REMOTE CONTROL UNIT
W
T
MENU/ENTER
For customer Use:
Enter below the Serial No. which is located
on the side panel of the cabinet. Retain this
information for future reference.
Pour l’utilisateur:
Inscrivez ci-dessous le No de série situé sur
le panneau latéral du coffret de l’appareil.
Conservez cette information à titre
d’information.
Model No.
No de modèle
DLA-G20U
Serial No.
No de série