JVC DLA-G20U DLA-G20U User instruction manual (2.6MB) - Page 31
Basic Operations Cont.
 |
View all JVC DLA-G20U manuals
Add to My Manuals
Save this manual to your list of manuals |
Page 31 highlights
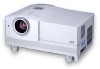
Basic Operations (Cont.) s Projector button STAND BY LAMP TEMP EMERGENCY VIDEO COMPUTER SETTING +3 QUICK ALIGN -2 SETTING button s Remote control unit OPERATE COMPUTER VIDEO VOL. PAGE BACK T ZOOM W FOCUS MENU/ENTER PRESET QUICK ALIGN. AV MUTING MENU/ENTER button s To display the SETTING menu The setting menu is used to make basic adjustments and settings (TRACKING, PHASE, H. POS., V. POS., FOCUS, ZOOM and AUDIO-VOL.) of the video picture being projected after installation (connection) or after inputs are switched. For operating the setting menu, refer to "Making Basic Settings" on page 32. • Press the projector's SETTING button. The setting menu is displayed on the screen. Projector SETTING s To display the MAIN menu The main menu is used to adjust or set the projected video picture and the projector's condition, etc. (PIXEL CLOCK, POSITION, PICTURE, SOUND, OPTIONS, SOURCE, CHANNEL, USER SOURCE SETUP, DISPLAY SIZE, DECODER and LANGUAGE). For operating the main menu, refer to pages 35 to 59. • Press the remote control's MENU/ENTER button. The main menu appears on the screen. Remote control unit MENU/ENTER Note • To change the menu language displayed English is set when the projector is shipped from the factory. The language displayed can be selected from the following six languages: (Japanese), ENGLISH, DEUTSCH (German), ESPAÑOL (Spanish), ITALIANO (Italian), and FRANÇAIS (French). However, some displays such as "Channel", "User Source Setup", "Display Size" and "Quick Alignment" are shown only in English. Proper nouns such as line and source displays are similarly treated. s To use the remote control's PRESET button The PRESET button is used for adjustments made on the main menu or setting menu. • When resetting only the selected settings to the factory-set values, press the remote control's PRESET button. Only the selected item's setting is reset to the factory-set value. Remote control unit PRESET PRESET button Notes • This button works only for numeric values. It does not work for switching between ON and OFF. • For items such as PIXEL CLOCK (TRACKING and PHASE), POSITION (H. POS. and V. POS.), SOUND (TREBLE and BASS), both settings are reset at the same time. 30
-
 1
1 -
2
-
3
-
4
-
5
-
6
-
7
-
8
-
9
-
10
-
11
-
12
-
13
-
14
-
15
-
16
-
17
-
18
-
19
-
20
-
21
-
22
-
23
-
24
-
25
-
 26
26 -
 27
27 -
 28
28 -
 29
29 -
 30
30 -
 31
31 -
 32
32 -
 33
33 -
 34
34 -
 35
35 -
 36
36 -
37
-
38
-
39
-
40
-
41
-
42
-
43
-
44
-
45
-
46
-
47
-
48
-
49
-
50
-
51
-
52
-
53
-
54
-
55
-
56
-
57
-
58
-
59
-
60
-
61
-
62
-
63
-
64
-
65
-
66
-
67
-
68
-
69
-
70
-
71
-
72
-
73
-
74
-
75
-
76
-
77
-
78
-
79
-
80
-
81
-
82
-
83
-
84
-
85
-
86
-
87
-
88
-
89
-
90
-
91
-
92
-
93
-
94
-
95
-
96
-
97
-
98
-
99
-
100
-
101
-
102
-
103
-
104
-
105
-
106
-
107
-
108
-
109
-
110
-
111
-
112
-
113
-
114
-
115
-
116
-
117
-
118
-
119
-
120
-
121
-
122
-
123
-
124
-
125
-
126
-
127
-
128
-
129
-
130
-
131
-
132
-
133
-
134
-
135
-
136
-
137
-
138
-
139
-
140
-
141
-
142
 |
 |
