JVC GY-HM700UXT JVC ProHD Clip Manager Owner's Manual (47 pg.) - Page 10
Selecting Work Media and Work Folders, To Select in the Tree View Pane
 |
View all JVC GY-HM700UXT manuals
Add to My Manuals
Save this manual to your list of manuals |
Page 10 highlights
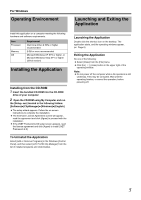
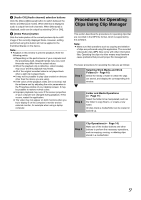
For Windows Selecting Work Media and Work Folders This section explains how to select the media or folder that contains the clips you want to work with. There are two ways to select them, by using the Tree View pane of an Info window, or by using the Change Root Folder dialog. Memo: ● In this manual, "media" refers to the following media types: ● SxS memory card ● USB memory ● SDHC memory card ● Internal hard disk ● Externally connected hard disk ● CD-R ● DVD-R ● Blu-ray Disc To Select in the Tree View Pane 1 In the Tree View pane of an Info window, double click the media or folder that you want to select ● The level beneath the double clicked media or folder appears. The Tree View pane displays two levels, consisting of the media or folder itself and the next lower level. ● When there are clips saved directly to the top level of the media, they appear in the List View pane. 2 Double click a lower-level folder ● The double clicked folder becomes the root folder, and its lower level folders appear. Ⅵ To return to the next higher level Select [Up] from the [View] menu, or click the Up button in the toolbar. 3 Repeat step 2 as required ● The contents of the selected folder appear in the List View pane. To select in the Change Root Folder dialog 1 Open the [Change Root Folder] dialog by selecting [Change Root Folder] from the [View] menu, or click the Change Root Folder button in the toolbar 2 In the Tree View pane of the dialog, select a media item or folder 3 Click [OK] ● The [Change Root Folder] dialog closes, and the contents of the selected media or folder appear in the List View pane. Ⅵ When there are no clips in the selected media or folder If the List View pane is in Thumbnails View mode, nothing appears in the List View pane. If it is in List View or Details View mode, a message appears saying that there are no clips to display. Note: ● When you select a media item, a message may appear saying that AThe work folder or media needs to be repaired.B, and that ARestore on the recording deviceB. This message appears when the data is defective, typically because the device was powered off during recording, or because the media was ejected too soon. If this message appears, you should reinsert the media into the device and attempt to salvage it as soon as possible. The data may become unrecoverable if you continue to work with it without salvaging it. 10
-
 1
1 -
2
-
3
-
4
-
 5
5 -
 6
6 -
 7
7 -
 8
8 -
 9
9 -
 10
10 -
 11
11 -
 12
12 -
 13
13 -
 14
14 -
 15
15 -
16
-
17
-
18
-
19
-
20
-
21
-
22
-
23
-
24
-
25
-
26
-
27
-
28
-
29
-
30
-
31
-
32
-
33
-
34
-
35
-
36
-
37
-
38
-
39
-
40
-
41
-
42
-
43
-
44
-
45
-
46
-
47
 |
 |
