JVC RMP-2580U RM-P2580 Dome Controller Instructions (1148KB) - Page 23
JVC RMP-2580U - Remote Controller For Color Domes Manual
 |
View all JVC RMP-2580U manuals
Add to My Manuals
Save this manual to your list of manuals |
Page 23 highlights
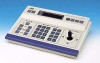
4. CONNECTIONS REAR PANEL CONNECTORS TO CAMERA Connection to control the camera. (The RM-P2580 is compatible with a TK-C675B camera.) Communication is carried out by MULTIDROP FULL DUPLEX (RS-485, FULL DUPLEX). RM-P2580 CAMERA 1 RX+ RX- TX+ TX- R R T T X X X X + - + - A B C D A T X B T X C R X D R X + - + - Hold. CAMERA 2 Attach or remove each cable by pushing down and holding each terminal connector, as shown above. A T X B T X C R X D R X + - + - SERIAL-1, -2 Connect a frame switcher, etc. (D-sub 9-pin, male connectors) The electrical standards applied to the SERIAL-1 and SERIAL2 connectors can be switched between RS-232C and RS-422A using pins 7 and 8 of the rear panel DIP switch. 1 5 DIP SW Set Connector OFF ON 9 6 7 8 SERIAL-1 SERIAL-2 RS-232C RS-232C RS-422A RS-422A Signals when the RS-232C is set Pin No. Signal Name NC RXD (Data input) TXD (Data output) DTR (Control output) GND DSR (Control input) RTS (Control input) CTS (Control output) NC Internally connected via a driver. Internally connected. Signals when the RS-422A/485 is set Pin No. Signal Name NC RXD- (Data input) TXD- (Data output) NC GND NC TXD+ (Data output) RXD+ (Data input) NC Internally connected. 1 2 3 4 5 6 7 8 9 1 2 3 4 5 6 7 8 9 Note Communication speed is 9600 bps. DIP Switch Set the mode and select the electrical standard for the SERIAL connector. 1 2 3 4 5 6 7 8 Pin No. 1 2 | 6 7 8 Description System mode selection Cannot be used. (Ensure that they are set to OFF.) SERIAL-1 electrical standard selection SERIAL-2 electrical standard selection OFF A mode ON B mode ON RS-232C RS-232C RS-422A RS-422A (Default: All OFF) 23
-
 1
1 -
2
-
3
-
4
-
5
-
6
-
7
-
8
-
9
-
10
-
11
-
12
-
13
-
14
-
15
-
16
-
17
-
 18
18 -
 19
19 -
 20
20 -
 21
21 -
 22
22 -
 23
23 -
 24
24 -
 25
25 -
 26
26 -
 27
27 -
 28
28 -
29
-
30
-
31
-
32
 |
 |
