Konica Minolta bizhub 181 bizhub 181Copy/Fax/Print/Scan Operation User Manual
Konica Minolta bizhub 181 Manual
 |
View all Konica Minolta bizhub 181 manuals
Add to My Manuals
Save this manual to your list of manuals |
Konica Minolta bizhub 181 manual content summary:
- Konica Minolta bizhub 181 | bizhub 181Copy/Fax/Print/Scan Operation User Manual - Page 1
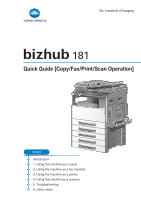
Quick Guide [Copy/Fax/Print/Scan Operation] INDEX Introduction 1. Using the machine as a copier 2. Using the machine as a fax machine 3. Using the machine as a printer 4. Using the machine as a scanner 5. Troubleshooting 6. Utility mode - Konica Minolta bizhub 181 | bizhub 181Copy/Fax/Print/Scan Operation User Manual - Page 2
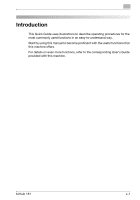
procedures for the most commonly used functions in an easy-to-understand way. Start by using this manual to become proficient with the useful functions that this machine offers. For details on even more functions, refer to the corresponding User's Guide provided with this machine. bizhub 181 x-1 - Konica Minolta bizhub 181 | bizhub 181Copy/Fax/Print/Scan Operation User Manual - Page 3
SIDE COVER" appears x-29 When the messages "OPEN 2nd SIDE COVER" through "OPEN 5th SIDE COVER" appear x-31 Replacing the toner bottle x-32 To replace the toner bottle x-32 Turning on/off the machine x-34 Turning on the machine x-34 Turning off the machine x-34 Options x-36 x-2 bizhub 181 - Konica Minolta bizhub 181 | bizhub 181Copy/Fax/Print/Scan Operation User Manual - Page 4
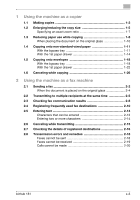
1 Using the machine as a copier 1.1 Making copies 1-2 1.2 Enlarging/reducing the copy size 1-5 Specifying an details of registered destinations 2-16 2.8 Transmission errors and remedies 2-18 Faxes cannot be sent 2-18 Faxes cannot be received 2-19 Calls cannot be made 2-20 bizhub 181 x-3 - Konica Minolta bizhub 181 | bizhub 181Copy/Fax/Print/Scan Operation User Manual - Page 5
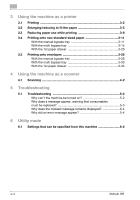
Printing onto envelopes 3-26 With the manual bypass tray 3-26 With the multi bypass tray 3-30 With the 1st paper drawer 3-34 4 Using the machine as a scanner 4.1 Scanning 4-2 5 Troubleshooting 5.1 Troubleshooting mode 6.1 Settings that can be specified from this machine 6-2 x-4 bizhub 181 - Konica Minolta bizhub 181 | bizhub 181Copy/Fax/Print/Scan Operation User Manual - Page 6
machine's functions. bizhub 181 User's Guide This manual contains descriptions of the Copy mode operations and machine maintenance. Refer to this manual for details on the paper and documents, copy procedures using convenient functions, replacing consumables, and troubleshooting operations such as - Konica Minolta bizhub 181 | bizhub 181Copy/Fax/Print/Scan Operation User Manual - Page 7
This manual contains descriptions on local TWAIN operations, where this machine is connected to a computer, and on TWAIN operations through the network. Refer to this manual for details on using the TWAIN driver. This manual is provided on the User Software/Printer Driver CD-ROM. x-6 bizhub 181 - Konica Minolta bizhub 181 | bizhub 181Copy/Fax/Print/Scan Operation User Manual - Page 8
peripheral that eases the workflow and satisfies any application or office environment. By providing copy, fax, scanning, printing and network functions indispensable to most office operations, this machine can be used in a wide range of applications to meet any need. bizhub 181 x-7 - Konica Minolta bizhub 181 | bizhub 181Copy/Fax/Print/Scan Operation User Manual - Page 9
as an e-mail attachment, or a fax can be sent using the Internet. Scan printing function, printing of important documents can be protected with a password. The printer driver can be installed from the enclosed CD-ROM. For details, refer to User's Guide of the GDI printer controller. x-8 bizhub 181 - Konica Minolta bizhub 181 | bizhub 181Copy/Fax/Print/Scan Operation User Manual - Page 10
are described below. In this manual, the names of control enter Power Save mode. dicator 2 Printer] key/indicator This indicator lights up while data is being printed from the computer and flashes while data is being sent. For details, refer to the User's Guide for the printer driver bizhub 181 x-9 - Konica Minolta bizhub 181 | bizhub 181Copy/Fax/Print/Scan Operation User Manual - Page 11
is in Scan mode. (Available only when network interface card NC-503 or image controller IC-206 are installed) Press to enter Copy mode. The indicator lights up in green to indicate that the machine is in Copy mode. Press to switch between number input mode and letter input mode. x-10 bizhub 181 - Konica Minolta bizhub 181 | bizhub 181Copy/Fax/Print/Scan Operation User Manual - Page 12
stop the transmission/reception of the fax. • Press to stop the print job from the computer. • Press fax numbers. • Use to type in speed dial numbers and text. • In Fax mode, the [ ] key is used for tone transmissions (pulse dialing), and the [#] key is used for accessing an outside line. bizhub 181 - Konica Minolta bizhub 181 | bizhub 181Copy/Fax/Print/Scan Operation User Manual - Page 13
dialing, this key is used to generate a pause when trans- ferring from an internal to an external line or receiving information services. • Use to dial previously registered fax numbers. • Use keys [01] through [32] for specifying one-touch dialing and group dialing settings. • Use keys [29] through - Konica Minolta bizhub 181 | bizhub 181Copy/Fax/Print/Scan Operation User Manual - Page 14
Performing operations from the control panel To change a setting, press the or [,] key in or ‘ to the desired position. To apply the selection, press the [OK] key in . to move the cursor Example: Selecting a zoom ratio 1 Press the [Zoom] key. 2 Press the [,] key once. bizhub 181 x-13 - Konica Minolta bizhub 181 | bizhub 181Copy/Fax/Print/Scan Operation User Manual - Page 15
key. The selected zoom ratio is applied. ! Detail In this manual, this type of operation is indicated as "Press the [+] or [,] key until the desired setting is selected, and then press the [OK] key.". To correct the operation, press the [Back] key to return to the previous screen. x-14 bizhub 181 - Konica Minolta bizhub 181 | bizhub 181Copy/Fax/Print/Scan Operation User Manual - Page 16
down. Align the document with in the back-left corner of the document scales. ! Detail For transparent documents (such as overhead projector transparencies) and documents printed on thin paper (tracing paper), place white paper on top of the document. bizhub 181 x-15 - Konica Minolta bizhub 181 | bizhub 181Copy/Fax/Print/Scan Operation User Manual - Page 17
Loading the document into the document feeder Position the document so that the side to be copied faces up and then, slide the document guides. x-16 bizhub 181 - Konica Minolta bizhub 181 | bizhub 181Copy/Fax/Print/Scan Operation User Manual - Page 18
w, 11×14 w, Legal w, Letter w/v, Invoice w/v (5-1/2×8-1/2 w/v) DF-605 11×17 w, 11×14 w, Legal w, Letter w/v, Invoice w/v (5-1/2×8-1/2 w/v) Document width: 3-9/16 to 11-11/16 Document length: 8-1/4 to 17 bizhub 181 x-17 - Konica Minolta bizhub 181 | bizhub 181Copy/Fax/Print/Scan Operation User Manual - Page 19
, align the book with - at the center of the document scale. ! Detail Do not place documents weighing more than 6-1/2 lb on the original glass. x-18 bizhub 181 - Konica Minolta bizhub 181 | bizhub 181Copy/Fax/Print/Scan Operation User Manual - Page 20
document feeder DF-605: 11×17 w and Legal w; 11×17 and Letter w; Legal w and Letter w. For details on the document size combinations, refer to the User's Guide for the copier. bizhub 181 x-19 - Konica Minolta bizhub 181 | bizhub 181Copy/Fax/Print/Scan Operation User Manual - Page 21
Loading paper Follow the procedures described below to load paper into the various paper drawers. Loading the 1st paper drawer 1 Pull out the paper drawer. - Press down on the paper-lifting plate until it locks into place. x-20 bizhub 181 - Konica Minolta bizhub 181 | bizhub 181Copy/Fax/Print/Scan Operation User Manual - Page 22
2 Load the paper into the drawer, and then adjust the paper guides. - Slide the paper guides against the edges of the paper. - Load the paper so that the side to be printed on faces up. - Do not load so many pages that the top of the stack is higher than the , mark. bizhub 181 x-21 - Konica Minolta bizhub 181 | bizhub 181Copy/Fax/Print/Scan Operation User Manual - Page 23
A maximum of 10 envelopes can be loaded. 2 Note For details, refer to chapter 3, "Before making copies", in the User's Guide of the copier. Loading the 2nd, 3rd, 4th or 5th paper drawer 1 Pull out the paper drawer. x-22 - Press down on the paper-lifting plate until it locks into place. bizhub 181 - Konica Minolta bizhub 181 | bizhub 181Copy/Fax/Print/Scan Operation User Manual - Page 24
2 Load the paper into the drawer, and then adjust the paper guides. - Load the paper so that the side to be printed on faces up. - Do not load so many pages that the top of the stack is higher than the , mark. bizhub 181 x-23 - Konica Minolta bizhub 181 | bizhub 181Copy/Fax/Print/Scan Operation User Manual - Page 25
! Detail A maximum of 250 sheets of plain paper can be loaded. Special paper (thick paper, overhead projector transparencies, label sheets and envelopes) cannot be loaded. 2 Note For details, refer to chapter 3, "Before making copies", in the User's Guide of the copier. x-24 bizhub 181 - Konica Minolta bizhub 181 | bizhub 181Copy/Fax/Print/Scan Operation User Manual - Page 26
print onto label sheets or other special paper. This machine is equipped with a multi bypass tray, which can be loaded with up to 100 sheets of plain paper, and a manual to be printed on faces down. - Do not load so many pages that the top of the stack is higher than the , mark. bizhub 181 x-25 - Konica Minolta bizhub 181 | bizhub 181Copy/Fax/Print/Scan Operation User Manual - Page 27
2 Adjust the paper guides. - Slide the paper guides against the edges of the paper. 3 From the control panel, select the appropriate paper settings. Press the [+] or [,] key desired is selected, and then press the [OK] key. media type is selected, and then press the [OK] key. x-26 bizhub 181 - Konica Minolta bizhub 181 | bizhub 181Copy/Fax/Print/Scan Operation User Manual - Page 28
-sized paper: 3-9/16 inch to 11-11/16 inch wide, 5-1/2 inch to 17 inch long. 2 Note For details, refer to chapter 4, "Making copies", in the User's Guide of the copier. bizhub 181 x-27 - Konica Minolta bizhub 181 | bizhub 181Copy/Fax/Print/Scan Operation User Manual - Page 29
Multi bypass tray 2nd paper drawer 3rd paper drawer 4th paper drawer 5th paper drawer Remove any misfed paper according to the corresponding procedure. x-28 bizhub 181 - Konica Minolta bizhub 181 | bizhub 181Copy/Fax/Print/Scan Operation User Manual - Page 30
PC drum Fusing unit release levers Green knob 7 CAUTION The area around the fusing unit is extremely hot. % Touching any part other than those indicated may result in burns. If you are burnt, immediately cool the skin under cold water, and then seek professional medical attention. bizhub 181 - Konica Minolta bizhub 181 | bizhub 181Copy/Fax/Print/Scan Operation User Manual - Page 31
2 Reminder Decreased copy quality may result if the surface of the PC drum is touched. Be careful not to touch the surface of the PC drum. Decreased copy quality may result if the surface of the image transfer pulling them down. Only turn the green knob when turning the roller. x-30 bizhub 181 - Konica Minolta bizhub 181 | bizhub 181Copy/Fax/Print/Scan Operation User Manual - Page 32
When the messages "OPEN 2nd SIDE COVER" through "OPEN 5th SIDE COVER" appear 2 Note For details, refer to chapter 7, "When a message appears", in the User's Guide of the copier. bizhub 181 x-31 - Konica Minolta bizhub 181 | bizhub 181Copy/Fax/Print/Scan Operation User Manual - Page 33
Replacing the toner bottle When toner is about to run out, the "Caution" indicator lights up and a message appears. When this message appears, replace the toner bottle with a new one. To replace the toner bottle x-32 bizhub 181 - Konica Minolta bizhub 181 | bizhub 181Copy/Fax/Print/Scan Operation User Manual - Page 34
your service representative. Since some toner may spurt out while the seal is being peeled off, be sure to peel off the seal slowly. 2 Note For details on the procedure to replace the toner bottle, refer to chapter 7, "When a message appears", in the User's Guide of the copier. bizhub 181 x-33 - Konica Minolta bizhub 181 | bizhub 181Copy/Fax/Print/Scan Operation User Manual - Page 35
Turning on/off the machine Turning on the machine Turning off the machine x-34 bizhub 181 - Konica Minolta bizhub 181 | bizhub 181Copy/Fax/Print/Scan Operation User Manual - Page 36
machine while it is printing, otherwise a paper misfeed may occur. Do not turn off the machine while it is operating, otherwise data being scanned or transmitted or queued jobs may be deleted. 2 Note For details, refer to chapter 2, "Precaution", in the User's Guide of the copier. bizhub 181 x-35 - Konica Minolta bizhub 181 | bizhub 181Copy/Fax/Print/Scan Operation User Manual - Page 37
feeder DF-502 (optional) Description Presses down on the loaded document to keep it in place. Referred to as the "original cover" throughout the manual. Automatically feeds one document sheet at a time for scanning. Referred to as the "document feeder" throughout the manual. x-36 bizhub 181 - Konica Minolta bizhub 181 | bizhub 181Copy/Fax/Print/Scan Operation User Manual - Page 38
, refer to the User's Guide for network interface card NC-503. Allows this machine to be used as a fax machine. 128 MB expansion memory that increases the number of document pages that can be processed by the machine Referred to as the "expanded memory unit" throughout the manual. bizhub 181 x-37 - Konica Minolta bizhub 181 | bizhub 181Copy/Fax/Print/Scan Operation User Manual - Page 39
-502* (optional) from collecting in the paper. * The internal options are not shown in the illustration. 2 Note For details, refer to chapter 2, "Precaution", in the User's Guide of the copier. x-38 bizhub 181 - Konica Minolta bizhub 181 | bizhub 181Copy/Fax/Print/Scan Operation User Manual - Page 40
1 Using the machine as a copier Using the machine as a copier Chapter 1 - Konica Minolta bizhub 181 | bizhub 181Copy/Fax/Print/Scan Operation User Manual - Page 41
Using the machine as a copier 1.1 Making copies The general copy procedure, from pressing the [Copy] key to printing, is described below. Keys used in this procedure 2,3 1 23 4 4 1 Press the [Copy] key, and then position the document. - When loaded into the document feeder 1-2 bizhub 181 - Konica Minolta bizhub 181 | bizhub 181Copy/Fax/Print/Scan Operation User Manual - Page 42
When placed on the original glass Using the machine as a copier Chapter 1 - For details on positioning the document, refer key until the desired setting is selected, and then press the [OK] key. bizhub 181 If "MANUAL" is selected, press the [*] or [)] key until the desired density is selected, - Konica Minolta bizhub 181 | bizhub 181Copy/Fax/Print/Scan Operation User Manual - Page 43
Using the machine as a copier Chapter 1 1 Using the machine as a copier - If "MANUAL" was selected, select one of the nine density levels. - placed on the original glass, repeat steps 1 and 4. - To stop printing copies, press the [Clear/Stop] key. For details, refer to page 1-26. 1-4 bizhub 181 - Konica Minolta bizhub 181 | bizhub 181Copy/Fax/Print/Scan Operation User Manual - Page 44
Using the machine as a copier Chapter 1 Using the machine as a copier 1 1.2 Enlarging/reducing the copy size A zoom ratio can be selected to print copies of the loaded document on paper of a different size. Keys used - For details on positioning the document, refer to page x-15. bizhub 181 1-5 - Konica Minolta bizhub 181 | bizhub 181Copy/Fax/Print/Scan Operation User Manual - Page 45
the keypad to specify the zoom ratio, select "MANUAL". 3 Specify the number of copies, and then press the [Start] key. - If the document was placed on the original glass, repeat steps 1 and 3. - To stop printing copies, press the [Clear/Stop] key. For details, refer to page 1-26. 1-6 bizhub 181 - Konica Minolta bizhub 181 | bizhub 181Copy/Fax/Print/Scan Operation User Manual - Page 46
Using the machine as a copier Chapter 1 Using the machine as a copier Specifying an exact zoom ratio 1 Press the [+] or [,] key until the "Manual" is selected, and then press the [OK] key. ZOOM". For details, refer to chapter 4, "Making copies", in the User's Guide of the copier. bizhub 181 1-7 - Konica Minolta bizhub 181 | bizhub 181Copy/Fax/Print/Scan Operation User Manual - Page 47
paper use while copying The procedure for printing multiple document pages (2 or 4 pages) on a single sheet of paper is described below. Keys used in this procedure 2 1 2 3 3 1 Press the [Copy] key, and then position the document. - When loaded into the document feeder 1-8 bizhub 181 - Konica Minolta bizhub 181 | bizhub 181Copy/Fax/Print/Scan Operation User Manual - Page 48
either "2in1" or "4in1". - When printing 4in1 copies, select the order in which the four pages are to be printed. For details, refer to chapter 6, "Utility mode/Copy mode parameters", in the User's Guide of the copier. 3 Specify the number of copies, and then press the [Start] key. bizhub 181 1-9 - Konica Minolta bizhub 181 | bizhub 181Copy/Fax/Print/Scan Operation User Manual - Page 49
2 Note If the optional automatic duplex unit is installed, double-sided copies can be printed. For details, refer to chapter 5, "Advanced copy operations", in the User's Guide of the copier. When placing the document on the original glass The following procedure must be performed if the document - Konica Minolta bizhub 181 | bizhub 181Copy/Fax/Print/Scan Operation User Manual - Page 50
Using the machine as a copier Chapter 1 Using the machine as a copier 1 1.4 Copying onto non-standard-sized paper In this manual, paper of a size other than the standard sizes (such as Press the [Copy] key, and then position the document. - When loaded into the document feeder bizhub 181 1-11 - Konica Minolta bizhub 181 | bizhub 181Copy/Fax/Print/Scan Operation User Manual - Page 51
machine as a copier - When placed on the original glass Using the machine as a copier Chapter 1 2 Load the paper into the bypass tray. - With the manual bypass tray - With the multi bypass tray 1-12 - With the manual bypass tray, one sheet of non-standard-sized paper can be loaded. bizhub 181 - Konica Minolta bizhub 181 | bizhub 181Copy/Fax/Print/Scan Operation User Manual - Page 52
Using the machine as a copier Chapter 1 Using the machine as a copier 1 - With the multi bypass tray, up to 20 sheets of non-standard-sized paper can be loaded. - When the size of the non-standard-sized paper is not known, use the document scales to measure the X and Y lengths. bizhub 181 1-13 - Konica Minolta bizhub 181 | bizhub 181Copy/Fax/Print/Scan Operation User Manual - Page 53
Using the machine as a copier Chapter 1 1 Using the machine as a copier 4 Specify the number of copies, and then press the [Start] key. - For details on specifying 3 4 4 4 1 Press the [Copy] key, and then position the document. - When loaded into the document feeder 1-14 bizhub 181 - Konica Minolta bizhub 181 | bizhub 181Copy/Fax/Print/Scan Operation User Manual - Page 54
Using the machine as a copier Chapter 1 Using the machine as a copier 1 - When placed on the original glass 2 Load the paper into the 1st paper drawer. Y X - A maximum of 20 of the non-standard-sized paper is not known, use the document scales to measure the X and Y lengths. bizhub 181 1-15 - Konica Minolta bizhub 181 | bizhub 181Copy/Fax/Print/Scan Operation User Manual - Page 55
Chapter 1 1 Using the machine as a copier 3 Select the settings for the non-standard-sized paper. - Press the [+] or [,] key until the desired setting is selected, and then press the [OK] key. ( ) - Using the keypad, type in the paper size, and then press the [OK] key. ( ) 1-16 bizhub 181 - Konica Minolta bizhub 181 | bizhub 181Copy/Fax/Print/Scan Operation User Manual - Page 56
Using the machine as a copier Chapter 1 Using the machine as a copier 1 4 Select the 1st paper drawer, specify the number of copies, and then press the [Start] key. - be selected from the control panel. - For details on specifying Quality and Density settings, refer to page 1-2 bizhub 181 1-17 - Konica Minolta bizhub 181 | bizhub 181Copy/Fax/Print/Scan Operation User Manual - Page 57
Using the machine as a copier Chapter 1 1 Using the machine as a copier 1.5 Copying onto envelopes When copying onto envelopes, the paper size and paper type settings must 3 1 4 4 1 Press the [Copy] key, and then position the document. - When loaded into the document feeder 1-18 bizhub 181 - Konica Minolta bizhub 181 | bizhub 181Copy/Fax/Print/Scan Operation User Manual - Page 58
Using the machine as a copier Chapter 1 Using the machine as a copier 1 - When placed on the original glass - The relationship between the document image orientation and the orientation of the copy image printed on the envelope is shown below. bizhub 181 1-19 - Konica Minolta bizhub 181 | bizhub 181Copy/Fax/Print/Scan Operation User Manual - Page 59
Using the machine as a copier Chapter 1 1 Using the machine as a copier 2 Load the envelopes into the bypass tray. - Load the drawer or the bypass trays. - With the manual bypass tray, one envelope can be loaded. - With the multi bypass tray, up to 10 envelopes can be loaded. 1-20 bizhub 181 - Konica Minolta bizhub 181 | bizhub 181Copy/Fax/Print/Scan Operation User Manual - Page 60
Using the machine as a copier Chapter 1 Using the machine as a copier 1 3 Specify the settings for envelopes. - Press the [+] or [,] key until the desired setting is selected, press the [Start] key. - For details on specifying Quality and Density settings, refer to page 1-2. bizhub 181 1-21 - Konica Minolta bizhub 181 | bizhub 181Copy/Fax/Print/Scan Operation User Manual - Page 61
Using the machine as a copier Chapter 1 1 With the 1st paper drawer Keys used in this procedure Using the machine as a copier 3 1 3 4 4 4 1 Press the [Copy] key, and then position the document. - When loaded into the document feeder - When placed on the original glass 1-22 bizhub 181 - Konica Minolta bizhub 181 | bizhub 181Copy/Fax/Print/Scan Operation User Manual - Page 62
Using the machine as a copier Chapter 1 Using the machine as a copier 1 2 Load the envelopes into the 1st paper drawer. - Load the envelopes so that the side to be printed on faces up. - A maximum of 10 envelopes can be loaded into the 1st paper draw- er. bizhub 181 1-23 - Konica Minolta bizhub 181 | bizhub 181Copy/Fax/Print/Scan Operation User Manual - Page 63
Using the machine as a copier Chapter 1 1 Using the machine as a copier 3 Specify the settings for envelopes. - Press the [+] or [,] key until the desired setting is selected, and then size of the envelope is not known, use the document scales to measure the X and Y lengths. 1-24 bizhub 181 - Konica Minolta bizhub 181 | bizhub 181Copy/Fax/Print/Scan Operation User Manual - Page 64
Using the machine as a copier Chapter 1 Using the machine as a copier 1 4 Select the 1st paper drawer, specify the number of copies, and then press the [Start] key. - For details on specifying Quality and Density settings, refer to page 1-2. bizhub 181 1-25 - Konica Minolta bizhub 181 | bizhub 181Copy/Fax/Print/Scan Operation User Manual - Page 65
1 1 Using the machine as a copier 1.6 Canceling while copying The following procedure describes how to cancel copying after the [Start] key is pressed. Keys used in this procedure 3 2 1 1 Specify the copy settings, and then press the [Start] key. 2 Press the [Clear/Stop] key. 1-26 bizhub 181 - Konica Minolta bizhub 181 | bizhub 181Copy/Fax/Print/Scan Operation User Manual - Page 66
Using the machine as a copier Chapter 1 Using the machine as a copier 1 3 Select "YES". - Press the [+] or [,] key until "YES" is selected, and then press the [OK] key. - To continue copying, select "NO". bizhub 181 1-27 - Konica Minolta bizhub 181 | bizhub 181Copy/Fax/Print/Scan Operation User Manual - Page 67
1 Using the machine as a copier Using the machine as a copier Chapter 1 1-28 bizhub 181 - Konica Minolta bizhub 181 | bizhub 181Copy/Fax/Print/Scan Operation User Manual - Page 68
2 Using the machine as a fax machine Using the machine as a fax machine Chapter 2 - Konica Minolta bizhub 181 | bizhub 181Copy/Fax/Print/Scan Operation User Manual - Page 69
number after the [Fax] key is pressed. The general fax procedure, from loading the fax document to sending it to a destination, is described below. Keys used in this procedure 1 23 4 4 1 Press the [Fax] key, and then position the document. - When loaded into the document feeder 2-2 bizhub 181 - Konica Minolta bizhub 181 | bizhub 181Copy/Fax/Print/Scan Operation User Manual - Page 70
FINE/PHOTO" is selected, detailed areas of the document can be clearly reproduced; however, some fax machine may not be compatible with the "S-FINE" settings. 3 Select a Density setting. - Press the [*] or [)] key until the desired setting is selected, and then press the [OK] key. bizhub 181 2-3 - Konica Minolta bizhub 181 | bizhub 181Copy/Fax/Print/Scan Operation User Manual - Page 71
fax MANUAL" is se- lected, and then press the [OK] key. - If "MANUAL" is selected, specify the size of paper. 2 Press the [OK] key to scan the document. Position the next document page, and then press the [OK] key. 3 After all document pages have been scanned, press the [Start] key. 2-4 bizhub 181 - Konica Minolta bizhub 181 | bizhub 181Copy/Fax/Print/Scan Operation User Manual - Page 72
to multiple destinations at the same time. Keys used in this procedure 2 1 2 3 1 Press the [Fax] key, and then position the document. - When loaded into the document feeder - When placed on the original glass - For details on positioning the document, refer to page x-15. bizhub 181 2-5 - Konica Minolta bizhub 181 | bizhub 181Copy/Fax/Print/Scan Operation User Manual - Page 73
2 2 Specify the destination. Using the machine as a fax machine Using the machine as a fax machine Chapter 2 - Press the [+] or [,] key until "BROADCAST" is selected, and then press the [OK] key. ( key. - For details on specifying Quality and Density settings, refer to page 1-2. 2-6 bizhub 181 - Konica Minolta bizhub 181 | bizhub 181Copy/Fax/Print/Scan Operation User Manual - Page 74
on the original glass" on page 2-4. - To stop sending the fax, press the [Clear/Stop] key. For details, refer to page 2-15. ! Detail A maximum of 32 destinations can be specified by using the one-touch dial keys. A of the one-touch dial keys, speed dial numbers and by typing. bizhub 181 2-7 - Konica Minolta bizhub 181 | bizhub 181Copy/Fax/Print/Scan Operation User Manual - Page 75
how to check whether the fax was sent to the destinations. Keys used in this procedure 2,3 1 1 Press the [Confirm] key. 2 Check the key to print the communication results for the displayed job. - To print the reception results report or the activity report, continue with step 3. 2-8 bizhub 181 - Konica Minolta bizhub 181 | bizhub 181Copy/Fax/Print/Scan Operation User Manual - Page 76
, refer to chapter 2, "Faxing" in the User's Guide of the fax kit. Settings can be specified to normally print the transmission results report and the reception results report. For details, refer to chapter 5, "Utility mode/Fax mode parameters" in the User's Guide of the fax kit. bizhub 181 2-9 - Konica Minolta bizhub 181 | bizhub 181Copy/Fax/Print/Scan Operation User Manual - Page 77
(recipient name and fax number) can be registered as onetouch dial keys, speed dial numbers or groups. The procedure for programming a one-touch dial key is described below. Keys used in this procedure 1,2,3 1 1 Press the [Utility] key, and then select "DIAL REGISTRATION". 2-10 bizhub 181 - Konica Minolta bizhub 181 | bizhub 181Copy/Fax/Print/Scan Operation User Manual - Page 78
and fax number of the recipient. - For details on entering text, refer to page 2-13. - Transmission settings for the F-code, transmission speed and transmission time can be specified. For details, refer to chapter 5, "Utility mode/Fax mode parameters" in the User's Guide of the fax kit. bizhub 181 - Konica Minolta bizhub 181 | bizhub 181Copy/Fax/Print/Scan Operation User Manual - Page 79
2 4 Press the [OK] key. Using the machine as a fax machine Using the machine as a fax machine Chapter 2 2-12 bizhub 181 - Konica Minolta bizhub 181 | bizhub 181Copy/Fax/Print/Scan Operation User Manual - Page 80
text. Keys used in this procedure Using the machine as a fax machine Chapter 2 Characters that can be entered Example: Characters that ) - (hyphen) 1 2 ABC2abc 3 DEF3def 4 GHI4ghi 5 JKL5jkl 6 MNO6mno 7 PQRS7pqrs 8 TUV8tuv 9 WXYZ9wxyz 0 (space) 0 * bizhub 181 2-13 - Konica Minolta bizhub 181 | bizhub 181Copy/Fax/Print/Scan Operation User Manual - Page 81
machine Chapter 2 2 Using the machine as a fax machine Keypad key # Available characters [1...] [A...] # # Entering two or more characters After entering the first character, press the [*] the cursor to the character to be deleted, and then press the [Clear/Stop] key. 2-14 bizhub 181 - Konica Minolta bizhub 181 | bizhub 181Copy/Fax/Print/Scan Operation User Manual - Page 82
or [,] key until "YES" is selected, and then press the [OK] key. - If "NO" is selected, the fax is sent again. 2 Note To delete a timer transmission or polling transmission job, press the [Function] key. For details, refer to chapter 2, "Faxing" in the User's Guide of the fax kit. bizhub 181 2-15 - Konica Minolta bizhub 181 | bizhub 181Copy/Fax/Print/Scan Operation User Manual - Page 83
numbers is printed. - If "KEY SETTING LIST" is selected, the settings for group dialing and program dialing registered with one-touch dial keys are printed. - Reports can be printed on paper of the following sizes. Invoice (8-1/2×5-1/2) v, Letter w/v, Legal (8-1/2×14) w, Ledger (11×17) w bizhub 181 - Konica Minolta bizhub 181 | bizhub 181Copy/Fax/Print/Scan Operation User Manual - Page 84
Using the machine as a fax machine 2 2 Note Registered destinations can be changed or deleted from Utility mode. For details, refer to chapter 5, "Utility mode/Fax mode parameters" in the User's Guide of the fax kit. Using the machine as a fax machine Chapter 2 bizhub 181 2-17 - Konica Minolta bizhub 181 | bizhub 181Copy/Fax/Print/Scan Operation User Manual - Page 85
number. Is a number specifically for tel- Check the fax number. ephone calls being dialed? Is there a problem with the recipient's fax machine (it is out of paper, it is not set to receive faxes automatically, it is turned off, etc.)? Have the recipient check their fax machine. 2-18 bizhub 181 - Konica Minolta bizhub 181 | bizhub 181Copy/Fax/Print/Scan Operation User Manual - Page 86
performing an Follow the instructions in any operation? messages that appear on the display. Black streaks appear through Is there a problem with the the copy. caller's fax machine? Check that the machine can make clean copies. If it can, have the caller send the fax again. bizhub 181 2-19 - Konica Minolta bizhub 181 | bizhub 181Copy/Fax/Print/Scan Operation User Manual - Page 87
Chapter 2 2 Calls cannot be made Using the machine as a fax machine Symptom Possible cause Remedy Nothing can be heard from the Is the cord from the telephone (loud). connected telephone been set too low (high)? Adjust the ringer volume of the connected telephone. 2-20 bizhub 181 - Konica Minolta bizhub 181 | bizhub 181Copy/Fax/Print/Scan Operation User Manual - Page 88
3 Using the machine as a printer Using the machine as a printer Chapter 3 - Konica Minolta bizhub 181 | bizhub 181Copy/Fax/Print/Scan Operation User Manual - Page 89
printing, the printing driver for this machine must be installed. For details on installing the driver, refer to the User's Guide of the GDI printer controller or the image controller. 1 Select "Print" from the menu of the application. Using the machine as a printer Chapter 3 3-2 bizhub 181 - Konica Minolta bizhub 181 | bizhub 181Copy/Fax/Print/Scan Operation User Manual - Page 90
Using the machine as a printer Chapter 3 Using the machine as a printer 3 2 Select the printer, and then click the [Properties] button. 1 2 3 Specify the print settings. bizhub 181 3-3 - Konica Minolta bizhub 181 | bizhub 181Copy/Fax/Print/Scan Operation User Manual - Page 91
3 4 Click the [OK] button. Using the machine as a printer 1 Using the machine as a printer Chapter 3 2 3-4 bizhub 181 - Konica Minolta bizhub 181 | bizhub 181Copy/Fax/Print/Scan Operation User Manual - Page 92
fit the paper By specifying the paper size for the computer data and the paper size from the printer driver, the data can be enlarged or reduced to fit the selected paper. 1 Select the printer, and then click the [Properties] button. 1 2 Using the machine as a printer Chapter 3 bizhub 181 3-5 - Konica Minolta bizhub 181 | bizhub 181Copy/Fax/Print/Scan Operation User Manual - Page 93
Using the machine as a printer Chapter 3 3 Using the machine as a printer 2 Select the paper size for the document. 3 Specify the print settings. - When specifying the size of the paper to be printed on 3-6 bizhub 181 - Konica Minolta bizhub 181 | bizhub 181Copy/Fax/Print/Scan Operation User Manual - Page 94
Using the machine as a printer Chapter 3 Using the machine as a printer 3 - When specifying a zoom ratio - A zoom ratio can be selected in the "Zoom" group box. Select "Manual", and then specify the zoom ratio. 4 Click the [OK] button. bizhub 181 3-7 - Konica Minolta bizhub 181 | bizhub 181Copy/Fax/Print/Scan Operation User Manual - Page 95
pages, the number of pages printed on a single sheet of paper can be selected. With this machine, 2, 4, 6, 9 or 16 document pages can be printed on a single sheet of paper. 1 Select the printer, and then click the [Properties] button. 1 2 Using the machine as a printer Chapter 3 3-8 bizhub 181 - Konica Minolta bizhub 181 | bizhub 181Copy/Fax/Print/Scan Operation User Manual - Page 96
the "Combination" list. 1 2 - To select the page arrangement, click the [Combination Details] button, and then select a setting in the "Order" list. Using the machine as a printer Chapter 3 - To print a line around each page, select the "Border Line" check box. bizhub 181 3-9 - Konica Minolta bizhub 181 | bizhub 181Copy/Fax/Print/Scan Operation User Manual - Page 97
the machine as a printer - If a setting was selected from the "Combination" list, a zoom ratio cannot be specified in the "Zoom" group box. - If a setting was selected from the "Combination" list, a setting cannot be selected in the "Output Size" list. 4 Click the [OK] button. 3-10 bizhub 181 - Konica Minolta bizhub 181 | bizhub 181Copy/Fax/Print/Scan Operation User Manual - Page 98
2 are performed from the computer, and step 3 is performed from the machine. 0 Specify the settings from the printer driver before loading the paper. If paper is loaded into the manual bypass tray of the machine, an error message appears. Using the machine as a printer Chapter 3 bizhub 181 3-11 - Konica Minolta bizhub 181 | bizhub 181Copy/Fax/Print/Scan Operation User Manual - Page 99
3 Using the machine as a printer 1 Select the printer, and then click the [Properties] button. 1 2 Using the machine as a printer Chapter 3 3 3-12 bizhub 181 - Konica Minolta bizhub 181 | bizhub 181Copy/Fax/Print/Scan Operation User Manual - Page 100
Using the machine as a printer 3 4 Using the machine as a printer Chapter 3 5 6 bizhub 181 7 3-13 - Konica Minolta bizhub 181 | bizhub 181Copy/Fax/Print/Scan Operation User Manual - Page 101
3 Using the machine as a printer 8 Using the machine as a printer Chapter 3 9 10 3-14 - For a paper size that is not registered, click the [Edit Custom] ( ) button, and ). - The size selected in the "Output Size" list must match the paper setting specified for the data to be printed. bizhub 181 - Konica Minolta bizhub 181 | bizhub 181Copy/Fax/Print/Scan Operation User Manual - Page 102
the pa- per into the manual bypass tray. Using the machine as a printer Chapter 3 - Only one sheet of non-standard-sized paper can be loaded. - When the paper is loaded, printing begins. With the multi bypass appears. Select the settings for the non-standardsized paper in step 2. bizhub 181 3-15 - Konica Minolta bizhub 181 | bizhub 181Copy/Fax/Print/Scan Operation User Manual - Page 103
Using the machine as a printer Chapter 3 3 Using the machine as a printer 2 Select the settings for the non-standard-sized paper. - Press the [+] or [,] key until the desired setting non-standard-sized paper is not known, use the document scales to measure the X and Y lengths. 3-16 bizhub 181 - Konica Minolta bizhub 181 | bizhub 181Copy/Fax/Print/Scan Operation User Manual - Page 104
Using the machine as a printer 3 3 Select the printer, and then click the [Properties] button. 1 2 Using the machine as a printer Chapter 3 3 bizhub 181 3-17 - Konica Minolta bizhub 181 | bizhub 181Copy/Fax/Print/Scan Operation User Manual - Page 105
3 Using the machine as a printer 4 Using the machine as a printer Chapter 3 5 6 3-18 7 bizhub 181 - Konica Minolta bizhub 181 | bizhub 181Copy/Fax/Print/Scan Operation User Manual - Page 106
Using the machine as a printer 3 8 Using the machine as a printer Chapter 3 9 10 - For a paper size that is not registered, click the [Edit Custom] ( ) button, and - The size selected in the "Output Size" list must match the paper setting specified for the data to be printed. bizhub 181 3-19 - Konica Minolta bizhub 181 | bizhub 181Copy/Fax/Print/Scan Operation User Manual - Page 107
Using the machine as a printer Chapter 3 3 Using the machine as a printer 4 Click the [OK] button. With the 1st paper drawer 0 Steps 1 and 2 are performed from the machine, and step 3 non-standard-sized paper is not known, use the document scales to measure the X and Y lengths. 3-20 bizhub 181 - Konica Minolta bizhub 181 | bizhub 181Copy/Fax/Print/Scan Operation User Manual - Page 108
3 2 Select the settings for the non-standard-sized paper. Using the machine as a printer Chapter 3 - Press the [+] or [,] key until the desired setting is selected, and then press the [OK] key. ( ) - Using the keypad, type in the paper size, and then press the [OK] key. ( ) bizhub 181 3-21 - Konica Minolta bizhub 181 | bizhub 181Copy/Fax/Print/Scan Operation User Manual - Page 109
3 Using the machine as a printer 3 Select the printer, and then click the [Properties] button. 1 2 Using the machine as a printer Chapter 3 3 3-22 bizhub 181 - Konica Minolta bizhub 181 | bizhub 181Copy/Fax/Print/Scan Operation User Manual - Page 110
Using the machine as a printer 3 4 Using the machine as a printer Chapter 3 5 6 bizhub 181 7 3-23 - Konica Minolta bizhub 181 | bizhub 181Copy/Fax/Print/Scan Operation User Manual - Page 111
3 Using the machine as a printer 8 Using the machine as a printer Chapter 3 9 10 3-24 - For a paper size that is not registered, click the [Edit Custom] ( ) button, and ). - The size selected in the "Output Size" list must match the paper setting specified for the data to be printed. bizhub 181 - Konica Minolta bizhub 181 | bizhub 181Copy/Fax/Print/Scan Operation User Manual - Page 112
Using the machine as a printer 3 4 Click the [OK] button. Using the machine as a printer Chapter 3 bizhub 181 3-25 - Konica Minolta bizhub 181 | bizhub 181Copy/Fax/Print/Scan Operation User Manual - Page 113
be selected for the data to be printed and from the printer driver. With the manual bypass tray 0 Steps 1 and printer driver before loading the paper. If paper is loaded into the manual bypass tray of the machine, an error message appears. Using the machine as a printer Chapter 3 3-26 bizhub 181 - Konica Minolta bizhub 181 | bizhub 181Copy/Fax/Print/Scan Operation User Manual - Page 114
Using the machine as a printer 3 1 Select the printer, and then click the [Properties] button. 1 2 Using the machine as a printer Chapter 3 3 bizhub 181 3-27 - Konica Minolta bizhub 181 | bizhub 181Copy/Fax/Print/Scan Operation User Manual - Page 115
- The envelope size settings registered with the printer driver are "Env. Com 10 (4-1/4×9-1/2)" and "Env. C6. 3/4 (3-1/2×6-1/2)". - Select the envelope size in the "Original Size" list. ( ) - Select "Bypass" in the "Paper Source" list. ( ) - Select "Envelope" in the "Paper Type" list. ( ) bizhub 181 - Konica Minolta bizhub 181 | bizhub 181Copy/Fax/Print/Scan Operation User Manual - Page 116
for the data to be printed. 2 Click the [OK] button. 3 Check the message that appeared in the display, and then load the pa- per into the manual bypass tray. - Load envelopes with the flap facing up. - Only one envelope can be loaded. - When the paper is loaded, printing begins. bizhub 181 3-29 - Konica Minolta bizhub 181 | bizhub 181Copy/Fax/Print/Scan Operation User Manual - Page 117
Using the machine as a printer Chapter 3 3 Using the machine as a printer With the multi bypass tray 0 Steps 1 and 2 are performed from the machine, and step 3 and 4 are SETTING" menu appears. Select the settings for the envelopes in step 2. 2 Specify the settings for envelopes. 3-30 bizhub 181 - Konica Minolta bizhub 181 | bizhub 181Copy/Fax/Print/Scan Operation User Manual - Page 118
Using the machine as a printer 3 - Press the [+] or [,] key until the desired setting is selected, and then press the [OK] key. ( ) - Use and Y lengths. - Press the [+] or [,] key until "MEDIA" is selected, and then select "ENVELOPE". ( ) Using the machine as a printer Chapter 3 bizhub 181 3-31 - Konica Minolta bizhub 181 | bizhub 181Copy/Fax/Print/Scan Operation User Manual - Page 119
3 Using the machine as a printer 3 Select the printer, and then click the [Properties] button. 1 2 Using the machine as a printer Chapter 3 3 3-32 bizhub 181 - Konica Minolta bizhub 181 | bizhub 181Copy/Fax/Print/Scan Operation User Manual - Page 120
size settings registered with the printer driver are "Env. Com 10 (4-1/4×9-1/2)" and "Env. C6. 3/4 (3-1/2×6-1/2)". - Select the envelope size in the "Original Size" list. ( ) - Select "Bypass" in the "Paper Source" list. ( ) - Select "Envelope" in the "Paper Type" list. ( ) bizhub 181 3-33 - Konica Minolta bizhub 181 | bizhub 181Copy/Fax/Print/Scan Operation User Manual - Page 121
printer Chapter 3 3 Using the machine as a printer - When printing on envelope with a size that is not registered, refer to step 3 of "With the bypass tray" under "Printing the side to be printed on faces up. - A maximum of 10 envelopes can be loaded into the 1st paper draw- er. 3-34 bizhub 181 - Konica Minolta bizhub 181 | bizhub 181Copy/Fax/Print/Scan Operation User Manual - Page 122
3 2 Specify the settings for envelopes. Using the machine as a printer Chapter 3 - Press the [+] or [,] key until the desired setting is selected, and then press the [OK] key. - If the size of the envelope is not known, use the document scales to measure the X and Y lengths. bizhub 181 3-35 - Konica Minolta bizhub 181 | bizhub 181Copy/Fax/Print/Scan Operation User Manual - Page 123
3 Using the machine as a printer 3 Click the [Properties] button for the printer. 1 2 Using the machine as a printer Chapter 3 3 3-36 bizhub 181 - Konica Minolta bizhub 181 | bizhub 181Copy/Fax/Print/Scan Operation User Manual - Page 124
size settings registered with the printer driver are "Env. Com 10 (4-1/4×9-1/2)" and "Env. C6. 3/4 (3-1/2×6-1/2)". - Select the envelope size in the "Original Size" list. ( ) - Select "Tray 1" in the "Paper Source" list. ( ) - Select "Envelope" in the "Paper Type" list. ( ) bizhub 181 3-37 - Konica Minolta bizhub 181 | bizhub 181Copy/Fax/Print/Scan Operation User Manual - Page 125
to step 3 of "With the 1st paper drawer" under "Printing onto nonstandard-sized paper" on page 3-11. - Select a size in the "Original Size" list that matches the paper setting specified for the data to be printed. 4 Click the [OK] button. Using the machine as a printer Chapter 3 3-38 bizhub 181 - Konica Minolta bizhub 181 | bizhub 181Copy/Fax/Print/Scan Operation User Manual - Page 126
4 Using the machine as a scanner Using the machine as a scanner Chapter 4 - Konica Minolta bizhub 181 | bizhub 181Copy/Fax/Print/Scan Operation User Manual - Page 127
Using the machine as a scanner 4 Using the machine as a scanner 4.1 Scanning If the TWAIN driver is installed on a computer, data scanned with this machine can be imported onto a computer. . 1 Start the application on the computer. 1 2 Using the machine as a scanner Chapter 4 3 4-2 4 bizhub 181 - Konica Minolta bizhub 181 | bizhub 181Copy/Fax/Print/Scan Operation User Manual - Page 128
Using the machine as a scanner 4 - As an example, the procedure using Adobe Acrobat is described below. 2 Specify the scan settings. Using the machine as a scanner Chapter 4 bizhub 181 4-3 - Konica Minolta bizhub 181 | bizhub 181Copy/Fax/Print/Scan Operation User Manual - Page 129
4 Using the machine as a scanner Using the machine as a scanner Chapter 4 4-4 bizhub 181 - Konica Minolta bizhub 181 | bizhub 181Copy/Fax/Print/Scan Operation User Manual - Page 130
Using the machine as a scanner 4 Using the machine as a scanner Chapter 4 bizhub 181 4-5 - Konica Minolta bizhub 181 | bizhub 181Copy/Fax/Print/Scan Operation User Manual - Page 131
4 Using the machine as a scanner 3 Scan the document. - For pull scanning, position the document, and then click the [Scan] button to start scanning. Using the machine as a scanner Chapter 4 4-6 bizhub 181 - Konica Minolta bizhub 181 | bizhub 181Copy/Fax/Print/Scan Operation User Manual - Page 132
Using the machine as a scanner 4 Using the machine as a scanner Chapter 4 bizhub 181 4-7 - Konica Minolta bizhub 181 | bizhub 181Copy/Fax/Print/Scan Operation User Manual - Page 133
4 Using the machine as a scanner - For push scanning, click the [Scan] button, position the document, and then press the [Start] key in the machine's control panel to start scanning. Using the machine as a scanner Chapter 4 4-8 bizhub 181 - Konica Minolta bizhub 181 | bizhub 181Copy/Fax/Print/Scan Operation User Manual - Page 134
Using the machine as a scanner 4 Using the machine as a scanner Chapter 4 2 Note "Duplex Scanning" appears only when optional reverse automatic document feeder DF-605 is installed. bizhub 181 4-9 - Konica Minolta bizhub 181 | bizhub 181Copy/Fax/Print/Scan Operation User Manual - Page 135
4 Using the machine as a scanner Using the machine as a scanner Chapter 4 4-10 bizhub 181 - Konica Minolta bizhub 181 | bizhub 181Copy/Fax/Print/Scan Operation User Manual - Page 136
5 Troubleshooting Troubleshooting Chapter 5 - Konica Minolta bizhub 181 | bizhub 181Copy/Fax/Print/Scan Operation User Manual - Page 137
electrical outlet. In addition, check that the circuit breaker has not been tripped. - Check that the machine has been turned on. Troubleshooting Chapter 5 2 Reminder If the machine is not turned on after the indicated items have been checked, contact your service representative. 5-2 bizhub 181 - Konica Minolta bizhub 181 | bizhub 181Copy/Fax/Print/Scan Operation User Manual - Page 138
Troubleshooting 5 Why does a message appear, warning that consumables must be replaced? Answer When the consumables used by . 2 Reminder If the message remains displayed after the indicated items have been replaced, contact your service representative. Troubleshooting Chapter 5 bizhub 181 5-3 - Konica Minolta bizhub 181 | bizhub 181Copy/Fax/Print/Scan Operation User Manual - Page 139
. Troubleshooting Chapter 5 2 Reminder If the misfeed warning remains displayed after the indicated items have been checked, contact your service representative. Why did an error message appear? If the malfunction that occurred cannot be corrected by the user, the message "MACHINE TROUBLE SERVICE - Konica Minolta bizhub 181 | bizhub 181Copy/Fax/Print/Scan Operation User Manual - Page 140
6 Utility mode Utility mode Chapter 6 - Konica Minolta bizhub 181 | bizhub 181Copy/Fax/Print/Scan Operation User Manual - Page 141
on items 1 through 7, refer to chapter 6, "Utility mode/Copy mode parameters", of the User's Guide for the copier. For details on items 8 through 12, refer to chapter 5, "Utility mode/Fax mode parameters", of the User's Guide for the fax kit. No. Menu name Description 1 MACHINE SETTING Used to - Konica Minolta bizhub 181 | bizhub 181Copy/Fax/Print/Scan Operation User Manual - Page 142
the default settings for the various fax functions. Used to specify the default settings for the various transmission operations. Used to specify the default settings , refer to the User's Guide for image controller IC-206 or network interface card NC-503. Utility mode Chapter 6 bizhub 181 6-3 - Konica Minolta bizhub 181 | bizhub 181Copy/Fax/Print/Scan Operation User Manual - Page 143
6 Utility mode Utility mode Chapter 6 6-4 bizhub 181 - Konica Minolta bizhub 181 | bizhub 181Copy/Fax/Print/Scan Operation User Manual - Page 144
G This manual was printed using 100% post-consumer recycled paper. G This manual was printed with soy ink. http://konicaminolta.com A08E-9561-00 2007 Copyright Printed in China 2007. 3
-
 1
1 -
 2
2 -
 3
3 -
 4
4 -
 5
5 -
 6
6 -
 7
7 -
8
-
9
-
10
-
11
-
12
-
13
-
14
-
15
-
16
-
17
-
18
-
19
-
20
-
21
-
22
-
23
-
24
-
25
-
26
-
27
-
28
-
29
-
30
-
31
-
32
-
33
-
34
-
35
-
36
-
37
-
38
-
39
-
40
-
41
-
42
-
43
-
44
-
45
-
46
-
47
-
48
-
49
-
50
-
51
-
52
-
53
-
54
-
55
-
56
-
57
-
58
-
59
-
60
-
61
-
62
-
63
-
64
-
65
-
66
-
67
-
68
-
69
-
70
-
71
-
72
-
73
-
74
-
75
-
76
-
77
-
78
-
79
-
80
-
81
-
82
-
83
-
84
-
85
-
86
-
87
-
88
-
89
-
90
-
91
-
92
-
93
-
94
-
95
-
96
-
97
-
98
-
99
-
100
-
101
-
102
-
103
-
104
-
105
-
106
-
107
-
108
-
109
-
110
-
111
-
112
-
113
-
114
-
115
-
116
-
117
-
118
-
119
-
120
-
121
-
122
-
123
-
124
-
125
-
126
-
127
-
128
-
129
-
130
-
131
-
132
-
133
-
134
-
135
-
136
-
137
-
138
-
139
-
140
-
141
-
142
-
143
-
144
 |
 |

Quick Guide [Copy/Fax/Print/Scan Operation]
Introduction
1. Using the machine as a copier
2. Using the machine as a fax machine
3. Using the machine as a printer
4. Using the machine as a scanner
5. Troubleshooting
6. Utility mode
INDEX