Kyocera KM-5035 Print/Scan System (U) Operation Guide (Setup Edition) - Page 12
(2) Connecting the scanner to your computer network, (3) Making settings from the touch panel
 |
View all Kyocera KM-5035 manuals
Add to My Manuals
Save this manual to your list of manuals |
Page 12 highlights
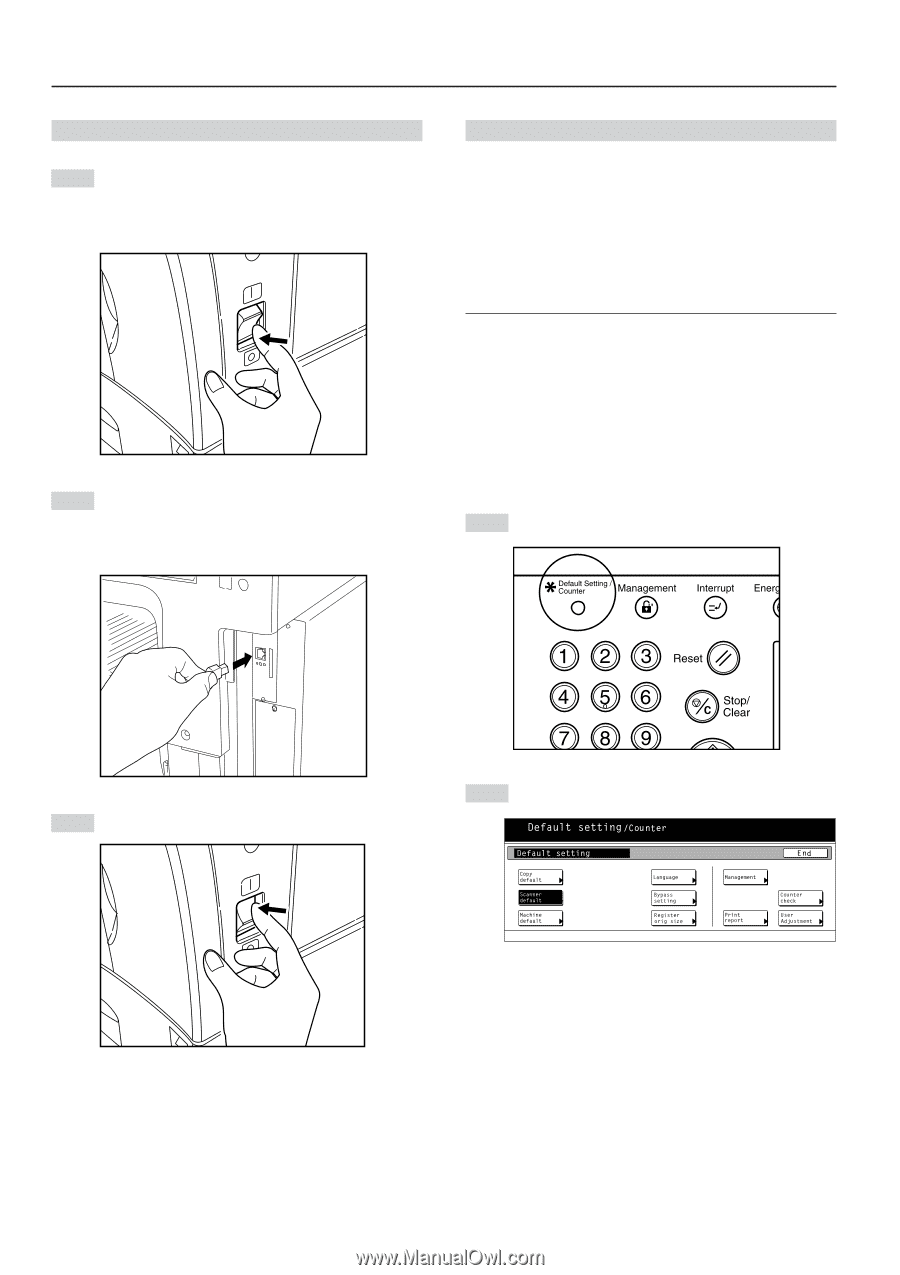
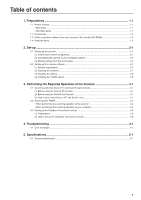
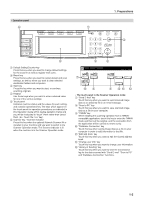
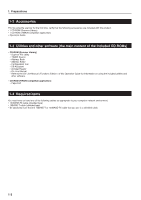
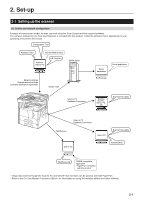
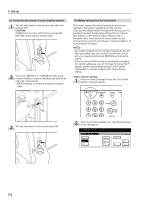
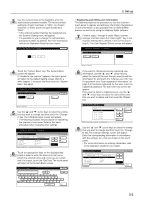
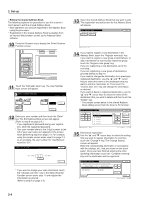
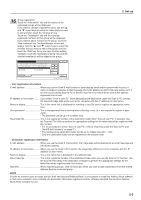
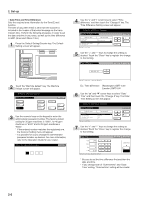
2. Set-up (2) Connecting the scanner to your computer network 1 Turn the main switch located on the right side of the scanner OFF. CAUTION: ALWAYS turn the main switch to the scanner OFF BEFORE connecting the network cable. 2 Connect a 10BASE-T or 100BASE-TX cable to the scanner interface connector located at the back of the right side of the scanner. * NEVER attempt to remove the Scanner Interface Card. (3) Making settings from the touch panel This section explains the default settings as well as user registration procedures required to use the scanner. If you use the software that is included with this product, it is possible to perform the following settings from an Internet Web browser, or the Address Editor software, from a computer that is connected to the same network as the scanner. Refer to the On-Line Manual for more detailed information. NOTES • The network addresses that should be registered here will differ depending upon your network environment. Check with your network administrator BEFORE performing this setting. • If you are using a DHCP server to automatically configure the network addresses, you will not need to change the IP address and the Subnet Mask because DHCP server configuration is already enabled as the factory default setting. • Basic scanner settings 1 Press the Default Setting/Counter key. The Default Setting screen will appear. 3 Turn the main switch to the scanner back ON. 2 Touch the "Scanner default" key. The Password Input screen will appear. 2-2
-
 1
1 -
2
-
3
-
4
-
5
-
6
-
 7
7 -
 8
8 -
 9
9 -
 10
10 -
 11
11 -
 12
12 -
 13
13 -
 14
14 -
 15
15 -
 16
16 -
 17
17 -
18
-
19
-
20
-
21
-
22
-
23
-
24
-
25
-
26
-
27
-
28
-
29
-
30
-
31
-
32
 |
 |