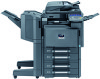
Kyocera TASKalfa 3051ci Printing System (11),(12),(13),(14) Configuration and - Page 21
LDAP authentication, Secure Erase, Connecting network cable to the E100, Back view of the E100
 |
View all Kyocera TASKalfa 3051ci manuals
Add to My Manuals
Save this manual to your list of manuals |
Page 21 highlights
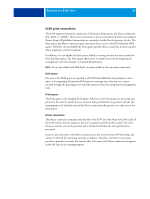
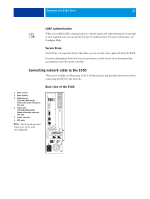
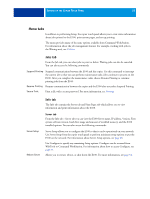
PREPARING FOR E100 SETUP 21 LDAP authentication When you enable LDAP communication to retrieve names and other information for people at your organization, you can specify the type of authentication. For more information, see Configure Help. Secure Erase Secure Erase is an optional feature that allows you to securely erase a print job from the E100. For more information about the Secure Erase feature, see the Secure Erase document that accompanies your Fiery print controller. Connecting network cable to the E100 This section includes an illustration of the E100 back panel, and provides information about connecting the E100 to the network. 1 Power switch 2 Power button 3 Network port (10/100/1000 BaseT) Connect from the network to this port. 4 Copier port (10/100/1000 BaseT) Connect from the copier to this port. 5 Copier interface 6 USB ports NOTE: The Network port and Copier port can be used interchangeably. Back view of the E100 6 5 34 12
-
 1
1 -
2
-
3
-
4
-
5
-
6
-
7
-
8
-
9
-
10
-
11
-
12
-
13
-
14
-
15
-
 16
16 -
 17
17 -
 18
18 -
 19
19 -
 20
20 -
 21
21 -
 22
22 -
 23
23 -
 24
24 -
 25
25 -
 26
26 -
27
-
28
-
29
-
30
-
31
-
32
-
33
-
34
-
35
-
36
-
37
-
38
-
39
-
40
-
41
-
42
-
43
-
44
-
45
-
46
-
47
-
48
-
49
-
50
-
51
-
52
-
53
-
54
-
55
-
56
-
57
-
58
-
59
 |
 |
