Kyocera TASKalfa 4551ci Printing System (11),(12),(13),(14) Printing Guide (Fi - Page 44
Setting up the Windows computer for printing, Setting up printing connections
 |
View all Kyocera TASKalfa 4551ci manuals
Add to My Manuals
Save this manual to your list of manuals |
Page 44 highlights
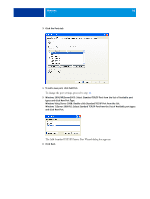
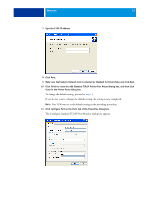
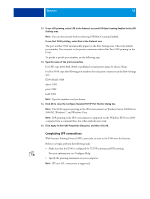
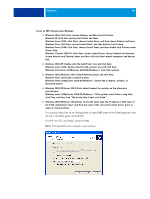
WINDOWS 44 Setting up the Windows computer for printing Now that you have installed the printer driver files, you need to configure the proper connection for your networked E100 printer. To print from Windows computers, you or the administrator must perform the following tasks to set up a connection other than port 9100: • Set up network servers, if any. • Set up the E100 to accept print jobs from your computer. • Configure a port on each Windows computer for the network type. Setting up printing connections The E100 supports the following printing connections: • SMB • Standard TCP/IP (RAW or LPR) • IPP or IPP over SSL For the location of each procedure, see the following table. Procedure Completing IPP connections Completing Standard TCP/IP Port (Raw or LPR) printing connections Completing the SMB printing connection Configuring installable options See page 48 page 45 page 44 page 51 Completing the SMB printing connection If your network does not have a Windows server, Windows computers can still print to the E100. This method of printing is SMB printing (also known as Windows or WINS printing). When users send print jobs, Windows computers operate in a peer-to-peer environment and communicate directly with the E100. Enabling SMB printing allows the E100 to be listed on the network, so that Windows clients can print to a particular print connection (Print queue, Hold queue, Direct connection or Virtual Printer) on the E100 without using other networking software. Windows printing runs via TCP/IP. You must configure TCP/IP on the E100 and on all computers that use SMB printing. After you enable SMB printing on the E100, you can set up the Windows or SMB connection and install the printer driver in one procedure. For more information, see "Installing printer drivers by Point and Print" on page 34.
-
 1
1 -
2
-
3
-
4
-
5
-
6
-
7
-
8
-
9
-
10
-
11
-
12
-
13
-
14
-
15
-
16
-
17
-
18
-
19
-
20
-
21
-
22
-
23
-
24
-
25
-
26
-
27
-
28
-
29
-
30
-
31
-
32
-
33
-
34
-
35
-
36
-
37
-
38
-
 39
39 -
 40
40 -
 41
41 -
 42
42 -
 43
43 -
 44
44 -
 45
45 -
 46
46 -
 47
47 -
 48
48 -
 49
49 -
50
-
51
-
52
-
53
-
54
-
55
-
56
-
57
-
58
-
59
-
60
-
61
-
62
-
63
-
64
-
65
-
66
-
67
-
68
-
69
-
70
-
71
-
72
-
73
-
74
-
75
-
76
-
77
-
78
-
79
-
80
-
81
-
82
-
83
-
84
-
85
-
86
-
87
-
88
-
89
-
90
-
91
-
92
-
93
-
94
-
95
-
96
-
97
-
98
-
99
-
100
-
101
-
102
-
103
-
104
-
105
-
106
-
107
-
108
-
109
-
110
 |
 |
