Kyocera TASKalfa 4551ci Printing System (11),(12),(13),(14) Printing Guide (Fi - Page 64
Printing and retrieving a secure print job, Press Secure Print in the Jobs tab.
 |
View all Kyocera TASKalfa 4551ci manuals
Add to My Manuals
Save this manual to your list of manuals |
Page 64 highlights
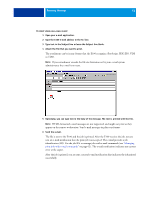
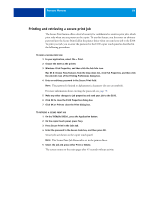
PRINTING METHODS 64 Printing and retrieving a secure print job The Secure Print feature offers a level of security for confidential or sensitive print jobs, which print only when you are present at the copier. To use this feature, you first enter an arbitrary password into the Secure Print field in the printer driver when you send your job to the E100. To print your job, you re-enter the password at the E100 copier touch panel as described in the following procedures. TO SEND A SECURE PRINT JOB 1 In your application, select File > Print. 2 Choose the E100 as the printer. 3 Windows: Click Properties, and then click the Job Info icon. Mac OS X: Choose Fiery Features from the drop-down list, click Full Properties, and then click the Job Info icon of the Printing Preferences dialog box. 4 Enter an arbitrary password in the Secure Print field. NOTE: The password is limited to alphanumeric characters (do not use symbols). For more information about entering the password, see page 70. 5 Make any other changes to job properties and send your job to the E100. 6 Click OK to close the E100 Properties dialog box. 7 Click OK or Print to close the Print dialog box. TO RETRIEVE A SECURE PRINT JOB 1 On the TASKalfa XX50ci, press the Application button. 2 On the copier touch panel, press Fiery. 3 Press Secure Print in the Jobs tab. 4 Enter the password in the Secure Code box, and then press OK. Secure jobs are shown on the copier touch panel. NOTE: The Secure Print Job Password is set in the printer driver. 5 Select the job and press either Print or Delete. The screen returns to the main pages after 45 seconds without activity.
-
 1
1 -
2
-
3
-
4
-
5
-
6
-
7
-
8
-
9
-
10
-
11
-
12
-
13
-
14
-
15
-
16
-
17
-
18
-
19
-
20
-
21
-
22
-
23
-
24
-
25
-
26
-
27
-
28
-
29
-
30
-
31
-
32
-
33
-
34
-
35
-
36
-
37
-
38
-
39
-
40
-
41
-
42
-
43
-
44
-
45
-
46
-
47
-
48
-
49
-
50
-
51
-
52
-
53
-
54
-
55
-
56
-
57
-
58
-
 59
59 -
 60
60 -
 61
61 -
 62
62 -
 63
63 -
 64
64 -
 65
65 -
 66
66 -
 67
67 -
 68
68 -
 69
69 -
70
-
71
-
72
-
73
-
74
-
75
-
76
-
77
-
78
-
79
-
80
-
81
-
82
-
83
-
84
-
85
-
86
-
87
-
88
-
89
-
90
-
91
-
92
-
93
-
94
-
95
-
96
-
97
-
98
-
99
-
100
-
101
-
102
-
103
-
104
-
105
-
106
-
107
-
108
-
109
-
110
 |
 |
